# Create a Display booking
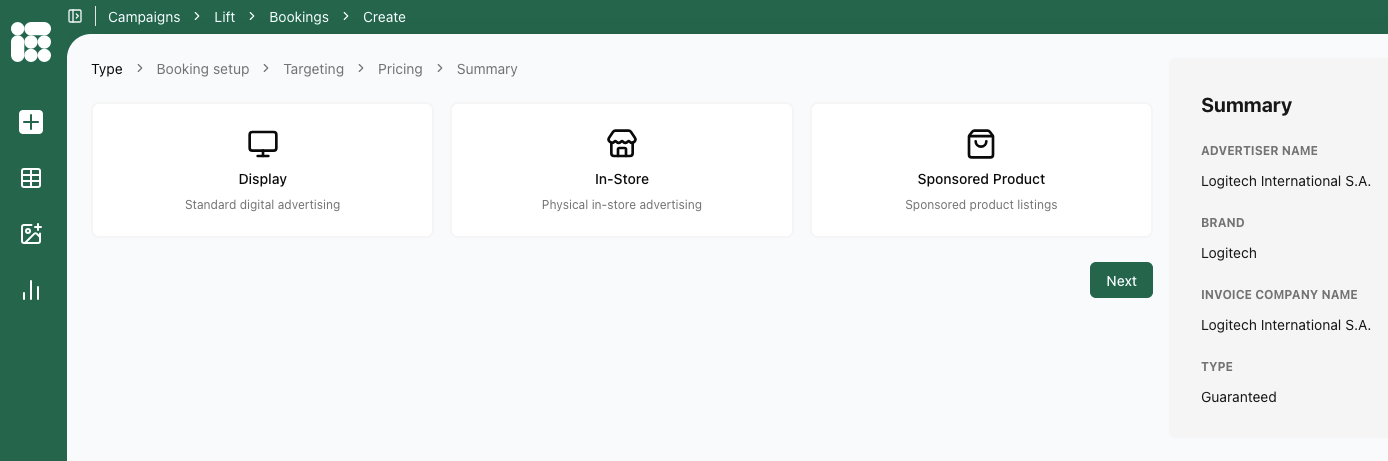
When creating a new booking, you'll first have to select a booking type. For Display bookings, select *Display*.
[](https://documentation.adhese.org/uploads/images/gallery/2026-08/1KbAzpCiF0xxQlPR-schermafbeelding-2026-08-18-om-14-29-48.png)
[](https://documentation.adhese.org/uploads/images/gallery/2026-08/pkS8rJeVx1Zrkq1O-schermafbeelding-2026-08-18-om-14-53-21.png)
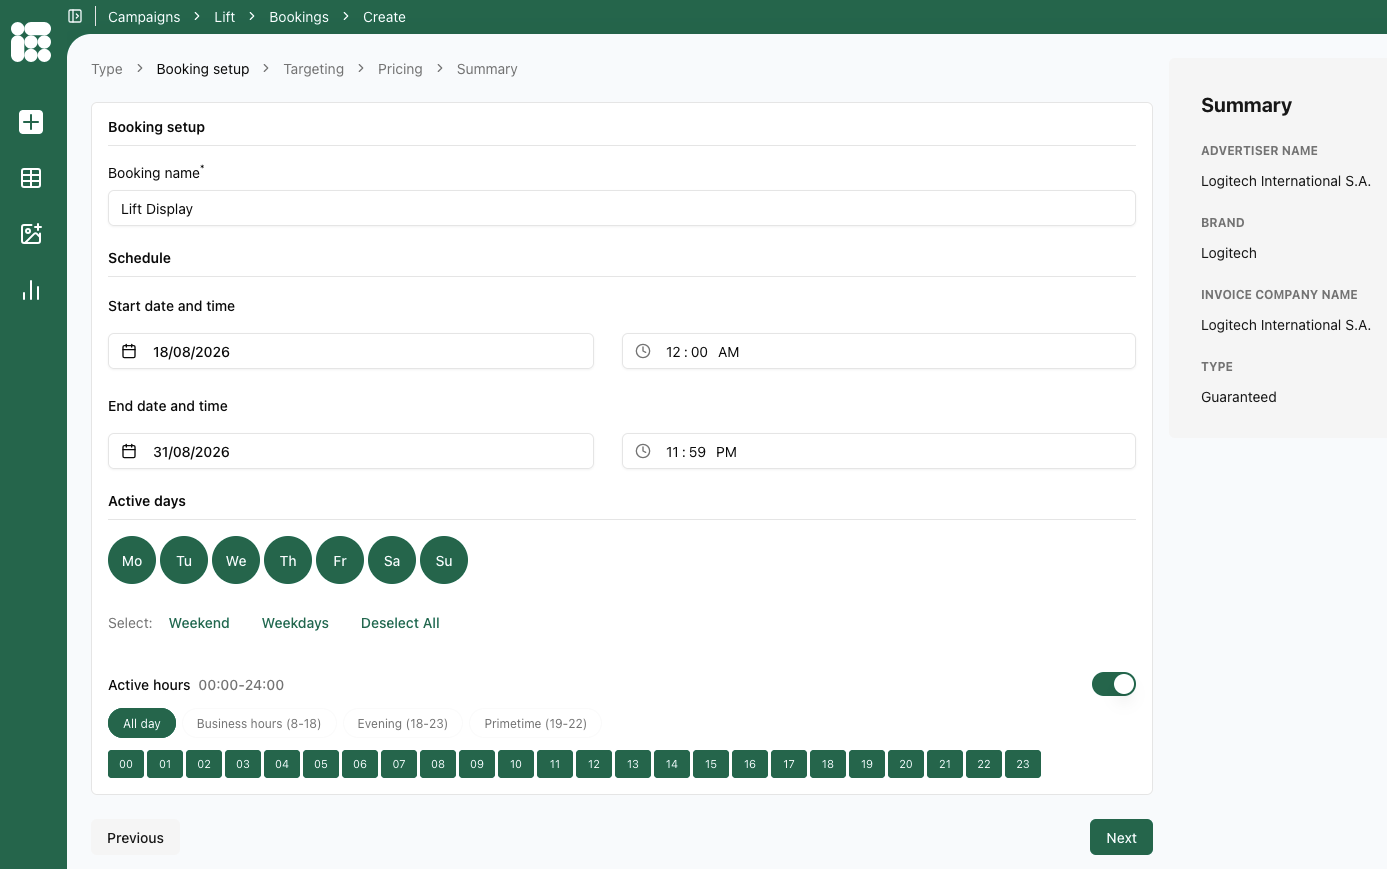
On the first Display booking screen, fill in the *Booking name*, *Start date and time*, *End date and* *time*.
Furthermore you can select the active days. Either by clicking the days you want the booking to be active or via the quick filters.
A toggle allows you to select which hours of the day the booking is going to be active for with some quick filters available as well.
When you're finished with the details on this booking screen, click *Next* in the bottom right.
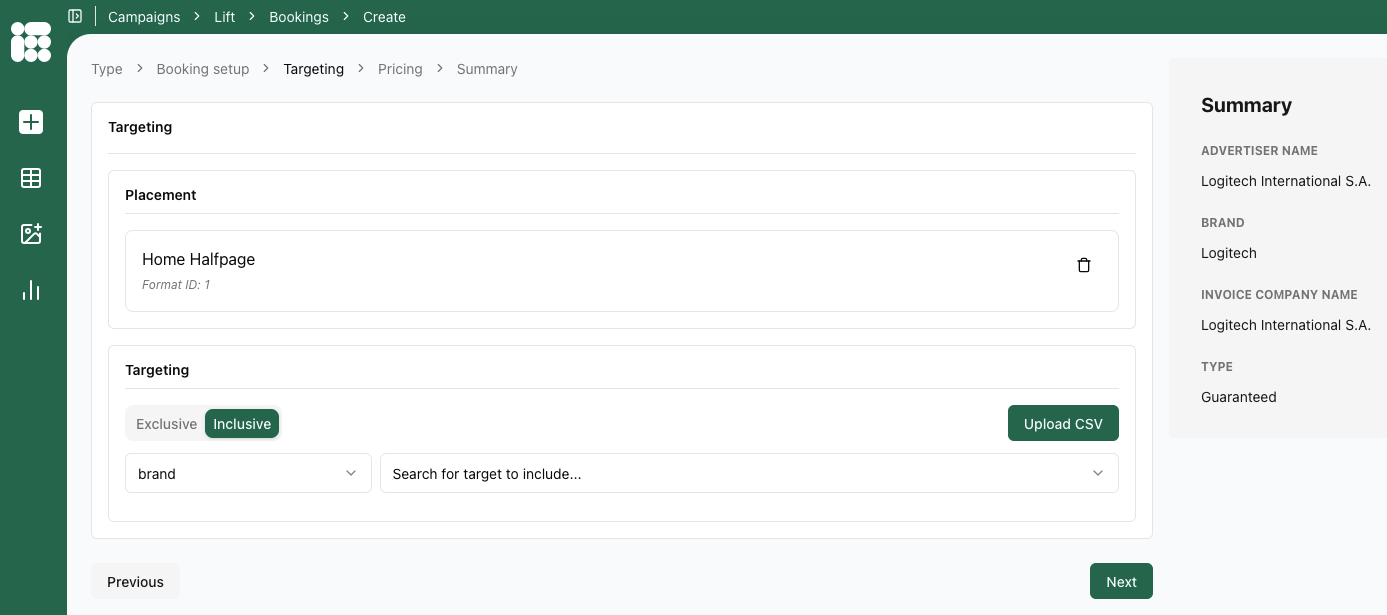
The next screen handles placements and targets:
[](https://documentation.adhese.org/uploads/images/gallery/2026-08/o80nBy12qO7k6S3Z-schermafbeelding-2026-08-18-om-14-56-58.png)
First you'll need to select a placement (where your booking will be delivered) and then any targets you wish to apply. You can select either:
- Exclusive targets: or negative targets. When a certain target is present, the booking will NOT deliver.
- Inclusive targets: when a certain target is present, the booking will deliver.
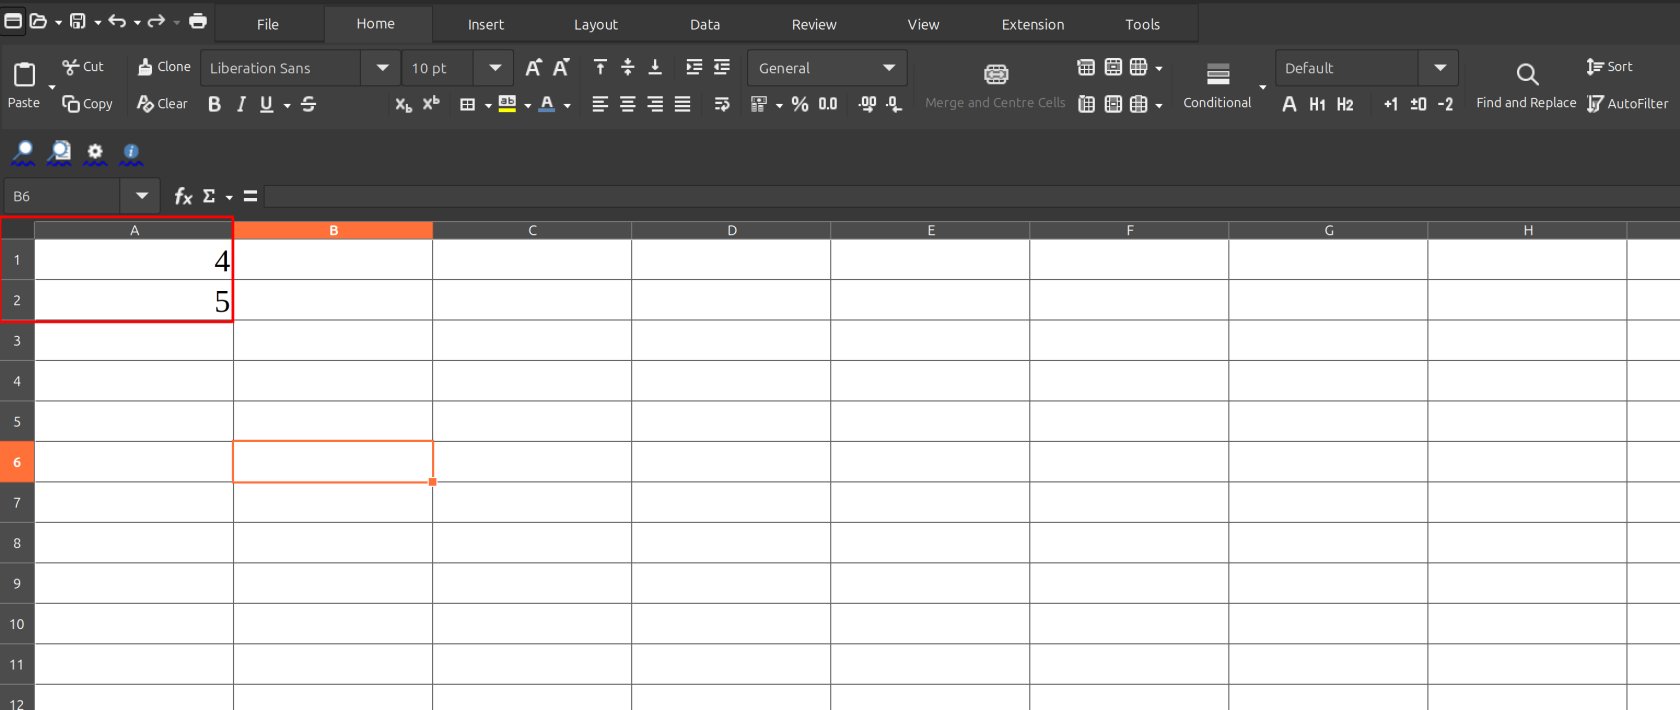
Targets can also be bulk uploaded via CSV import. Select a CSV file that contains the IDs or target codes for the target values you want to activate. The IDs/codes should be listed underneath each other under the first column of the CSV file:
[](https://documentation.adhese.org/uploads/images/gallery/2026-08/90pzXeyBI2jL8YKb-image.png)
Whether your target uses the ID (#) or target code (Code) depends on the target in question and how it was configured.
For the best results when bulk uploading targets, create a .csv file in a spreadsheet program like LibreOffice Calc or Microsoft Excel.
When your placement and targets (if any) are selected, you can continue to the *Pricing* section by clicking *Next* in the bottom right corner.
[](https://documentation.adhese.org/uploads/images/gallery/2026-08/fVUp8rnykCnPv5ef-schermafbeelding-2026-08-18-om-14-57-26.png)
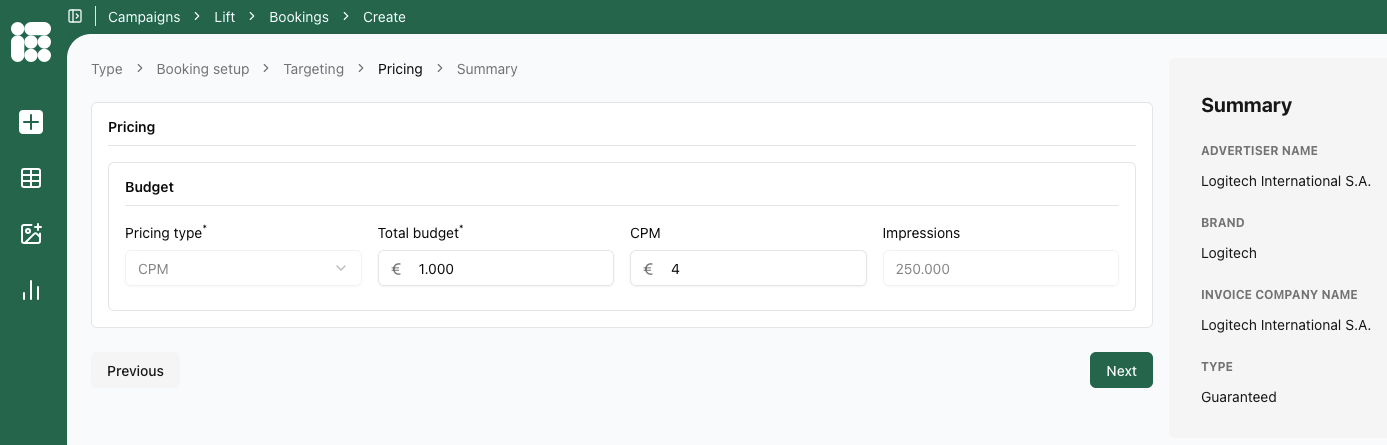
The *Pricing type* available for display bookings will depend on the settings the account holder has decided to make available for the chosen placement. In this case, only CPM (Cost per Mile/ Cost per 1000 impressions)
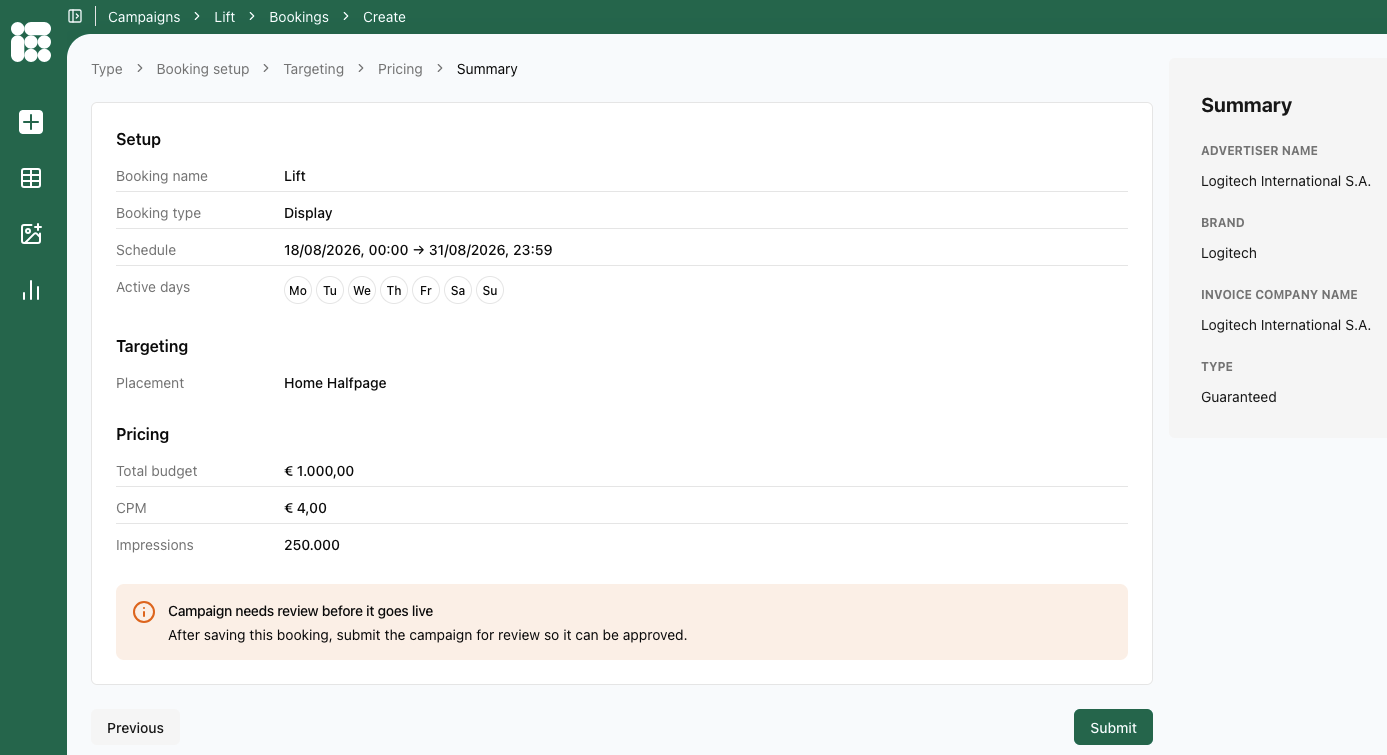
When you're done with the pricing page, you can move on to the booking summary:
[](https://documentation.adhese.org/uploads/images/gallery/2026-08/nPycqkzJqpDjzWBM-schermafbeelding-2026-08-18-om-14-57-40.png)
After checking if all details are filled in correctly, you can submit the booking (this will not submit them for approval). After clicking *Submit.*
[](https://documentation.adhese.org/uploads/images/gallery/2026-08/TPU9WF6adMhzakc7-schermafbeelding-2026-08-18-om-14-57-59.png)
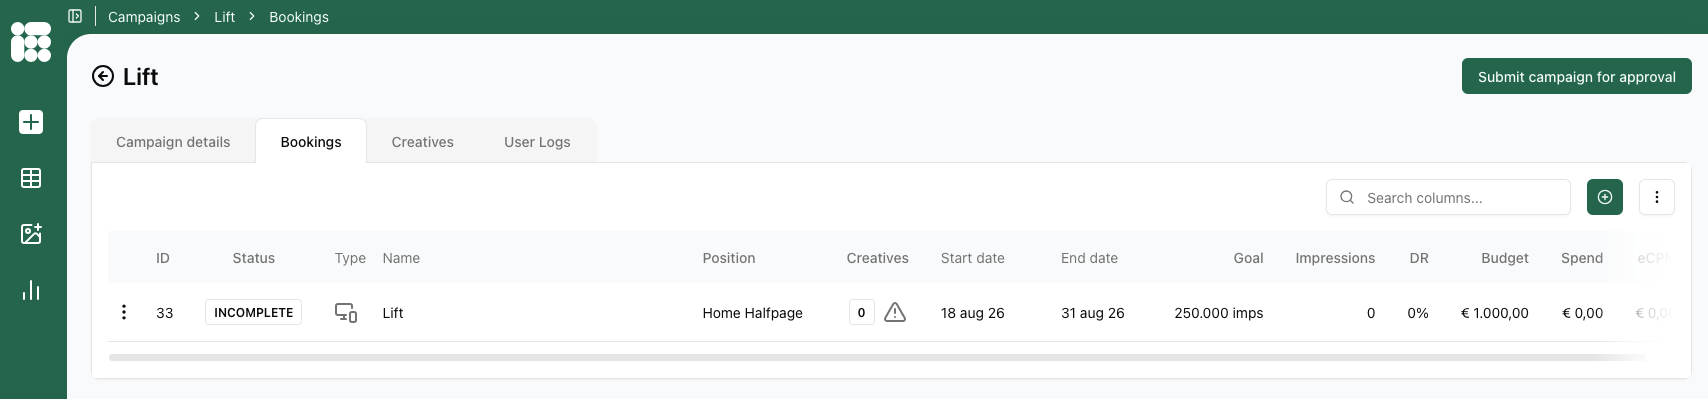
You'll return to the booking overview screen. From here you can either create another booking by clicking on the [](https://documentation.adhese.org/uploads/images/gallery/2026-08/FdaZDqieokqnDsQW-image.png) in the top right. If all bookings are filled in, you can click *Submit campaign for approval*. The account owner will then be able to approve (or reject) you campaign.
To move on to upload creatives, select the *Creatives* tab right next to *Bookings*.