Campaign Management
This section tells you all you need to know to about getting a campaign up and running, alongside information on how Adhese's delivery works.
- Campaign Delivery
- Campaign management
- The start of campaign delivery
- The delivery scheme of Adhese explained
- Delivery Distribution
- Campaign screen
- Campaigns
- Bookings
- Pacing Options
- Auto Delivery Limits
- Creatives
- Trafficking bookings and creatives
- Video ad serving
- Publish
- Statuses
- Alerting
Campaign Delivery
Campaign management
Adhese makes it easy to create online campaigns. It enables you to target, monitor, and optimise the delivery of online ads or content on any platform. This is the core of our technology.
The diagram below shows a simplified representation of a campaign's structure.
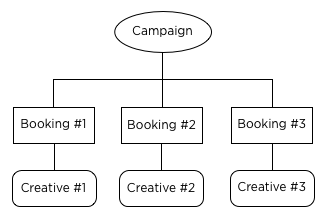
A campaign is made up of bookings and creatives, which are connected. We can extend this diagram after we have explained the properties of a booking and a creative.
Adhese offers standard solutions for all types of online advertising, including display advertising, video advertising, and text ads. Tailor-made creatives or additional features and functionalities can be included in specific campaigns using adjusted templates. Adhese also has the ability to integrate with third-party servers and marketplaces such as Magnite or Adform (refer to Marketplaces for more details).
This chapter on Campaign Management explains how to create a campaign in Adhese. Each step in this process, along with its related features and possibilities, will be thoroughly explained in distinct sections. You can only view and create campaigns for publishers and sub-publishers to which you are assigned.
The start of campaign delivery
You have now created a campaign. As illustrated in the simplified diagram of the campaign's structure, we have inserted the newly created bookings and attached creative:
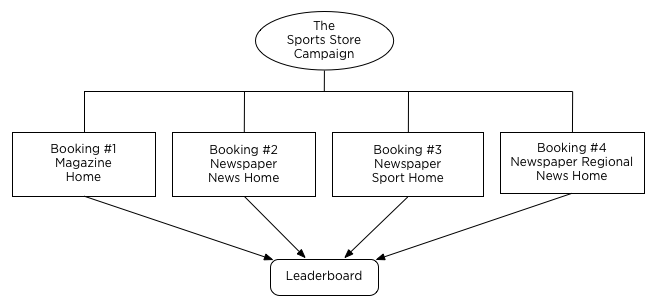
At this moment, the campaign is ready to start as you have:
- created a new campaign (Add a campaign),
- added bookings to the campaign (Add a booking),
- uploaded creatives (Upload a creative), and
- attached creatives to bookings or assigned positions to creatives (Trafficking bookings and creatives).
The delivery will start at the earliest start date of one of the bookings associated with the campaign.
Before a campaign starts, we recommend checking for possible issues that may inhibit or delay the start of the campaign. Adhese has built-in tools to make this job easy and effective: Statuses. By proactively monitoring the status of each campaign, you can ensure a smooth delivery without any unexpected delays.
The delivery scheme of Adhese explained
Please refer to this section for DOOH campaigns.
It is vital to understand and gain insight into the Adhese delivery process's decision-making logic and the factors taken into account to determine which booking must be served.
When a visitor accesses your website, the browser sends a request to the servers of Adhese. This request contains information about the requested position. In addition, the browser sends data about the user's browser, operating system, location, and other relevant information. Furthermore, Adhese enables the integration with existing user profile databases.
Remember that the unique identification of visitors and the storage of personal and other data are subject to national, European and international legislation. It is the exclusive responsibility of the publisher to comply with the law and adequately inform the user of his rights. Adhese can help and advise publishers here. More on user privacy is available in the GDPR section of the documentation.
Once Adhese receives a request, a number of factors are taken into account before a booking is shown. The following three elements are considered for each requested position:
- Campaign Priority
- Location Level
- Targeting
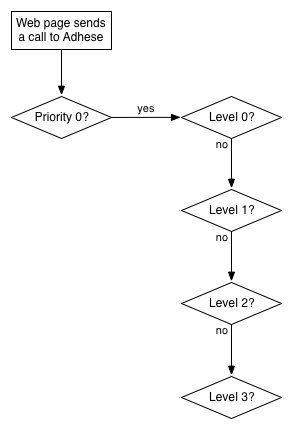
This chapter explains and visualises the Adhese delivery scheme step by step. The full scheme is provided at the end of this section; see the complete delivery scheme of Adhese.
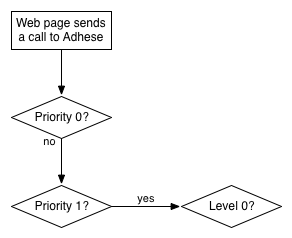
Campaign Priority
As outlined in the Priority section, each campaign is assigned a priority. Assume that the publisher has the following three priorities available in its Adhese account, ranked in order of importance:
- Paying (priority 0)
- Exchange (priority 1)
- In-house (priority 2)

Adhese will first check to see if a booking is available within the highest priority for the requested position, the Paying (priority 0) priority.
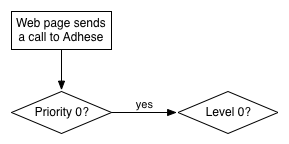
If there are more bookings at the Paying (priority 0) priority, the second factor to be considered is the Location Level factor. A full explanation of the Location Level factor is available in the next section.
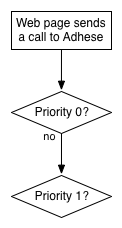
If nothing is booked at the Paying (priority 0) priority, Adhese will check if there is a booking at the Exchange (priority 1) priority.
If there are one or more bookings at the Exchange (priority 1) priority, the second factor to be considered is the Location level factor.
If nothing is booked at the Exchange (priority 1) priority, Adhese will check if there is a booking at the next priority: the In-house (priority 2) priority. The above procedure, as described for the Paying (priority 0) and Exchange (priority 1) priority, is repeated for the In-house (priority 2) priority.
If there is no booking at the In-house (priority 2) priority, there are no eligible bookings to be delivered and Adhese will not serve anything. Adhese may direct the request to a third party if the setup is structured that way (see Marketplaces for more information).
Location Level
The inventory of a publisher can be organised into Location Levels. The framework of these levels is determined within the database and is client-specific. The hierarchy of the levels is defined in the locations (see Create a new location).
Assume a publisher has four levels, where:
- An individual location gets Level 0;
- A channel that contains a selection of locations, such as the collection of identical locations throughout the Sports section of a publication, gets Level 1;
- The next channel contains a more extensive selection of locations, such as all locations across a single publication (i.e., Run Of Site), and gets Level 2;
- The last channel contains all locations across the entire network of a publisher (i.e., Run of Network) and gets Level 3.
In the above example, Level 0 has the highest priority. Level 1 comes next and has priority over Level 2 and Level 3. Whereas Level 2 only takes precedence over Level 3. Level 3 does not take precedence over any other level because it has the lowest priority.
The Location Level factor is considered after Adhese has collected a list of bookings for the requested position at the highest campaign priority available.

Following the above level structure, Adhese will first check if anything is booked at Location Level 0.
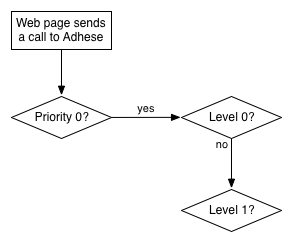
When no booking is found for that specific location, the next Location Level will be investigated.
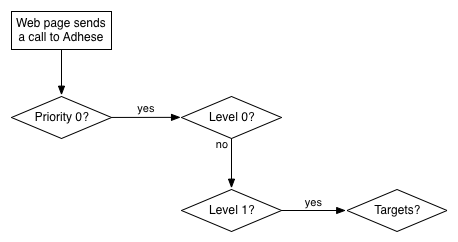
If one or more bookings are booked to be delivered explicitly at Location Level 1, the next factor will be considered: Targeting. The next section provides a full explanation of the Targeting factor.
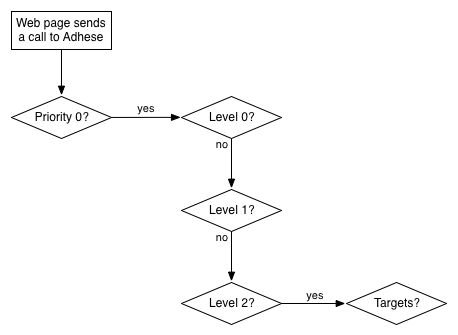
If there are any such bookings, the next factor will be taken into consideration.
If nothing is booked to be delivered across the publication's website (Location Level 2), Adhese will check if bookings are booked across the network of the publisher (Location Level 3).
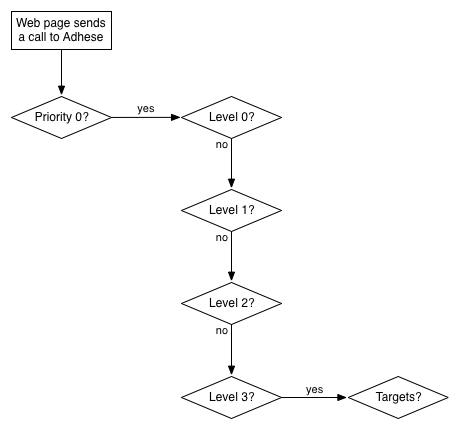
If there are such bookings, the Targets factor will be taken into consideration.
Adhese will look into the Exchange (priority 1) priority level and repeat the above procedure if no eligible bookings are available to be delivered based on the Targets factor or if there are no bookings across the network of the publisher (Location Level 3).
Targeting
The Targeting factor takes a booking's targeting properties into account and reduces the set of eligible bookings so that only one booking remains. For more information about targeting, refer to Targeting.
A booking with more specific targeting properties takes precedence over a booking with fewer or non-targeting properties when the inventory is not sufficient anymore for all running bookings (overdelivery).
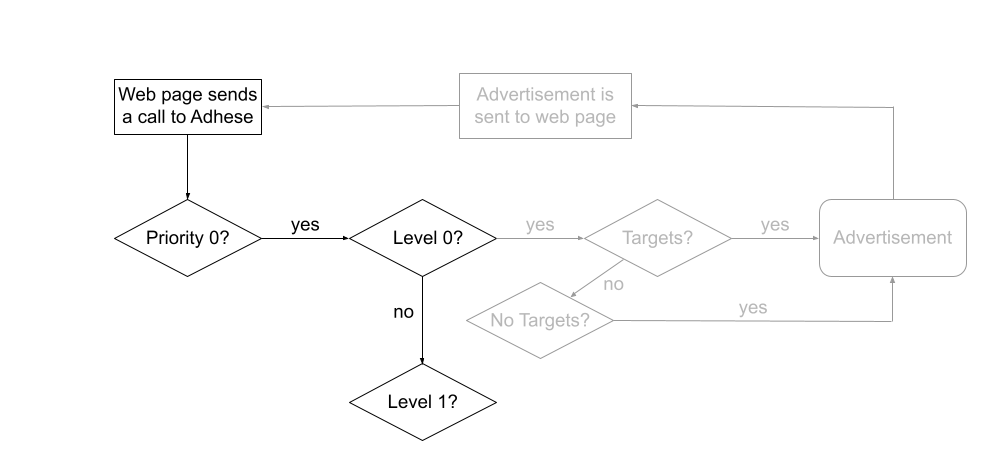
 Adhese prioritises bookings with targeting properties. Adhese will send the most eligible booking to the webpage so that the browser can display it. A booking with more specific targeting properties has a higher chance of being delivered, as they take precedence over a booking with fewer targeting properties.
 If no targeted bookings are available, Adhese will check the availability of bookings without targeting properties.
 If no bookings (with or without targeting properties) are available within Location Level 0, Adhese will take Location Level 1 into account.
The above procedure will be repeated until an eligible booking can be delivered within the Paying (priority 0) priority level. If no eligible bookings within the Paying (priority 0) priority level are available to be delivered, the above procedure will be repeated entirely for the next priority level.
It is possible that no booking can be delivered for a request because there simply is no booking available. If this happens, you can choose not to deliver anything, or you can choose to deliver an In-house booking to promote a proprietary product, for example.
The complete delivery scheme of Adhese
The following scheme displays the complete delivery scheme of Adhese. For a more detailed description, refer to the previous paragraphs.

DOOH campaigns
A DOOH campaign creates a playlist from all available bookings, with SOV determining how often each booking will be displayed.
It is important to note that attempting to increase priority through targets and priority has no effect on DOOH campaigns, whereas it would result in absolute priority for display campaigns. Therefore, it is crucial that DOOH campaigns are not significantly overbooked, given that both inventory and plays are fixed and inflexible compared to display campaigns.
Delivery Distribution
With campaigns and bookings set using the AUTO delivery method, deliveries will be evenly distributed throughout the period.
It is recommended that this default setting be adjusted in most cases. If you wish for a campaign or booking to deliver more in the first half of the period (frontloading), we can adapt the deliveryDistributionParamater. This setting is not available in the UI but can be configured by the Adhese Support department.
Here is an example of an uneven distribution: When the deliveryDistributionParameter is set to 0.5, 62.5% of the volume will be delivered in the first half of the period and 37.5% in the last half.
The deliveryDistributionParameter can be set between 0 and 1 ( to deliver x% in the first half, parameter = 4 * (x-50%)/100 )
You can calculate the value in the attachment.
Delivery Parameter Calculator.xlsx
Campaign screen
The user interface of Adhese has several components that make it easy to navigate, search, perform actions, etc.
It depends upon the context and the user permissions, what actions you can perform and which elements are visible in the interface.
Search bar
You find a search bar located at the top of each screen within the Adhese user interface. Use this search bar to quickly navigate to a specific campaign, booking, or creative.

If you click the search bar, the results box becomes visible.
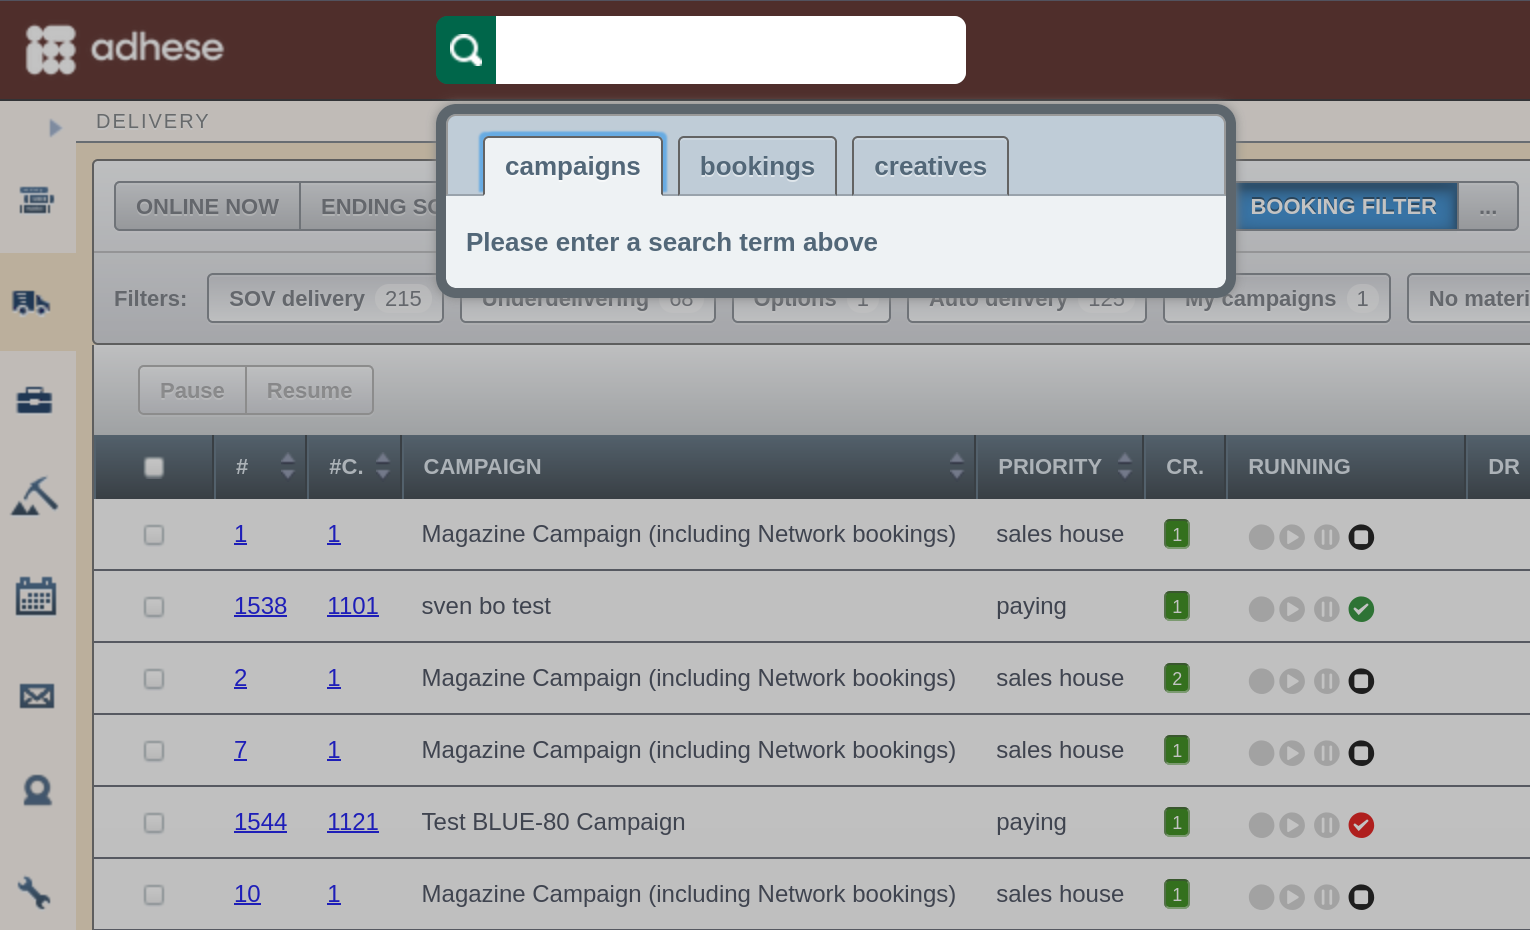
Select a category to search (campaigns, bookings, or creatives) and enter a search term in the search bar.
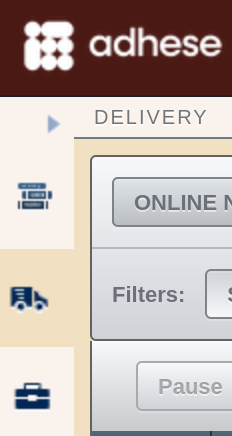
Main navigation
Access the main screens using the main navigation on the left. You can collapse the menu by clicking the left arrow at the top of the bar, leaving only the icons visible.
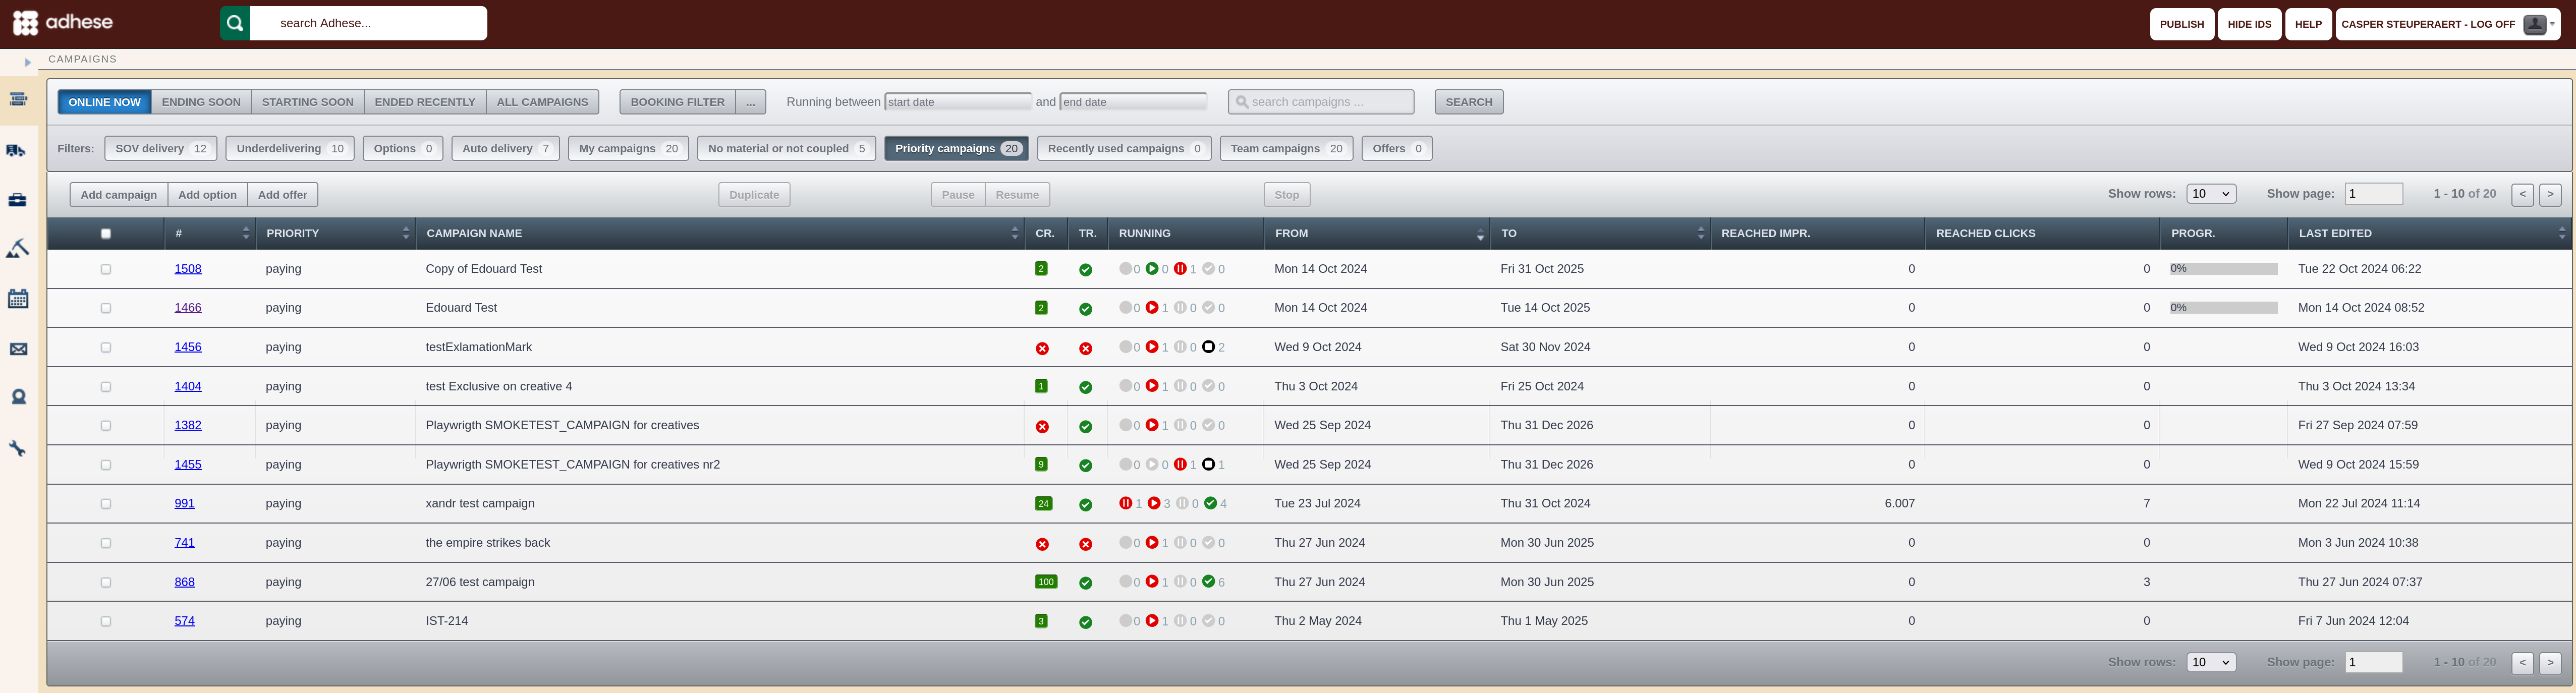
Tabulated overviews
Adhese displays the campaign management data in tabulated overviews for the publishers and/or sub-publishers to which you are assigned.

In such an overview, a row represents an individual entity (i.e. campaign, booking, or creative), and a column represents an attribute or property of the entity.
You can customise these overviews by personalising the table columns or using the campaign filter.
Campaign filter
A campaign filter is available in some of the overviews.

The campaign filter allows you to select different kinds of campaigns. The content of the overview will change according to the chosen campaign attributes.
Breadcrumb
The Adhese interface offers a breadcrumb trail to show you where you are in the navigation structure. Click on any breadcrumb to navigate to the corresponding screen.


Tab navigation

Drop-down navigation
To switch between campaigns, bookings, or creatives, simply use the drop-down menu located in the upper right corner of each overview. Click inside the box to reveal the available options.
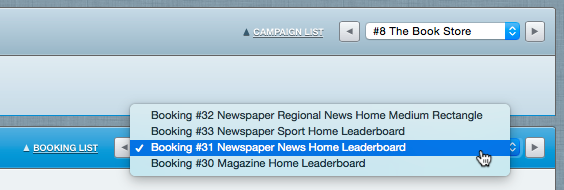
Click the arrows next to the drop-down menu to go to the next or previous campaign, booking, or creative.
If you have filtered the *Campaign* overview through the campaign filter, the \*Campaign\* drop-down menu will only show the filtered campaigns.
Next to the above drop-down menu, you will find a link that says Campaign list, Booking list, or Creatives list. Click this link to go back to the Campaign overview, Booking overview, or Creative overview, respectively.
Actions

Customise the Adhese user interface
Adhese offers several features to customise the Adhese user interface.
Campaign filter
Note that the specific contents of the campaign filter may be different for other types of Adhese users.
The general Campaign overview and the Delivery overview both have a campaign filter.

The campaign filter allows you to select different kinds of campaigns. The content of the overview will change according to the chosen campaign attributes.
- You can choose to select:
- Campaigns
- that are online;
- ending soon (including campaigns that ended until two weeks ago);
- starting soon (i.e. within two weeks);
- that have ended recently (within the last two weeks).
- All campaigns.
- Campaigns
You can select only one of the five buttons.
- Select all campaigns that are online within a certain period;
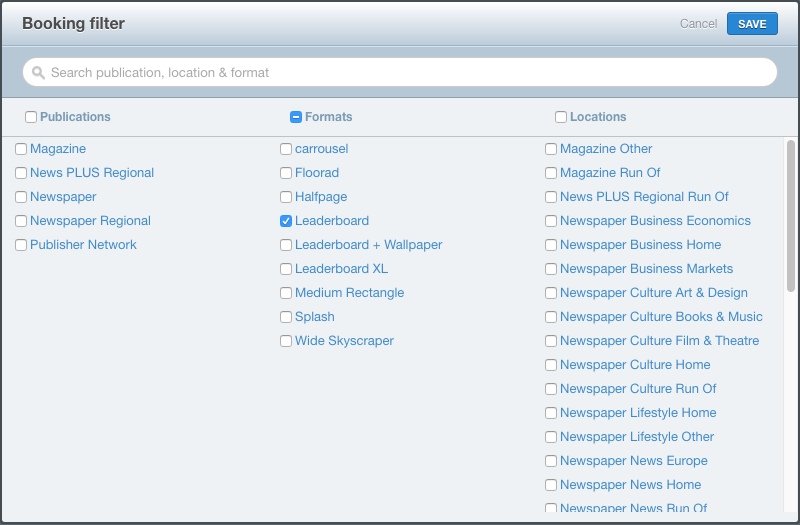
- Select campaigns by using the Booking filter. The Booking filter narrows your selection by publication, location, or format or a combination of two or more of these variables;
- You can choose to select or deselect all publications, formats, and locations in the header row by enabling the respective checkbox.
- If you hold down the ALT key and click the column's name (not the checkbox), the selection of items inverts.
- Add one or more additional filters that let you select campaigns that
- are booked with SOV as delivery method;
- are underdelivering;
The *underdelivering* campaign filter takes only running bookings into account.
-
- are options;
- are booked with auto as delivery method;
- the logged-in user has created;
- have no uploaded creatives or no trafficked creatives and bookings;
- have a high priority;
- recently used campaigns (campaigns you created, worked on or watched in the last 72 hours)
- are team campaigns;
- are offers.
- are options;
It is possible to combine the above filters to obtain a more granular section of campaign inventory.
Besides, the campaign filter also has a search bar.
Sort table columns
You can sort each overview based on a column variable. To perform this action, look for two stacked triangles. To sort the overview, simply click on the column heading.
-
The Running column can not be sorted:

-
The Campaign name column can be sorted:

-
The Campaign name column is sorted in ascending order:

-
The Campaign name column is sorted in descending order:


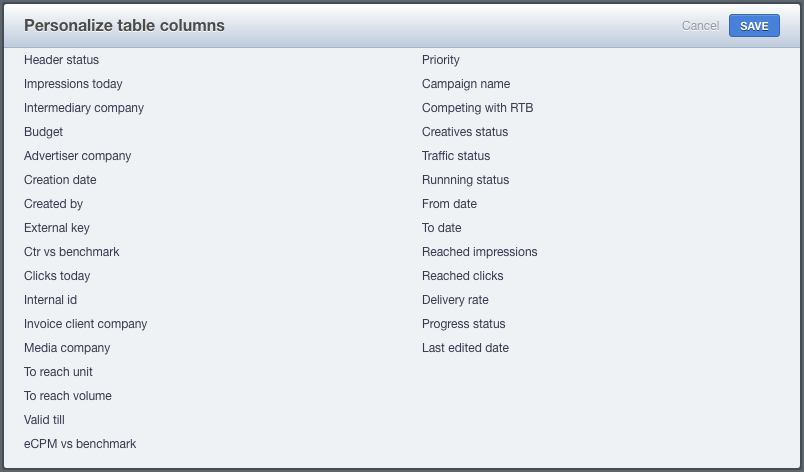
Personalise table columns
Each overview displays a table beneath the dashboard. Every row represents an individual campaign, booking, or creative – depending on the overview you are referring to. The columns represent the properties of a campaign, booking, or creative. You can decide which columns must be visible, set the display sequence, and change the name of a column's heading.
Refer to [Table columns in the Adhese interface](https://documentation.adhese.org/books/adhese-ui/page/table-columns-in-the-adhese-interface) for a complete overview and definition of available table columns per overview.
To change the table columns:
-
Right-click the column heading row. The right-click opens an overview with all available table columns; the Personalize table columns modal window. The table columns on the left are the available ones, while the ones on the right are currently displayed.

- Drag and drop a column name from the left to the right to add the column to the table.
- Drag and drop a column name from the right to the left to remove the column from the table.
- Drag the right-sided column names up and down to change the order of the columns in the table.
-
Click the Save button.
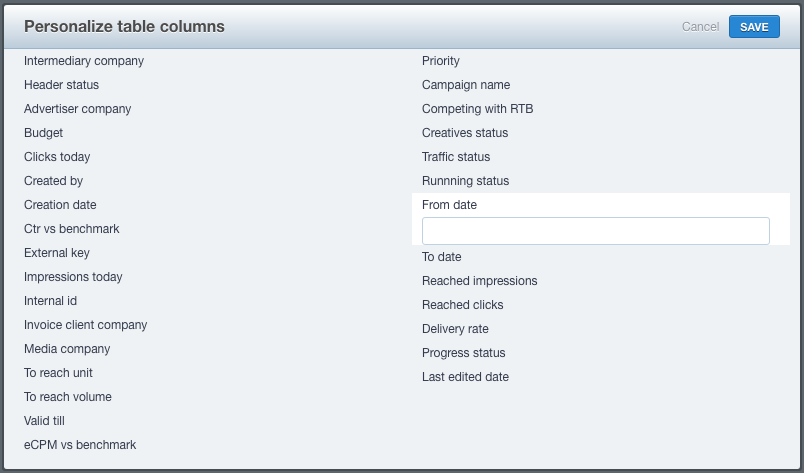
To change the name of a table column heading:
-
Right-click the column heading row. The right-click opens an overview with all available table columns; the Personalize table columns modal window.
-
Click the label of the table column of which you want to change the name.

-
Enter the new name and press enter.
-
Click the Save button.
Campaigns
Offers and options
Adhese distinguishes three different campaign statuses: Offer, Option, and Campaign. This chapter covers Offers and Options, while the next chapter provides a detailed description of Campaigns.
Offers
An offer simulates a campaign. It is used to propose an estimated cost price to a client.
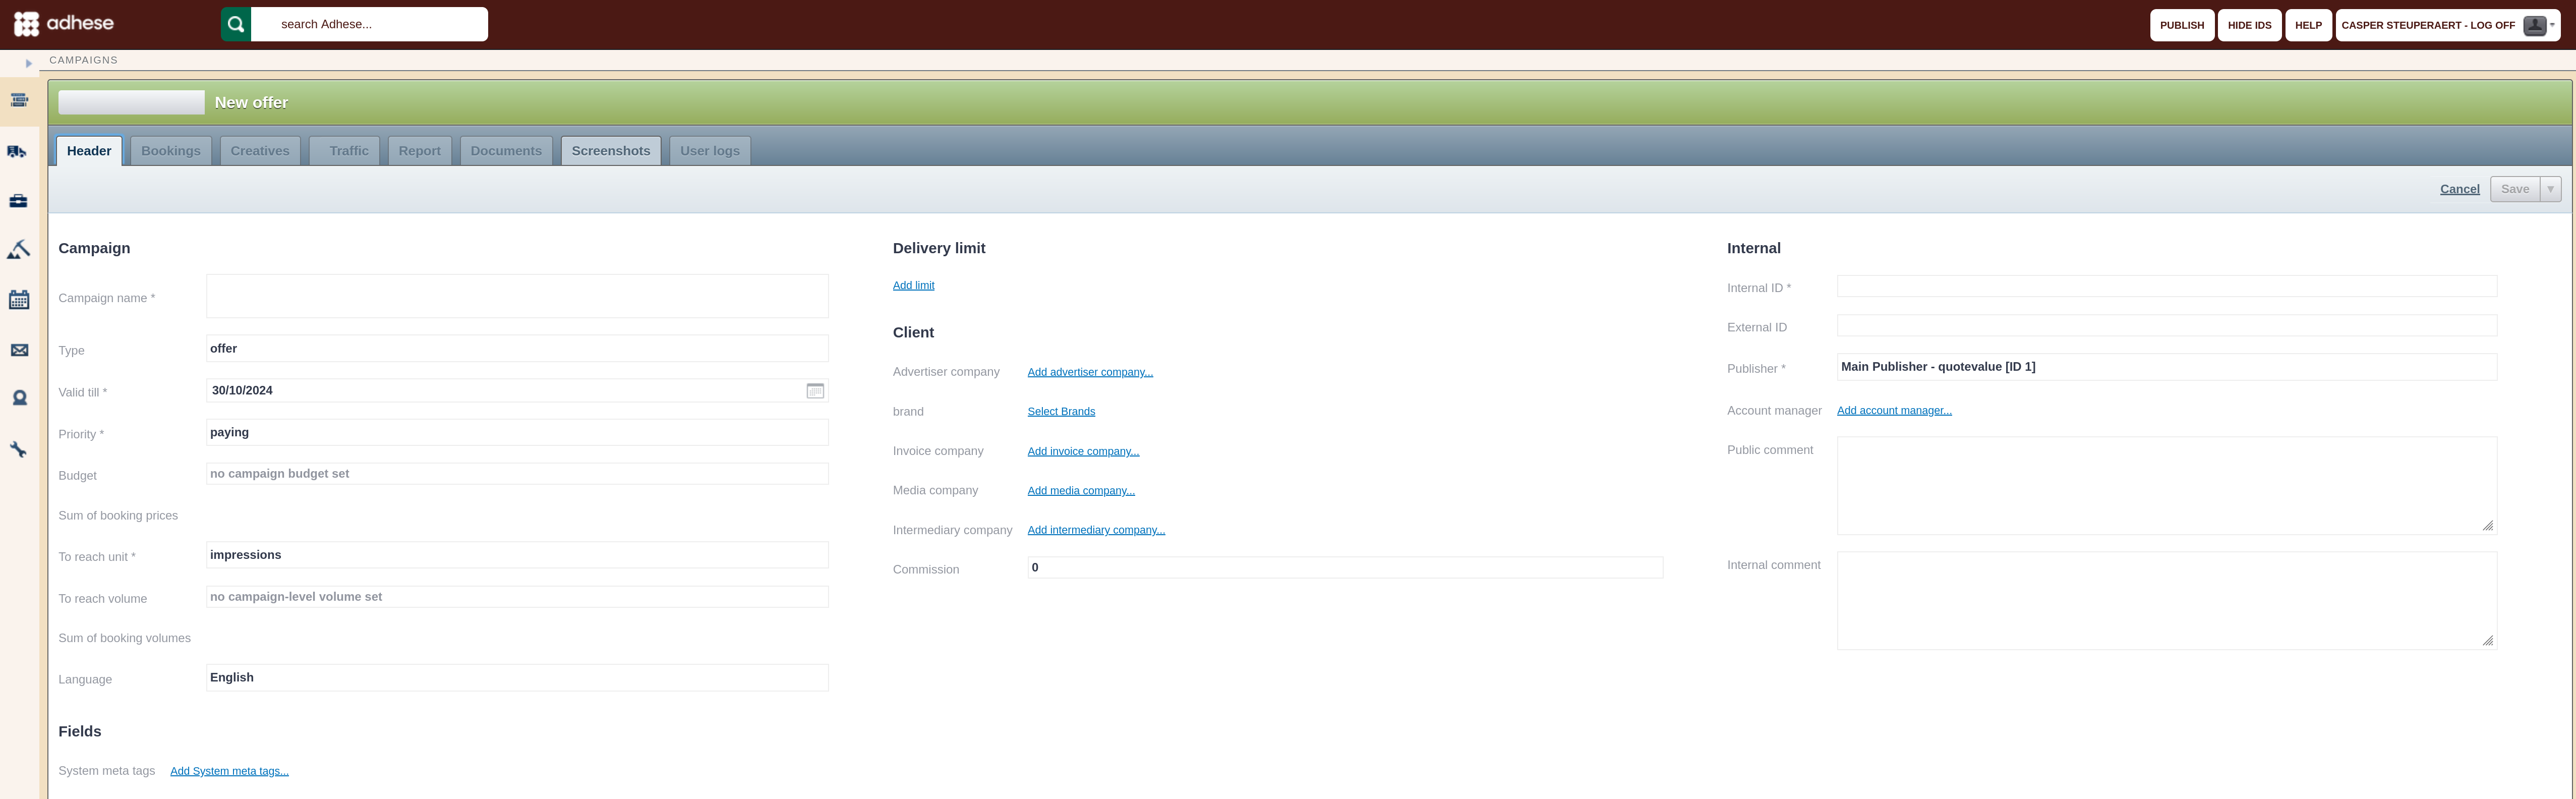
To create an offer:
- Click Campaigns in the left navigation menu. This opens the Campaign overview.
- Click the Add offer button. This opens the New offer screen, which has a green coloured header.

- You need to enter the same details as when you create a campaign (see Add a campaign). However, there are two different properties:
- Determine the status in the Type drop-down. The default value is Offer. If you are creating an offer, you don't need to change this property. However, if the offer is authorised to run, change the status to Option or Campaign.
- Pick a date from the calendar in the Valid till field. This date indicates the deadline for the offer. The default deadline is set to 14 days from the offer's creation. This can be adjusted if necessary.
If an offer is not converted into a campaign before the original start date of one of its bookings, its campaign status will change from planned to running. However, the offer will not deliver any impressions. Once the campaign period is over, the status will change from running to ended.
You can convert an offer to an option or campaign at any time.
The forecasting tool of Adhese does not take offers into account.
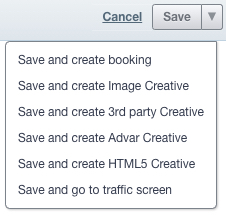
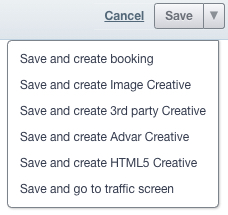
To save the offer, click on the Save button. Clicking the arrow next to the button will reveal several saving options in a drop-down menu:

|
Save and create booking |
Saves the current offer and opens a new create booking screen |
|
Save and create Image Creative |
Saves the current offer and opens a create Image Creative screen |
|
Save and create 3rd party Creative |
Saves the current offer and opens a create 3rd party Creative screen |
|
Save and create Advar Creative |
Saves the current offer and opens a create Advar Creative screen |
|
Save and create HTML5 Creative |
Saves the current offer and opens a create HTML5 Creative screen |
|
Save and go to traffic screen |
Saves the current offer and opens the traffic screen |
Options
An option is a campaign with a "shelf life". This enables you to plan campaigns that are pending or awaiting approval. Options differ from offers because the Adhese forecasting tool (see Forecasting and planning) takes option volumes into account.
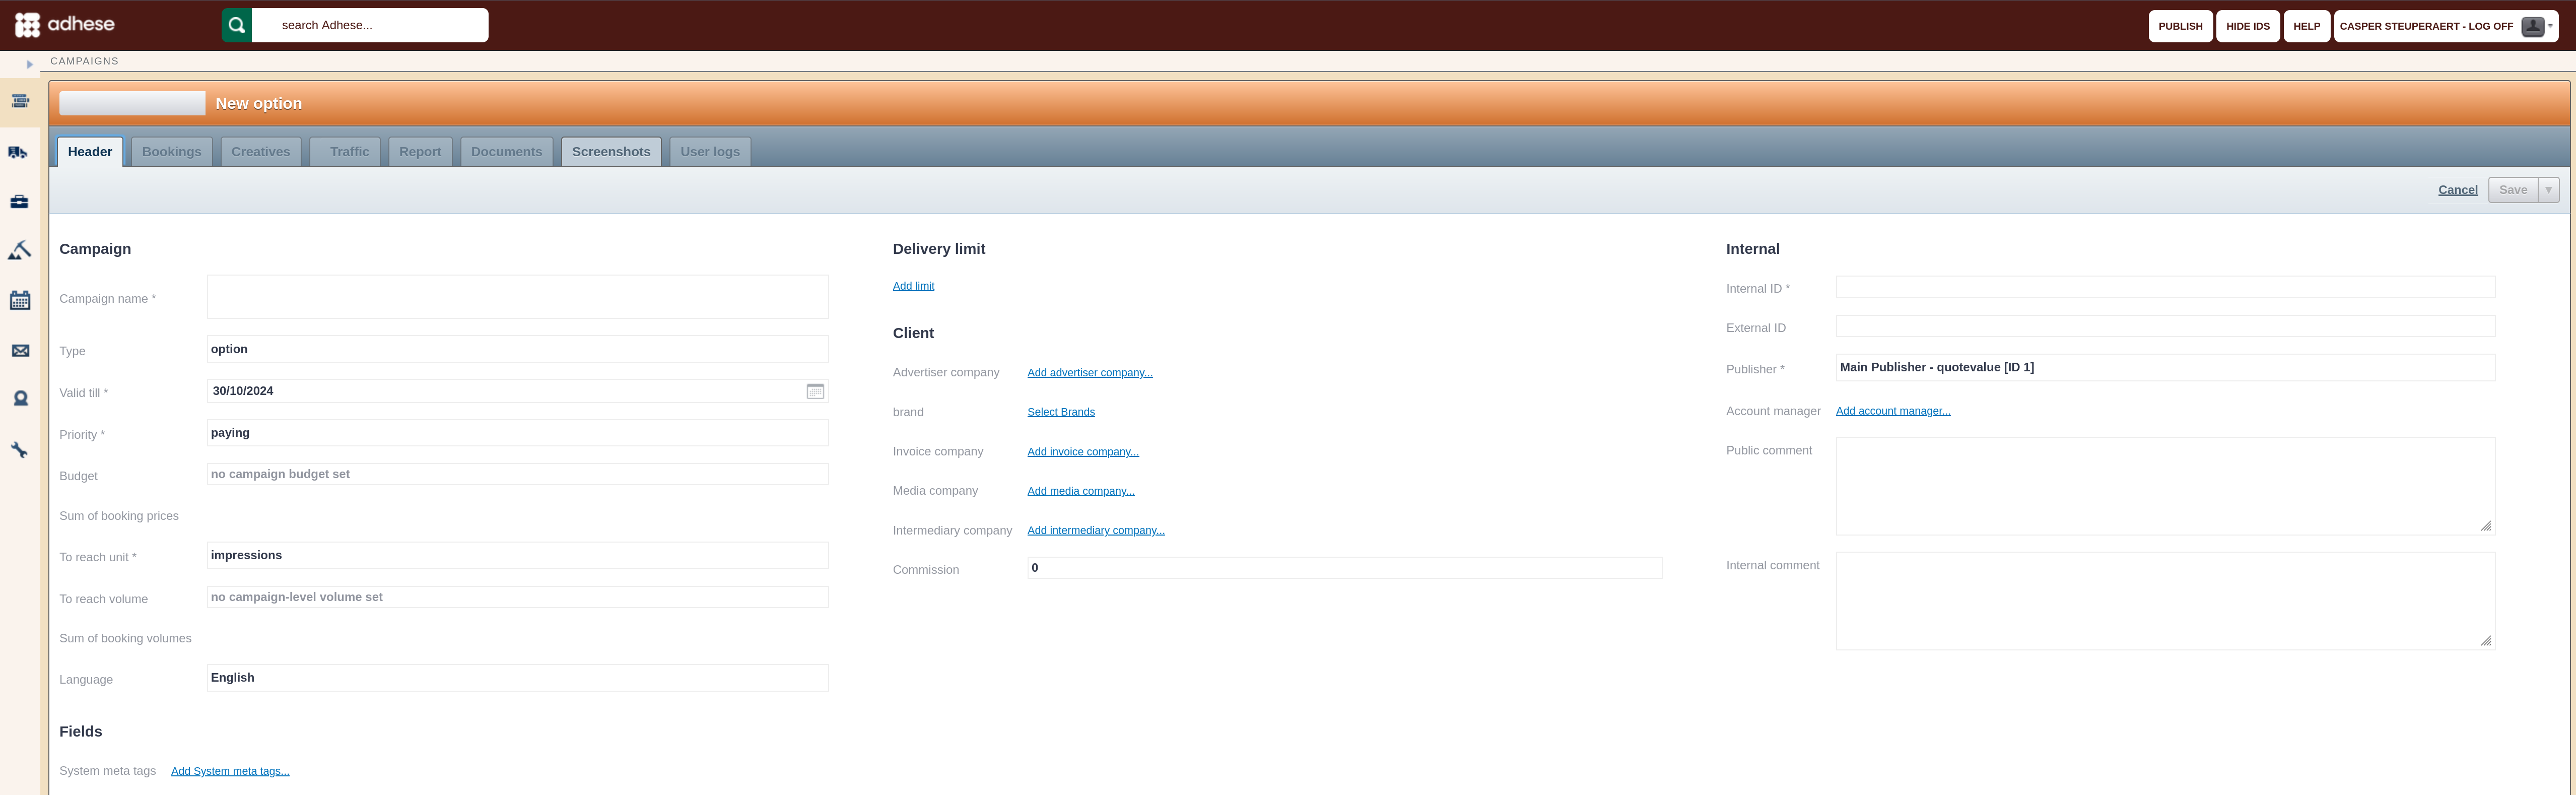
To create an option:
- Click Campaigns in the left navigation menu. The Campaign overview opens.
- Click the Add option button. This opens the New option screen, which has an orange coloured header.

- You need to insert the same details as with creating a campaign (see Add a campaign). However, there are two different properties:
- Determine the status from the Type drop-down. The default value is set at option. If you are creating an option, you don't need to modify this property. However, if the offer is authorised to run, change the status to Campaign.
- Pick a date from the calendar in the Valid till field. This date indicates the deadline for the option. The default deadline is set to 14 days from the option's creation. This can be adjusted if necessary.
If an option is not converted into a campaign before the original start date of one of its bookings, its campaign status will change from planned to running. However, the offer will not deliver any impressions. Once the campaign period is over, the status will change from running to ended.
At any time, you can convert an option to a campaign.
To save the option, click on the Save button. Clicking the arrow next to the button will reveal several saving options in a drop-down menu:

|
Save and create booking |
Saves the current option and opens a new create booking screen |
|
Save and create Image Creative |
Saves the current option and opens a create Image Creative screen |
|
Save and create 3rd party Creative |
Saves the current option and opens a create 3rd party Creative screen |
|
Save and create Advar Creative |
Saves the current option and opens a create Advar Creative screen |
|
Save and create HTML5 Creative |
Saves the current option and opens a create HTML5 Creative screen |
|
Save and go to traffic screen |
Saves the current option and opens the traffic screen |
If the option is about to expire, Adhese can send a notification email to the creator and any assigned account managers. To activate this feature, please contact Support.
Campaigns
Adhese makes it easy to target, monitor and optimise the delivery of online campaigns. Campaigns are a grouping of booking conditions and creatives.
Add a campaign
To add a new campaign:
- Click Campaigns in the Adhese navigation menu on the left. The Campaign overview opens:

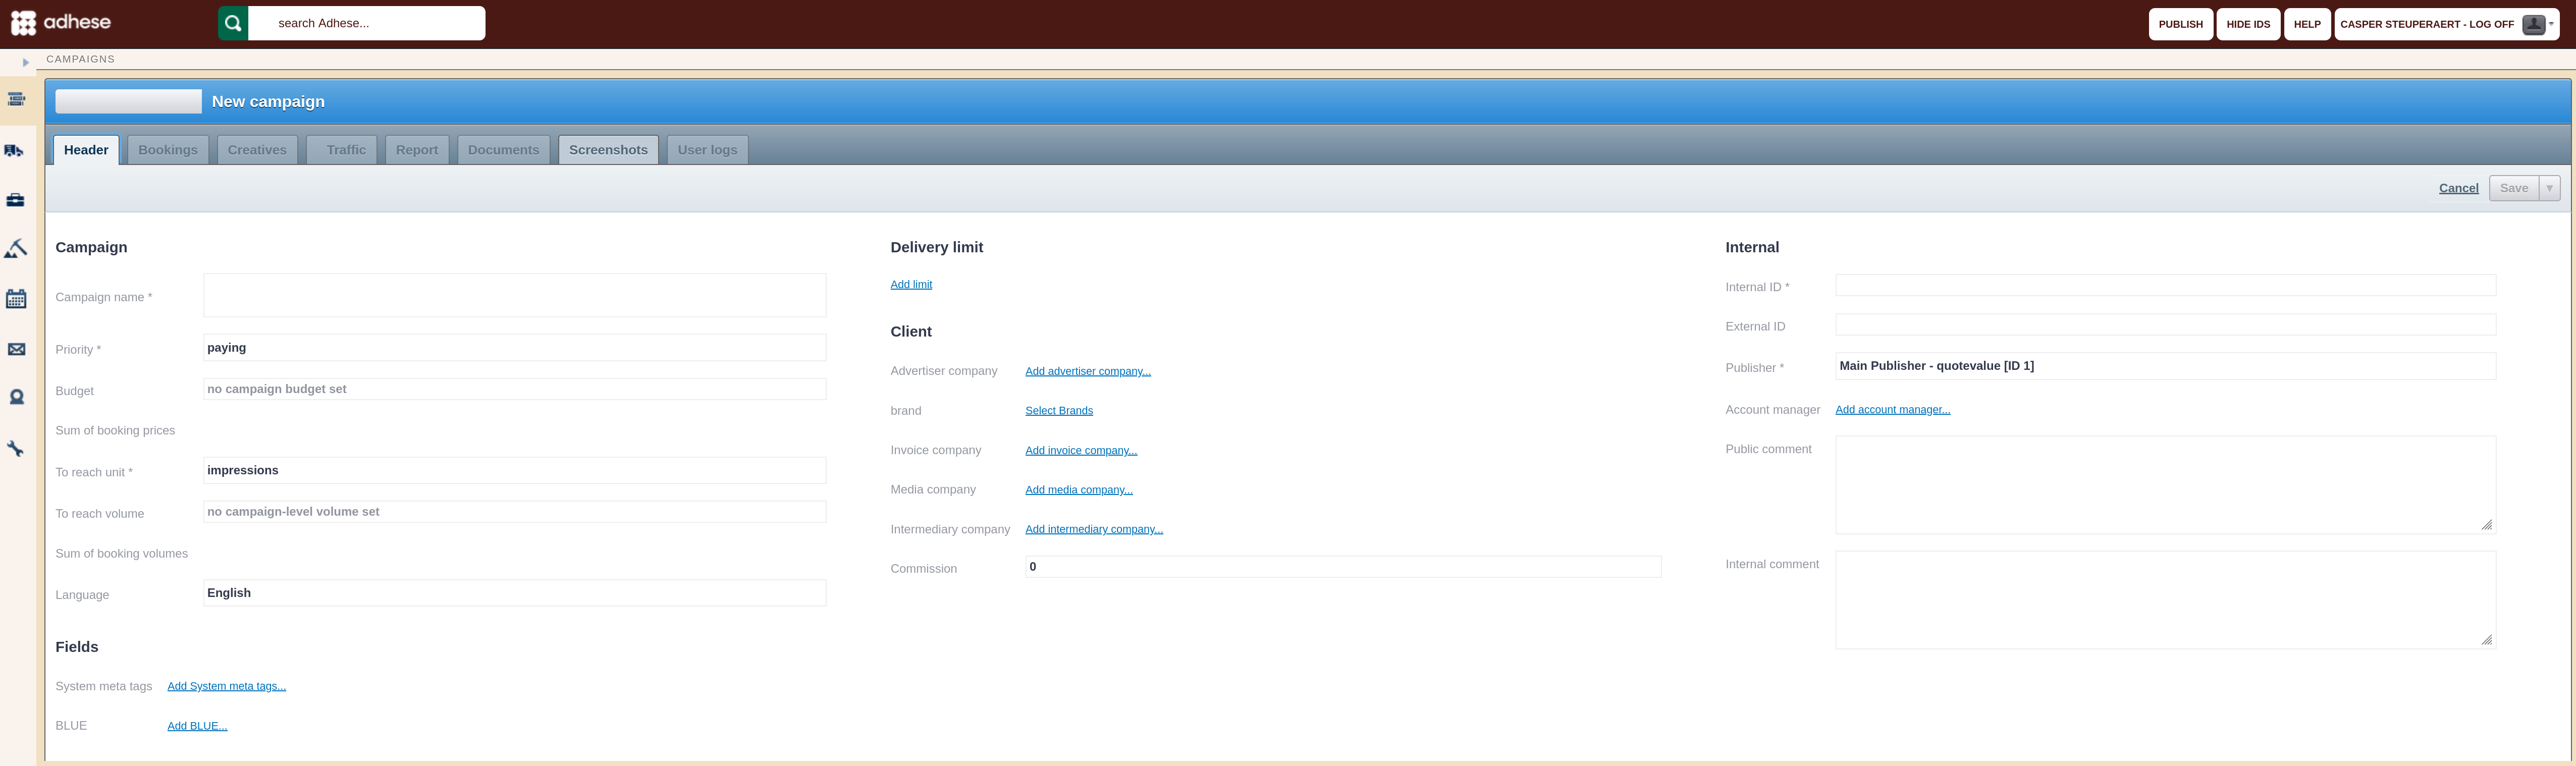
- Click the Add campaign button. The Header tab of the campaign opens with a blue coloured header.

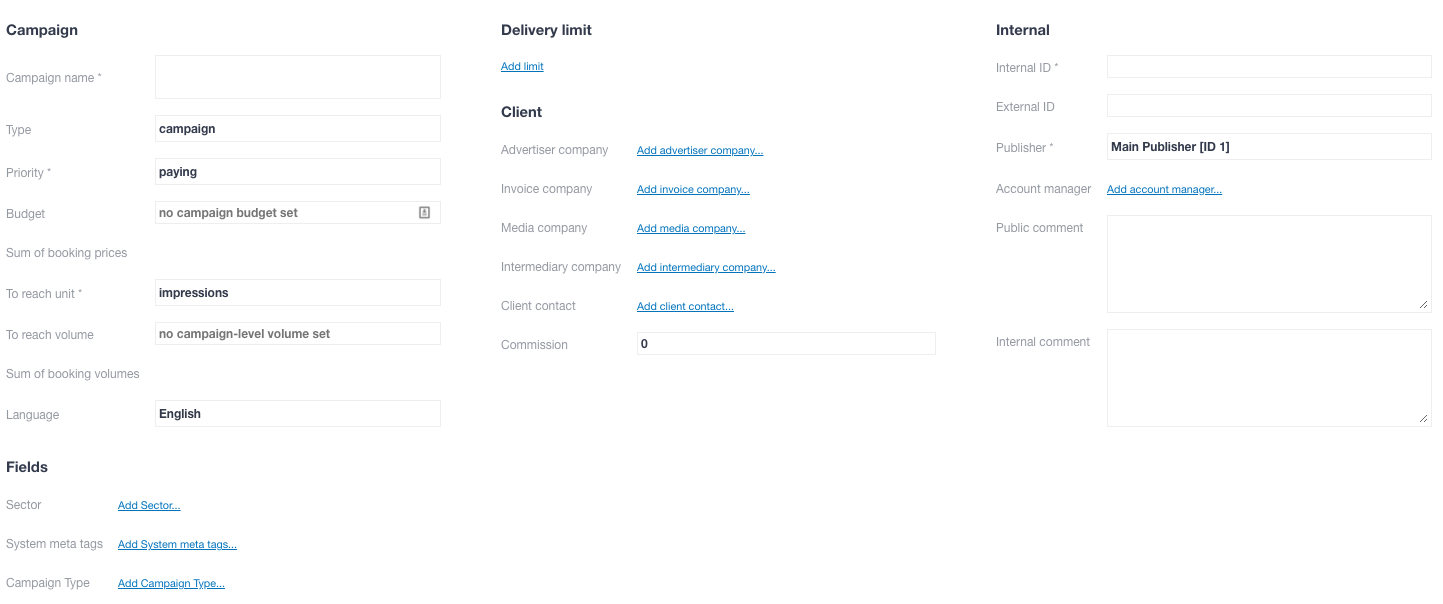
The Campaign header contains general campaign information and is divided into five sections:
- Campaign
- Fields (client-specific)
- Delivery limit
- Client
- Internal
A name is required for the campaign. It is possible to save a campaign without filling in all the compulsory fields, but the header status will be red, and the mandatory fields will be set to their default value.
During the setup of the Adhese account, the client decides which fields are mandatory. Rules can be set up to ensure that specific users or user levels complete one or more input fields.
Campaign
Campaign name
Enter a name for the campaign in the Campaign name field. To make the campaign easy to identify and locate, give it a unique, unambiguous name before saving it.
Priority
Select the priority of the campaign from the Priority drop-down.
The priority of a campaign determines how important it is for a campaign to achieve its objectives within the specified timeframe relative to other campaigns. It is one of the factors that determines whether a campaign takes precedence over competing campaigns (i.e. campaigns booked at the same position).
Multiple priority levels are available in the drop-down menu to rank campaigns based on their importance. Some typical examples of priority levels are paying, exchange, and inhouse.
Priority levels are defined during the implementation process.
Budget
Enter the campaign budget in the Budget field. The budget is based on the cost of a campaign and does not affect delivery (in most setups). Once a campaign has reached its budget limit, it will stop.
Sum of booking prices
The sum of the booking prices equals the sum of the budgets of the bookings that are part of the campaign. The budget for each booking is determined in Add a booking: Booking price.
To reach unit
A campaign can have an objective or a goal associated with it. Select one of the following units from the To reach unit drop-down:
- Impressions
- Clicks
- Unique visitors
- Tracking of certain events, for example, leads, purchases, etc.
The first two options are implemented by default. The remaining two are optional.
To reach volume
In the To reach volume field, enter the number of impressions, leads, … a campaign must reach before its delivery can stop.
It is possible to define and combine multiple goals, as an individual booking of a campaign can also have a goal associated with it. (see To reach and Unit).
A campaign will stop being delivered:
- If the campaign has achieved its goal
- If each booking of the campaign has achieved its goal
If you are planning to combine multiple goals, please ensure there is some logic between the desired to reach volume of a campaign and its bookings.
The to reach volume field in the Campaign distributes the volume over multiple (AUTO) bookings only if they have the same start and end date. Combining SOV and AUTO bookings with a to reach volume in the Campaign header is possible, but the combination must be logical. For instance, you could have a booking with 100% share of voice (SOV) on the first day of the week, followed by an AUTO booking with no volume for the remainder of the week. However, the to reach volume must exceed the estimated forecast volume of the 100% SOV booking.
Sum of booking volumes
The sum of booking volumes equals the sum of all volumes added to each booking.
Compete with RTB
Optional, depends on your Adhese configuration.
This part comes into view after saving the campaign.
Ticking the Compete with RTB box determines whether all bookings for a campaign should compete for Real-Time Bidding or RTB revenue.

The image above shows that the default RTB value for the selected campaign priority indicates that the campaign cannot compete with RTB. The ON radio button is selected to enable competition.
This setting can also be defined at the level of an individual booking. For more information, refer to Add a booking: How. Suppose one or more bookings are not permitted to compete with RTB revenue. In this case, the RTB checkbox on the Header tab of a campaign show how many bookings are and are not allowed to compete with RTB revenue:

Language
Select the language for reports and invoices from the Language drop-down menu. Available options include Dutch, French and English.
Fields
Sector
Client-specific. You can use sectors to specify campaigns by sector, like Financial or Auto. See Metadata for more info.
System meta tags
Client-specific. See Metadata for more info.
Delivery limit
Important: Delivery Limits are applied from the moment they are configured and published. Any impressions already served before the limit was set, will not be counted toward the total. If you add a delivery limit later in the day to an already-running campaign, the impressions delivered earlier that day are excluded from the count.
Additionally, delivery limits are based on tracked impressions rather than requested ads. If there is a significant delay between an ad request and the moment the impression is registered, the campaign will continue delivering during that window, which may result in overdelivery.
You can set a maximum delivery limit of impressions or clicks per day or hour for a campaign.
To add a Delivery limit:
- Click Add limit. The Delivery limit box appears:

- Choose between a Daily or an Hourly limit and between Impressions or Clicks
- Fill in the maximum number of Impressions (or Clicks)
- You can combine several delivery limits:


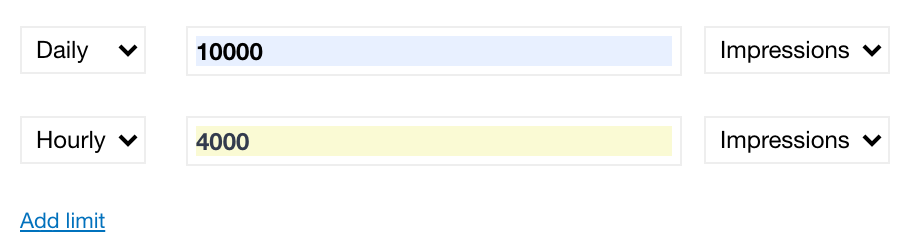
In the example above, the campaign's maximum daily impressions are 10000, with an hourly maximum of 4000.
Client
The following fields are optional and will not affect the start or delivery of a campaign. They can be used to provide additional information for the campaign or invoice.
To add the Advertiser company (or the client of the campaign):
- Click Add advertiser company. The Advertiser company modal window opens.
- Search for the company or add a new company straight away.
- Click Save.
For proper reporting of advertisers in BQ/Lookerstudio, make sure to fill in a valid domain in the quote field (ex. example.com). Valid domains cannot contain spaces or most special characters.
To add the Invoice company (or the party to whom you bill the campaign):
- Click Add invoice company. The Invoice company modal window opens.
- Search for the company or add a new company right away.
- Click Save.
To add the Media company (or the party providing the creative files for the campaign, such as a freelance designer or advertising agency):
- Click Add media company. The Media company modal window opens.
- Search for the company or add a new company immediately.
- Click Save.
To add an Intermediary company (for example, a media network):
- Click Add intermediary company. The Intermediary company modal window opens.
- Search for the company or add a new company instantly.
- Click Save.
To add a Client contact (or the person who represents the client):
- Click Add client contact. The Client contact modal window opens.
- Search for the contact or add a new contact at once.
- Click Save.
To determine the commission percentage paid to an agent, enter the percentage in the commission field.
Internal
The following fields are optional and will not affect the start or delivery of a campaign. These input fields are primarily intended for public or internal comments.
-
If there is a link to an internal system, such as an internal invoice system or customer relationship management (CRM) programme, enter an internal ID or key in the InternalID field.
-
If there is a connection with an external party or system, such as a third-party ad server or invoicing system, provide an external ID or key in the ExternalID field.
-
Choose a publisher from the Publisher drop-down.
The drop-down menu only shows the publishers and sub-publishers that have been assigned to you, as defined by the Company property in your user profile. Refer to Create a new user for more information. Selecting a publisher will also filter the available positions for a booking.
-
To add one or more Account managers (or a point of contact at the publisher's side):
- Click Add account manager. This opens the Account manager modal window.
- Select one or more users from the list.
- Click the Save button.
The users assigned as Account managers have access to the campaign.
-
Provide a public comment (like an announcement about the campaign's premature ending) in the Public comment field. A public comment will be visible on the invoice report.
-
Provide an internal comment (for instance, the need to monitor the campaign closely because of the importance of the client) in the Internal comment field. An internal comment will only be visible in the Adhese interface.
Save a campaign
Remember to click the Save button to save the campaign. Once saved, you can add one or more bookings to the campaign.
You can save the booking by clicking on the Save button. When clicking the arrow next to this button, additional saving options become available in a drop-down menu:
|
Save and create booking |
Saves the current campaign and opens a new create booking screen |
|
Save and create Image Creative |
Saves the current campaign and opens a create Image Creative screen |
|
Save and create 3rd party Creative |
Saves the current campaign and opens a create 3rd party Creative screen |
|
Save and create Advar Creative |
Saves the current campaign and opens a create Advar Creative screen |
|
Save and create HTML5 Creative |
Saves the current campaign and opens a create HTML5 Creative screen |
|
Save and go to the traffic screen |
Saves the current campaign and go to the traffic screen |
Metadata
You can create custom metadata fields to add to a campaign. Metadata provides additional information about the campaign. A typical example is a sector in which an advertiser operates, such as car manufacturers or financial institutions.
Metadata enables the comparison and benchmarking of similar campaigns. Additionally, metadata allows competing advertisers to avoid appearing on the same web page.
To add metadata to a campaign, first, add a campaign property to your Adhese account:
- Go to the Administration screen. Click Admin in the left navigation menu.
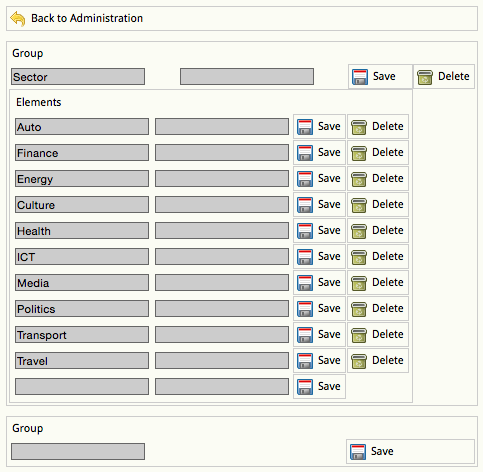
- Under General, click Campaign properties. This opens the following screen.

- Enter the name of the campaign property in the left Group field, for example, Sector.
- Enter a code or ID for the campaign property in the second (or right) Group field. The code can be the same as the property name.
- Click the Save button.
- In the Elements field, provide the options for the campaign property. Enter a name in the left field and a code or ID in the right field. Click the Save button to add an option to the campaign property.
- To save the campaign property, click the Save button next to the Group field.
Once you have saved the campaign property, a new section called Fields will appear in the Header tab of the campaign. This is where you can define the campaign property.
Assume you added Sector as a campaign property to your Adhese account. To add a specific Sector to a campaign:
- Go to the Campaign overview. Click Campaigns in the left navigation menu.
- Click the campaign for which you want to add metadata. The Header tab of the campaign opens.
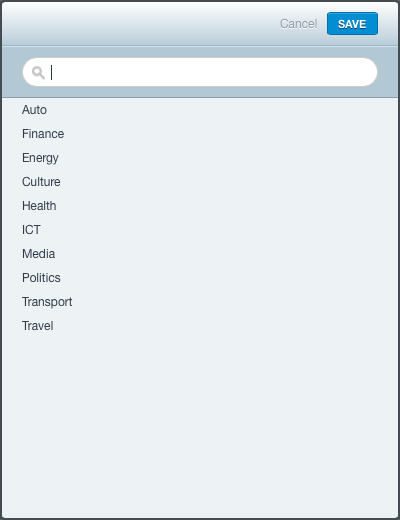
- Click Add Sector. This opens the Sector modal window.

- Choose a sector from the list. Once an industry is chosen, the Sector modal window will close.
Campaign Dashboard
Once a campaign has been selected, an overview will appear. At the top of this overview, you will find a campaign dashboard. The Campaign dashboard is also visible in all Booking and Creative overviews.

The Campaign dashboard provides an overview of the campaign's bookings, based on the following information and metrics:
- Start and end date (start of the earliest booking and end of the latest booking);
- Total number of calendar days the campaign is scheduled to run, along with a progress bar indicating the number of days that have passed;
- Total number of campaign days between the start and end date, or the number of days when bookings are running. If a campaign consists of two bookings, each running five days, the total number of campaign days is equal to 10;
- Total number of impressions booked for all bookings in the campaign;
- Reached impressions or the total number of impressions served, up until the last hour;
- A pie chart indicating the delivered impressions as a percentage of the booked impressions;
- Total number of impressions for the past seven days
- A bar chart denotes daily impressions. The weekends are indicated with a darker colour, while today is coloured orange;
- Below this bar chart, you see the number of impressions that have already been served today;
- Delivery rate (DR): the total number of served impressions as a percentage of the expected impressions until now. The DR indicates the speed of the delivery of a booking or campaign. This DR is calculated if an impression volume is defined in the Header tab of the campaign. Refer to Delivery overview for more information about the delivery rate;
- Total number of clicks;
- Total number of contacts or the total number of unique daily impressions;
- Total number of clicks for the past seven days
- A bar chart denotes the number of daily clicks. The weekends are indicated with a darker colour, while today is coloured orange;
- Below this bar chart, you see the number of daily clicks that have already been served today;
- Click-through rate or the number of clicks as a percentage of the total number of impressions;
- Click-through rate/contacts or the number of clicks as a percentage of the total number of contacts;
- Total budget;
- The estimate of today's budget;
- eCPM, or the effective cost per 1000 impressions. The eCPM is calculated by dividing the total earnings by the total number of thousands of impressions. The eCPM gives an idea of how much a booking would have cost if sold on a CPM basis. This allows for comparisons between different bookings or campaigns.
- eCPC, or the effective cost per click. The eCPC is calculated by dividing the total earnings by the total number of clicks.
Edit a campaign
To edit a campaign:
- Go to the Campaign overview. Click Campaigns in the left navigation menu.
- Click the campaign you want to modify. The Header tab of the campaign opens.
- Change any of the properties in the Header tab.
- Click Save. A confirmation message briefly appears.

Duplicate a campaign
To duplicate or copy a campaign:
- Go to the Campaign overview. Click Campaigns in the left navigation menu.
- Select the campaign you want to duplicate by ticking its box in the overview.
- Click the Duplicate button above the overview.

- Click OK on the confirmation screen. The campaign is duplicated

- The duplicated campaign has the following campaign name: Copy of [name of the original campaign].


Or,
- Go to the Campaign overview. Click Campaigns in the left navigation menu.
- Click the campaign you want to duplicate. This opens the Header tab of the campaign.
- Click the small triangle next to the Running status, left to the title of the campaign. A list appears.

- Click Duplicate campaign.
- Click OK on the confirmation screen. The campaign is duplicated.
- The duplicated campaign has the following name: Copy of [name of the original campaign].

The duplicated campaign is an exact copy of the original campaign. Its Running status is switched to paused. Remember to traffic bookings and creatives and to resume the campaign.
It is impossible to duplicate a campaign if one of the bookings is booked on an inactive position.
Pause a campaign
To pause a campaign:
- Go to the Campaign overview. Click Campaigns in the left navigation menu.
- Select the campaign you want to pause by ticking its box in the overview.
- Click the Pause button above the overview. The campaign is paused.


Or,
- Go to the Campaign overview. Click Campaigns in the left navigation menu.
- Click the campaign you want to pause.
- Click on the small triangle next to the Running status, left to the title of the campaign. A list appears.

- Click Pause campaign. This pauses the campaign.

When you pause a running campaign, its status changes to paused. The paused tooltip within the paused icon of the Running status (see Campaign status) denotes this.
Resume a campaign
To resume a paused campaign:
- Go to the Campaign overview. Click Campaigns in the left navigation menu.
- Select the paused campaign you want to resume by ticking its box in the overview.
- Click the Resume button above the overview. This resumes the campaign.


Or,
- Go to the Campaign overview. Click Campaigns in the left navigation menu.
- Click the campaign you want to resume.
- Click on the small triangle next to the Running status, left to the title of the campaign. A list appears.

- Click Resume campaign. This resumes the campaign.

Resuming a paused campaign will change its status back to its original status.
Stop a campaign
To stop a campaign:
- Go to the Campaign overview. Click Campaigns in the left navigation menu.
- Select the campaign you want to stop by ticking its box in the overview.
- Click the Stop button above the overview.

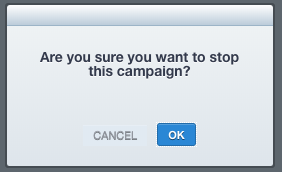
- Click OK on the confirmation screen. This stops the campaign.


Or,
- Go to the Campaign overview. Click Campaigns in the left navigation menu.
- Click the campaign you want to stop.
- Click on the small triangle next to the Running status, to the left of the title of the campaign. A list appears.
- Click Stop campaign from the list.

- Click OK on the confirmation screen. This stops the campaign.

The status changes to Stopped. A black circle in the Running status (see Campaign status) indicates this.
Campaigns that have not yet delivered any impressions will automatically be hidden in the UI when stopped.
Campaign forecasting
In addition to the performance data in the dashboards, Adhese forecasts the delivery of a running booking.
Forecasting figures
Several forecasts are given for the period the booking is running:

- Booking will reach is the number of impressions the booking is expected to reach. This is useful if you have predetermined the number of impressions you want. You can use this number to check whether or not this campaign will achieve its goal;
- Still available impressions are the total number of impressions available for the position during the period of the booking;
- Booked is the total number of impressions booked for this position. When you click on this number, it changes to a percentage showing the number of impressions booked relative to the number of impressions still available;

- Higher priority is the percentage of bookings with a higher top priority than the selected booking;
- Left available is the number of impressions still available for the position for the selected booking period. This number is equal to the number of impressions still available minus the number of impressions booked;
- Needed is the number of impressions that still need to be delivered for the selected booking.
The background colour of this section indicates whether the booking target will be met based on the forecasts. The colour can be any shade from red to green. If the background colour is red, it is likely that the target will not be met. However, forecasts are always subject to change as new data becomes available.
Position averages
The position average shows four intervals that represent the distribution of the impressions or contacts you can reach on a specific day:
- Number of impressions during a weekday;
- Number of contacts during a weekday;
- Number of impressions during a day at the weekend;
- Number of contacts during a day at the weekend.

This range represents the total number of daily impressions or contacts that the selected position can achieve with 95% confidence, for example, 208<325k>637. Adhese predicts, with 95% confidence, that more than 208 000 and less than 637 000 impressions will be delivered on a weekday. The middle number, 325 000 impressions, is the median of the past 30 days. You can view additional information by clicking More.

Refer to the following three paragraphs for more information about the additional graphs.
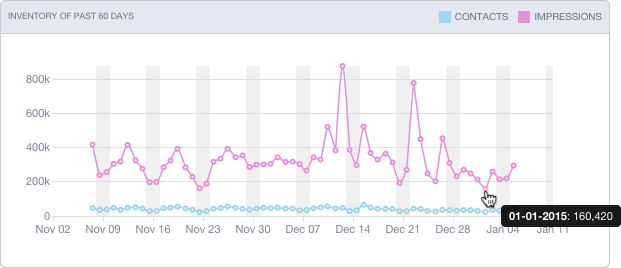
Inventory of the past 60 days
The past 60 days inventory line graph shows the volume of impressions (the pink sparkline) and contacts (the blue sparkline) served by the position over the past 60 days. Hover over the line graph to see the exact number of daily impressions or contacts.
Planned daily traffic
The Planned daily traffic bar chart shows the position's daily traffic for the booking period and allows you to examine the delivery on a daily basis. The traffic (or number of impressions) is expressed in either absolute or relative numbers.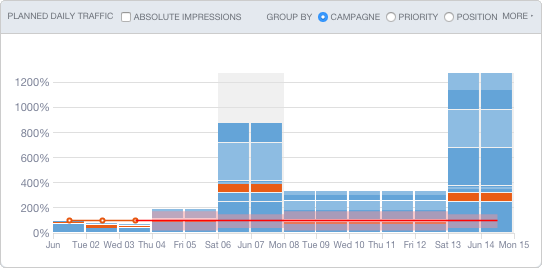
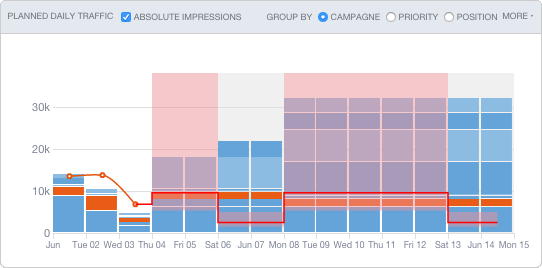
The bookings represented in one bar can be grouped by campaign, position or priority level (high-priority bookings appear lower in a bar).
Hovering over the bar chart highlights each individual booking and shows the delivered or expected volume of daily impressions.
When analysing the Planned daily traffic bar chart, you need to make a distinction between the past and the future:
- Past data
The red curve represents the total daily volume of online traffic for the booked position. The height of each bar represents the total number of impressions delivered. Each part of an individual bar represents the daily volume achieved by each booking (as a percentage or in absolute impressions). The selected campaign is highlighted in orange.
- Forecasted future data
The expected daily traffic for the position is shown to the right of the red curve. Each part of a single bar indicates the expected daily volume for each booking. The selected booking is coloured orange. The range of expected volume (or position average) is coloured red. A dark red line marks the median. The height of each bar represents the daily volume of impressions booked for that position. A position is considered overbooked if the height of an individual bar exceeds the dark red line, meaning that the number of booked impressions exceeds the number of forecasted impressions.
Competing bookings
Clicking More in the top right corner of the Planned daily traffic graph (see the previous paragraph) displays the competing bookings in the Competing bookings table. The selected booking shares inventory with other bookings booked at the same position, hence the name competing bookings. The bookings are sorted from highest to lowest priority.
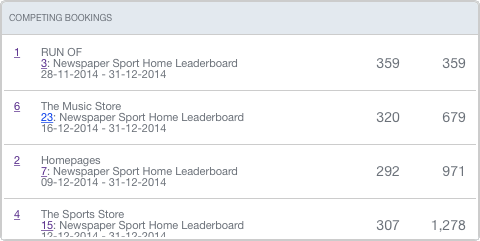
On the right-hand side of the Competing bookings table are two columns of impression figures that provide more information about the shared inventory volume for the period of the selected booking.
The first column represents the number of impressions each competing booking is expected to deliver during the selected booking period. The second column shows the cumulative number of impressions.
Bookings
Once you have completed and saved the Campaign header (as explained in the Add a campaign section), the next step is to create one or more bookings. This chapter explains each property of a booking, including all available options.
Uploading creatives before adding one or more bookings to the campaign is possible. However, a live preview of the creatives is not possible until a position is defined. A position is defined when a booking is created.
Add a booking
To add a booking to a campaign:
- Go to the Campaign overview. Click on Campaigns in the left-hand navigation menu of Adhese.
- Click the campaign you want to add a booking to. The Header tab of the campaign opens.
- Click the Bookings tab. The Booking overview will appear. It lists all bookings created for the selected campaign.

- To create a new booking, click the Add booking button. This opens the Header tab of the booking. Here, you can specify the location (where), time (when), method (how), and audience (to whom) for serving the creatives of this booking.


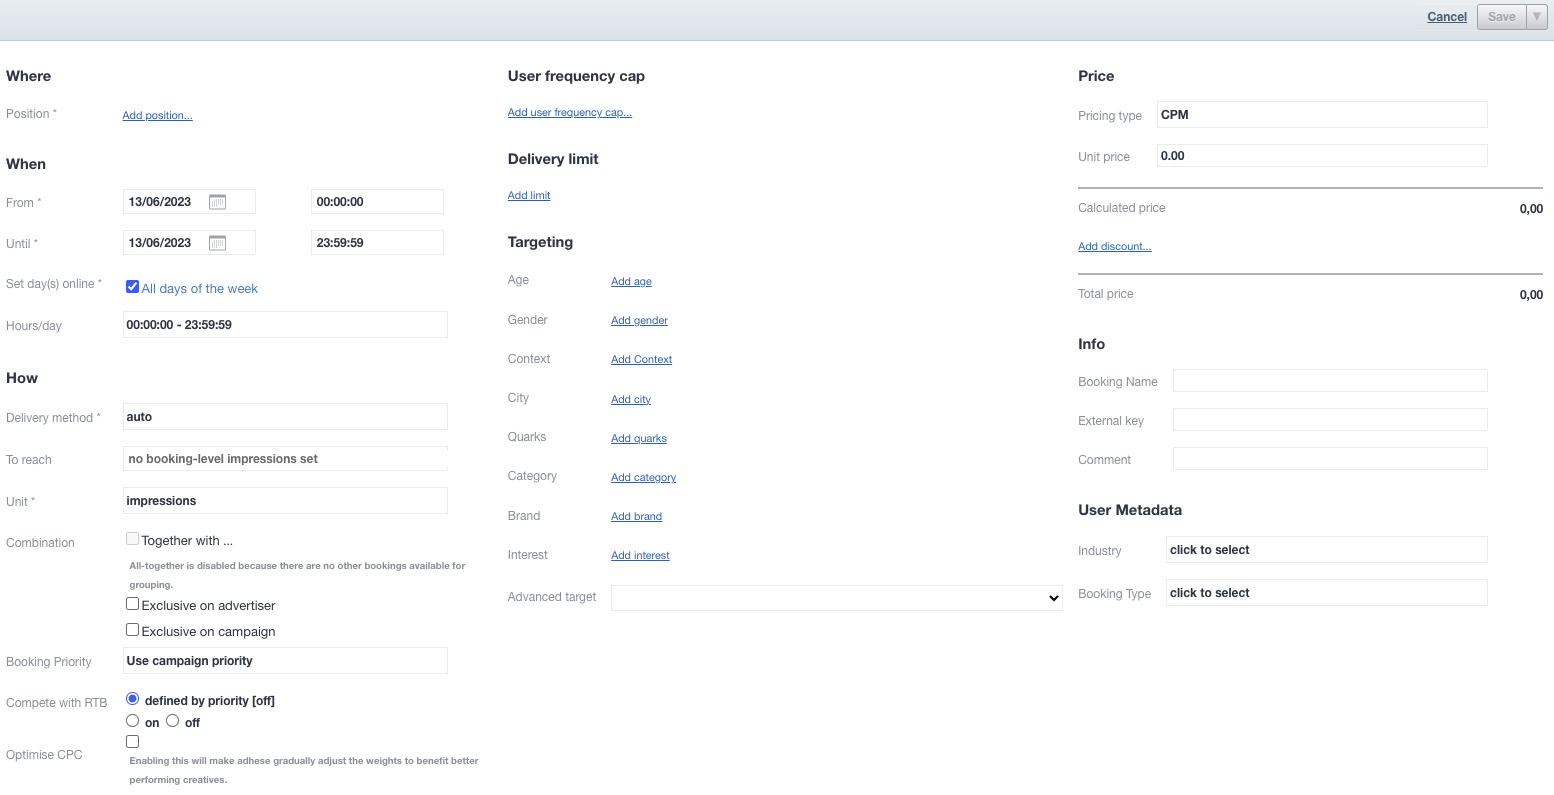
It depends on the client which fields are compulsory to complete. To save a booking, you must select a position in the Where section. If you do not fill in a mandatory field, you can still save the booking, but the required fields will be set to their default values.
Where
The Where section lets you select a position (i.e. a combination of location and format) to determine where a booking and its associated creatives should be served.
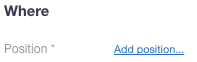
Add a position
To choose a position:
- Click Add position. The Search publication, location & format modal window opens.
- Choose a position by selecting a publication, location, and format.
Selecting a publisher at the campaign level (see internal) filters the relevant positions for bookings within that campaign.
If you have selected a position, the overview will show its forecasted volume based on position averages. These averages represent the range of impressions or contacts that can be reached with 95% certainty.
- Click the Save button to save your position.
Forecasting figures and position averages
Adhese displays the forecasting figures and position averages based on the position selected in the booking's Header tab. These figures offer an initial indication of whether the booking will meet its impression objective.


The position averages change based on the profile targets you choose in the next step (see Campaign targeting).
If the position is overbooked, the variable Booked from the forecasting figures will exceed 100%. Whether your booking will deliver and meet its goals depends on the priority of competing bookings (i.e. bookings made for the same position as your booking). If the number of impressions from the booking is less than the number of Needed impressions, the booking is not expected to reach its goal and the background colour of the forecast will turn red.

For more information on these numbers, refer to Forecasting figures and Position averages.
Exclude publications and positions
When you select a channel (or a group of positions), two additional links will appear. These links enable you to exclude specific publications and/or positions from the channel.
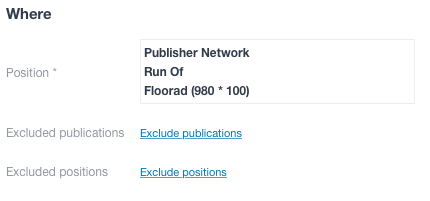
To exclude one or more publications:
- Click the Exclude publications link. The Excluded publications modal window opens.
- Select the publications you wish to exclude.
- Click the Save button.
To exclude one or more positions:
- Click the Exclude positions link. The Excluded positions modal window opens.
- Select the positions you wish to exclude.
- Click the Save button.
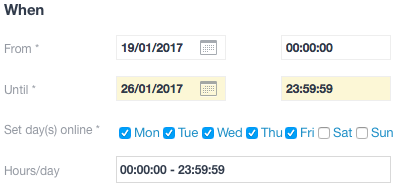
When
A bookings end date also determines priority. Bookings that will end earlier, but have the same priority setting as other bookings that will end later will receive a higher priority and a higher share. For more information see this page.
The When section of the Booking header lets you schedule the delivery period by adjusting the days and times of the booking.

You can schedule the delivery period based on the following variables:
- In the From field, select a start date from the calendar and pick a starting hour. The default setting is 00:00:00.
- In the Until field, select an end date from the calendar and pick an ending hour. The default setting is 23:59:59.
- In the Set day(s) online field, select the days of the week on which you would like the booking to be delivered. You can use this property to exclude certain days from delivery. The default setting is All days of the week. When this box is ticked, individual days can be selected or deselected.

- In the Hours/day field, enter the time of day at which you would like the booking to be delivered. You can exclude specific delivery hours, such as between 9:00 p.m. and 7:00 a.m. The default time setting is 00:00:00 - 23:59:59. To adjust the time setting:
- Click 00:00:00 - 23:59:59. A horizontal scrollbar appears.
- To adjust the daily starting hour, click the left square and slide it to the right.
- To adjust the daily ending hour, click the right square and slide it to the left.
- Click the OK button.
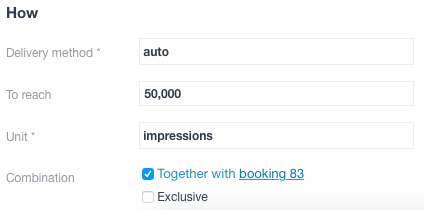
How
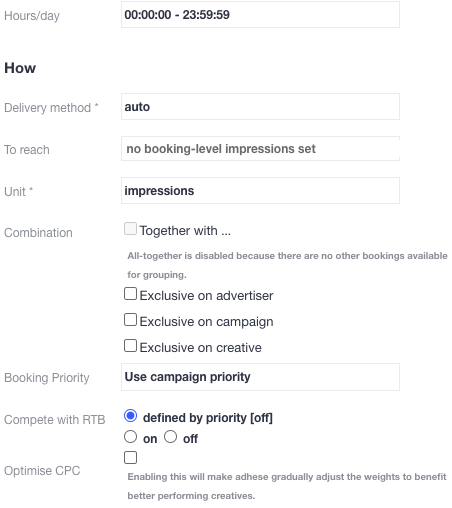
The How section of the Booking header tab allows you to specify the booking's delivery method. For example, you can select 'all-together' in the Combination section or choose whether the booking should compete with RTB revenue in the RTB section.
Delivery method
The delivery method determines how impressions of a booking are distributed throughout the day. A frequency cap can restrict this delivery.
Select one of the following three options from the Delivery method drop-down list: Share of Voice (SOV), Auto, or Rotation.
New targets & forecasting: New targets lack forecast data and are therefore best used in combination with the SOV setting. When used with the auto setting, the system will try to calculate an estimated share. However, with many competing bookings on that same target, only some will likely receive a share. The other bookings will only start delivering once the forecast data is available, which can take up to a week.
Share of voice (SOV)
To adjust the delivery percentage:
- Click the delivery percentage in the Delivery percentage field and either
- Slide the yellow slider to the desired percentage, or enter it manually.
- Click the blue OK button.
Delivery times may also be affected by other factors, such as traffic volume and competing bookings with higher priority, which can cause deviations from the desired schedule.
ASAP - If you want to set a goal (see How: To reach) and achieve it as quickly as possible, set the delivery percentage to 100%.
Use SOV when booking DOOH bookings.
Auto
Suppose the delivery method is set to Auto. In this case, Adhese will determine the percentage of impressions delivered by the selected booking, taking into account its properties and those of competing bookings. Adhese will always aim to deliver impressions evenly. However, variations in daily delivery may occur due to competing bookings with a higher priority or a shorter time span.
When using Auto as the delivery method, you must provide a volume in the To reach field of the booking (or on campaign level). Refer to the next paragraph for more information on the To reach field.
Rotation
The Rotation delivery method aims to start and stop bookings without changing the properties of competing bookings. Rotation ensures that competitive bookings with the same priority and delivery method have an equal chance of being delivered. For instance, if three bookings with the same priority are booked on the same position, whether in one campaign or separate campaigns, each booking will be displayed randomly for 33% of the time. Similarly, when ten bookings are booked, each one will be displayed for 10% of the time.
The Rotation delivery method is often used to fill unsold inventory, but it only works when all bookings are 100% identical. It is typically used for in-house (or stopper) campaigns and is displayed when no higher-priority campaigns have been booked.
You cannot combine rotation with other settings, such as all-together and exclusive.
We highly recommend using one creative per rotation booking. Using multiple creatives per booking with a rotation delivery schedule can result in the booking not being delivered in accordance with the share of each creative. For example, even if both creatives have a 50% share, it is possible that one creative will deliver significantly more impressions than the other.
To reach
In the To reach field, enter the desired number of impressions, clicks, etc. that you want the booking to receive. Once this volume has been reached, the booking's delivery will stop.
The forecasting figures for a booking will change according to the To reach volume and will predict whether or not a booking will achieve its goals.
If a booking delivery stops before reaching the desired volume, multiple goals may have been combined. Check the volume at the campaign level to ensure that the goals do not overlap. If multiple goals have been combined, ensure a logical connection exists between the target volume of the campaign and the individual bookings.
Unit
Select one of the following objectives from the Unit drop-down:
- Impressions
- Clicks
- Unique visitors
- Tracking of specific events, such as leads and purchases.
Impressions and clicks are implemented by default. Unique visitors and events can be applied on request.
Combination or delivery multiples
The use of this functionality depends on the type of implementation. For more information on this topic, please contact support.
The Combination feature allows you to combine or exclude multiple bookings within a campaign.
If none of the options for the Combination feature are selected, the campaign's bookings will be displayed independently of one another. Consider a campaign that contains bookings for three different positions on the same page. The page can show zero, one, two or all three bookings.
Exclude delivery
To exclude a booking, determine whether the exclusive setting should be applied to the advertiser, the campaign, or the creative.
If you tick the advertiser box, the current booking must not be delivered with any other booking from the same advertiser.
If you tick the campaign box, the current booking must not be delivered with any other booking from the current campaign.
If you tick the creative box, a creative linked to that booking can only be delivered once to the web page. This is useful when multiple formats with the same dimensions are requested on a web page, and a creative should be displayed only once on that page. Other creatives in the same campaign or coupled with the same booking can still be delivered on the same webpage.
Combine delivery
If you want to combine the delivery, it is essential to consider that the combined bookings must have identical delivery periods.- To use the Combination feature, navigate to the Header tab of the booking and select the leading format based on the Trigger Order setting. The trigger order determines the placement of formats on a web page by setting a number that indicates the position of the format in a sequence of formats. Therefore, the leading format has a lower trigger order (number 1) than the formats of the bookings (numbers 2 and 3) with which it is combined.
-
Only the leading format needs an assigned volume.
Assign a volume only to the leading booking. Failure to do so will result in issues with the delivery of the linked bookings.
When combining two bookings with subformats, ensure their main formats have a set trigger order.
The follow-up bookings can only be trafficked with a single creative.
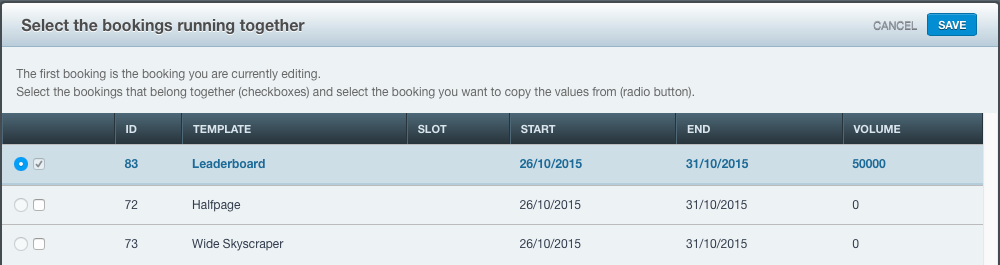
To combine the delivery of one, several, or all bookings with the current leading booking:
-
Tick the Together with box. The Select the bookings running together modal window opens:

The leading booking is highlighted in a darker colour. In the example above, the Leaderboard format runs from 26/10/2015 to 31/10/2015 and has an assigned volume. Bookings that can be delivered together with the leading format are also shown.
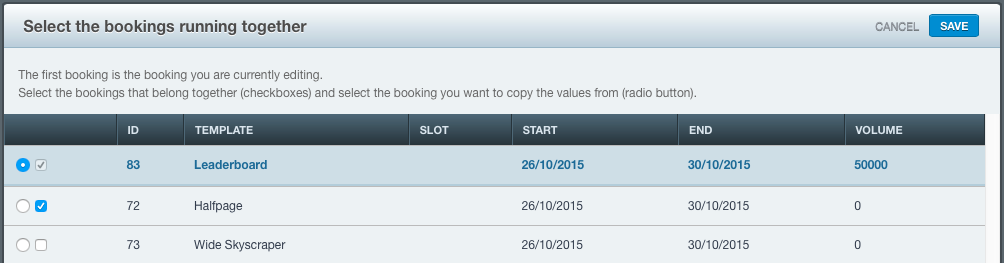
-
Tick the checkboxes of the bookings you wish to deliver together with the current booking.
- You cannot tick the boxes of bookings that are already booked in the same position as the current booking.
- The radio button copies the delivery period, targeting properties and volumes of the checked booking.
- Once it has been determined which bookings are delivered together, they will behave as a single booking. Therefore, if you modify the delivery period, targeting properties and/or volumes of the leading booking, the properties of the accompanying bookings will adjust accordingly.
-
In the following screenshot, the Leaderboard and Halfpage formats will be delivered simultaneously. The delivery of the combination will start on 26/10/2015 and end on 31/10/2015, with a volume of 50.000.

-
Click the Save button in the upper right corner of the modal window. The bookings will now be treated as a single booking.
The How section of the Booking header for booking 83 (Leaderboard) is as follows:
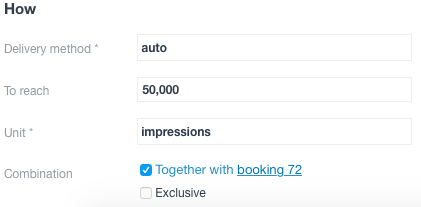
In contrast, the How section of the Booking header for booking 72 (Halfpage) is as follows:
Booking priority
The priority of a campaign is set at header level. The default setting for this box is 'Use campaign priority'. Select an option from the dropdown to assign a different priority to the booking.
RTB
Determine whether the booking can compete with Real-Time Bidding or RTB by enabling the Compete with RTB checkbox.

In the above image, the default RTB value for the selected campaign priority indicates that the booking cannot compete with RTB. The on radio button is ticked to allow for competition.
Optimise CPC
Bookings with multiple creatives can be optimised for CPC. When more than one creative is coupled to a booking, you can let Adhese optimise it so that the best-performing creatives are prioritised over the less-performing ones.
Enabling CPC optimisation will cause Adhese to gradually adjust the weights to benefit better-performing creatives.
| impressions A | clicks A | impressions B | clicks B | share A | share B |
|---|---|---|---|---|---|
| 0 | 0 | 0 | 0 | 0.5 | 0.5 |
| 1000 | 12 | 1000 | 8 | 0.59 | 0.41 |
| 1000 | 15 | 1000 | 5 | 0.73 | 0.27 |
| 1000 | 20 | 1000 | 0 | 0,95 | 0.05 |
In the example above, each creative gets a 50% share at the start of the campaign. Once both creatives have reached 1000 views, their weights are adjusted. Creative A's percentage becomes 0.59, while B's becomes 0.41. This process is repeated after every 1000 impressions.
User frequency cap
The Constraints section in the Booking header enables Adhese to limit the number of times an advertisement is delivered to a unique visitor within a defined period. This process is also referred to as frequency capping.

Please note that the unique identification of visitors and the storage of personal and other data are subject to national, European, and international laws and regulations. It is the exclusive responsibility of the publisher to comply with the law and adequately notify the user of their rights. Adhese can help and advise publishers here. More on user privacy is available in the GDPR section of the documentation.
Adhese won't deliver a campaign with a frequency cap to implementations without any consent integration or to visitors who do not accept cookies (see The user privacy settings of a browser).
To add a user frequency cap:
-
Click Add user frequency cap. The Add user frequency cap box opens.

-
To set a user frequency cap, specify the following details:
- Enter the number of times a booking may be delivered in a given time period in the Cap on impressions field.
- Select a constraint level from the Constraint level drop-down menu (in the above screenshot, it is set as booking). The constraint level determines the level at which an individual visitor's cap (or the number of impressions) should be taken into account before delivery of the current booking is stopped. Select one of the following options:
- Booking level. The visitor's capping volume increases each time an impression for the selected booking is delivered. If the maximum number of impressions for a booking is reached (as determined by CAP), the booking will no longer be served to this specific visitor, regardless of the number of creatives attached to the booking. For instance, if the cap is set at 1 and 2 creatives are attached to one booking, only one creative will be displayed.
- Campaign level. The visitor's capping volume increases with each impression of any booking within the campaign. Once the maximum number of impressions is reached for the entire campaign, delivery of the selected booking will cease. For example, if a campaign includes two bookings, booking A without a capping limit and booking B with a frequency cap of 3 at the campaign level, after three impressions for the campaign, regardless of the booking, booking B will no longer be served to the visitor.
- Traffic level. At the traffic level, the visitor capping volume applies to each combination of a booking and its attached creatives. For example, if three creatives are attached to the booking and the frequency cap is set at 3, the booking will be delivered a maximum of 9 times before the frequency cap is reset. It is important to note that each combination of a booking and a creative will be delivered three times.
- The number of impressions per unique visitor can be reset after a defined period in the Resetting section. To set the duration period of a frequency cap, choose one of the following options:
-
Never. If this option is selected, the frequency cap will never reset. Once the frequency cap is reached, the booking or creative will no longer be displayed.
-
Every … hours. The frequency cap resets at fixed intervals, counting from midnight. If you want the cap to reset every 5 hours, it will be reset at midnight, 5:00 a.m., 10:00 a.m., 3:00 p.m., and 8:00 p.m.
We recommend setting a minimum frequency cap that resets every three hours
-
… hours/minutes after first impression. The frequency cap resets after a set period of time based on the visitor's first impression. For instance, if the cap is set at 2 and you want to reset it 3 hours after the first impression, the booking will be offered a maximum of twice between 10 am and 1 pm. The frequency cap will reset at 1 pm. The duration of the frequency cap will be taken into account when the surfer makes a subsequent visit after 1 pm.
-

A frequency cap resets after a visitor deletes cookies from their browser. Therefore, a capped campaign will only be shown on the second page view, as Adhese must first verify that the visitor accepts cookies.
A frequency cap does not affect the forecasting figures for a booking. The inventory figures will remain the same regardless of the frequency cap.
Delivery limit
Important: Delivery Limits are applied from the moment they are configured and published. Any impressions already served before the limit was set, will not be counted toward the total. If you add a delivery limit later in the day to an already-running booking, the impressions delivered earlier that day are excluded from the count.
Additionally, delivery limits are based on tracked impressions rather than requested ads. If there is a significant delay between an ad request and the moment the impression is registered, the booking will continue delivering during that window, which may result in overdelivery.
The Delivery limit section lets you specify a maximum delivery limit of impressions or clicks per day or hour for a booking.
To add a Delivery limit:
-
Click Add limit. The Delivery limit box appears:
-
Choose between a Daily or an Hourly limit and between Impressions or Clicks
-
Fill in the maximum number of Impressions (or Clicks)
-
You can combine several delivery limits:
In the example above, the booking has a maximum of 10 000 daily impressions with a maximum of 4 000 per hour.


Targeting
The targeting section allows you to deliver bookings when specific targets are present or absent (negative targeting). For more detailed targeting information, check this page.
To add a target to a booking, click Add ... next to the targeting types:
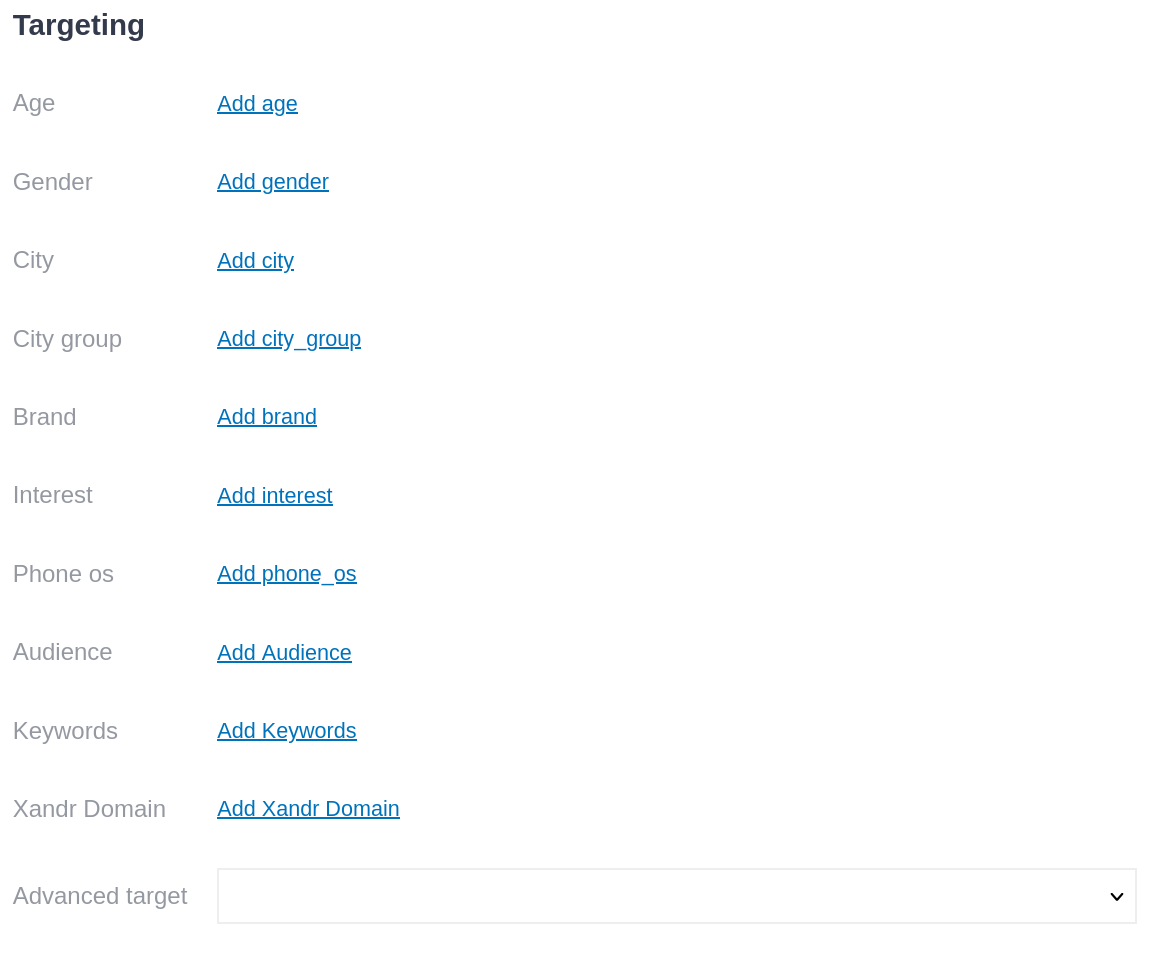
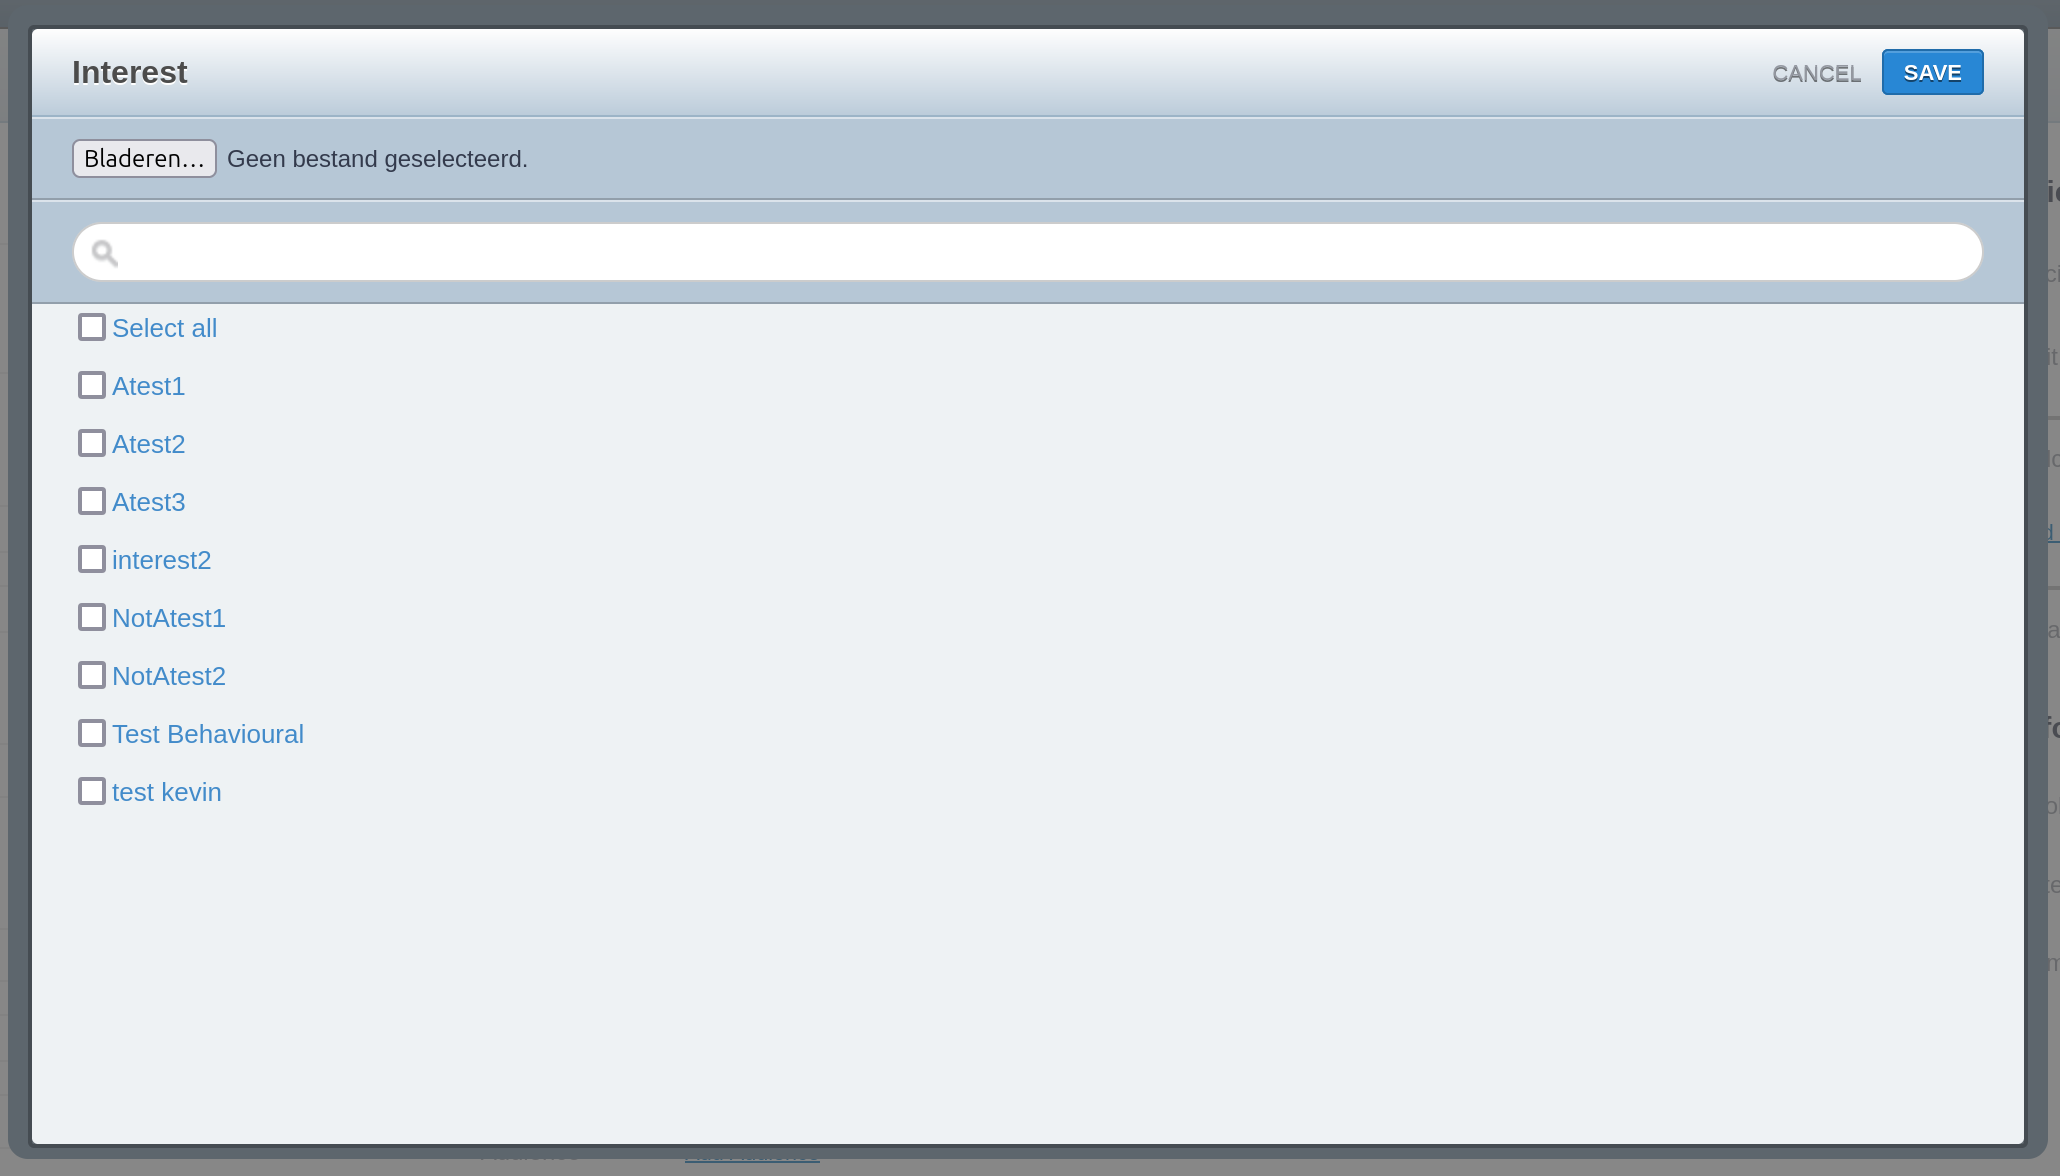
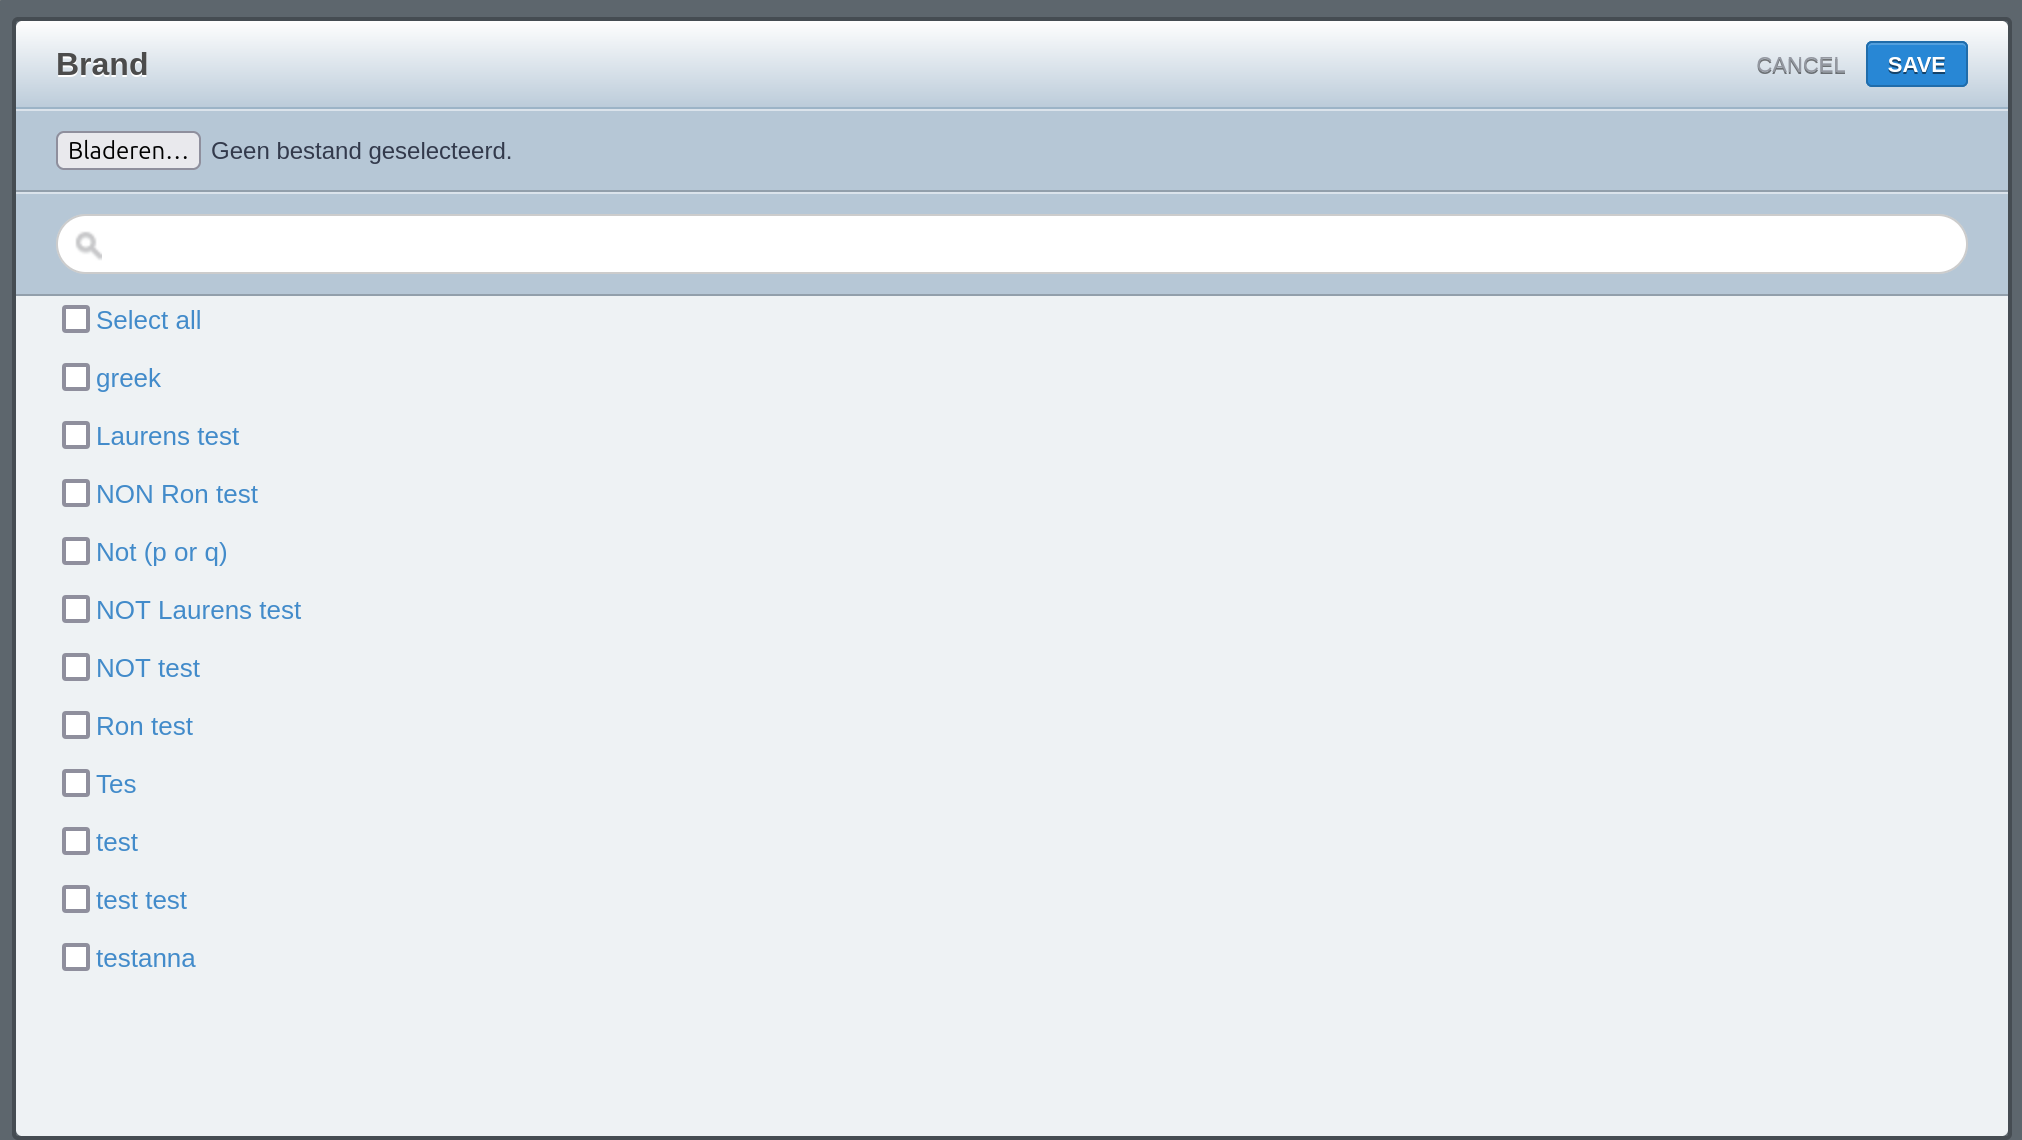
When you click a target type, a pop-up window appears with the available target values for that category. Here you can select the targets you want active on the booking:
When you select multiple target values, it's important to take several things into account:
- Two or more active target values within the same target type exist in an OR relation. This means that at least one of the options must be present for the booking to be delivered.
- Target types themselves exist in an AND relation. That is, if there are two target values, each in a different target type, both target values must be present for the booking to be delivered.
- When you have multiple target values and multiple target types, both OR and AND relations exist. If you have two target values each in two target types, the two target values in the same target type will be in an OR relation and the two target types will be in an AND relationship, which means that one target value of each target type must be present for the booking to be delivered.

Be cautious when combining positive and negative target values within the same target type. A positive target value in the same target type as a negative target value can cancel out the negative target. If the positive target is present, the booking will be delivered (since it's in an OR relation, only one target needs to be present), even if the target that needs to be excluded is present. You can solve this by making a combined target value. For more information, see the Targeting page.
Targets make a booking more specific and, therefore, count towards its priority, IF the inventory is not sufficient for all running bookings (overdelivery). A booking with targets active will take priority over a booking without in this cse, provided the actual priority level is equal.
Bulk activating targets
To activate multiple target values at once, follow these steps:
- Click Add on the target type you wish to add targets to, and the targeting screen will open:

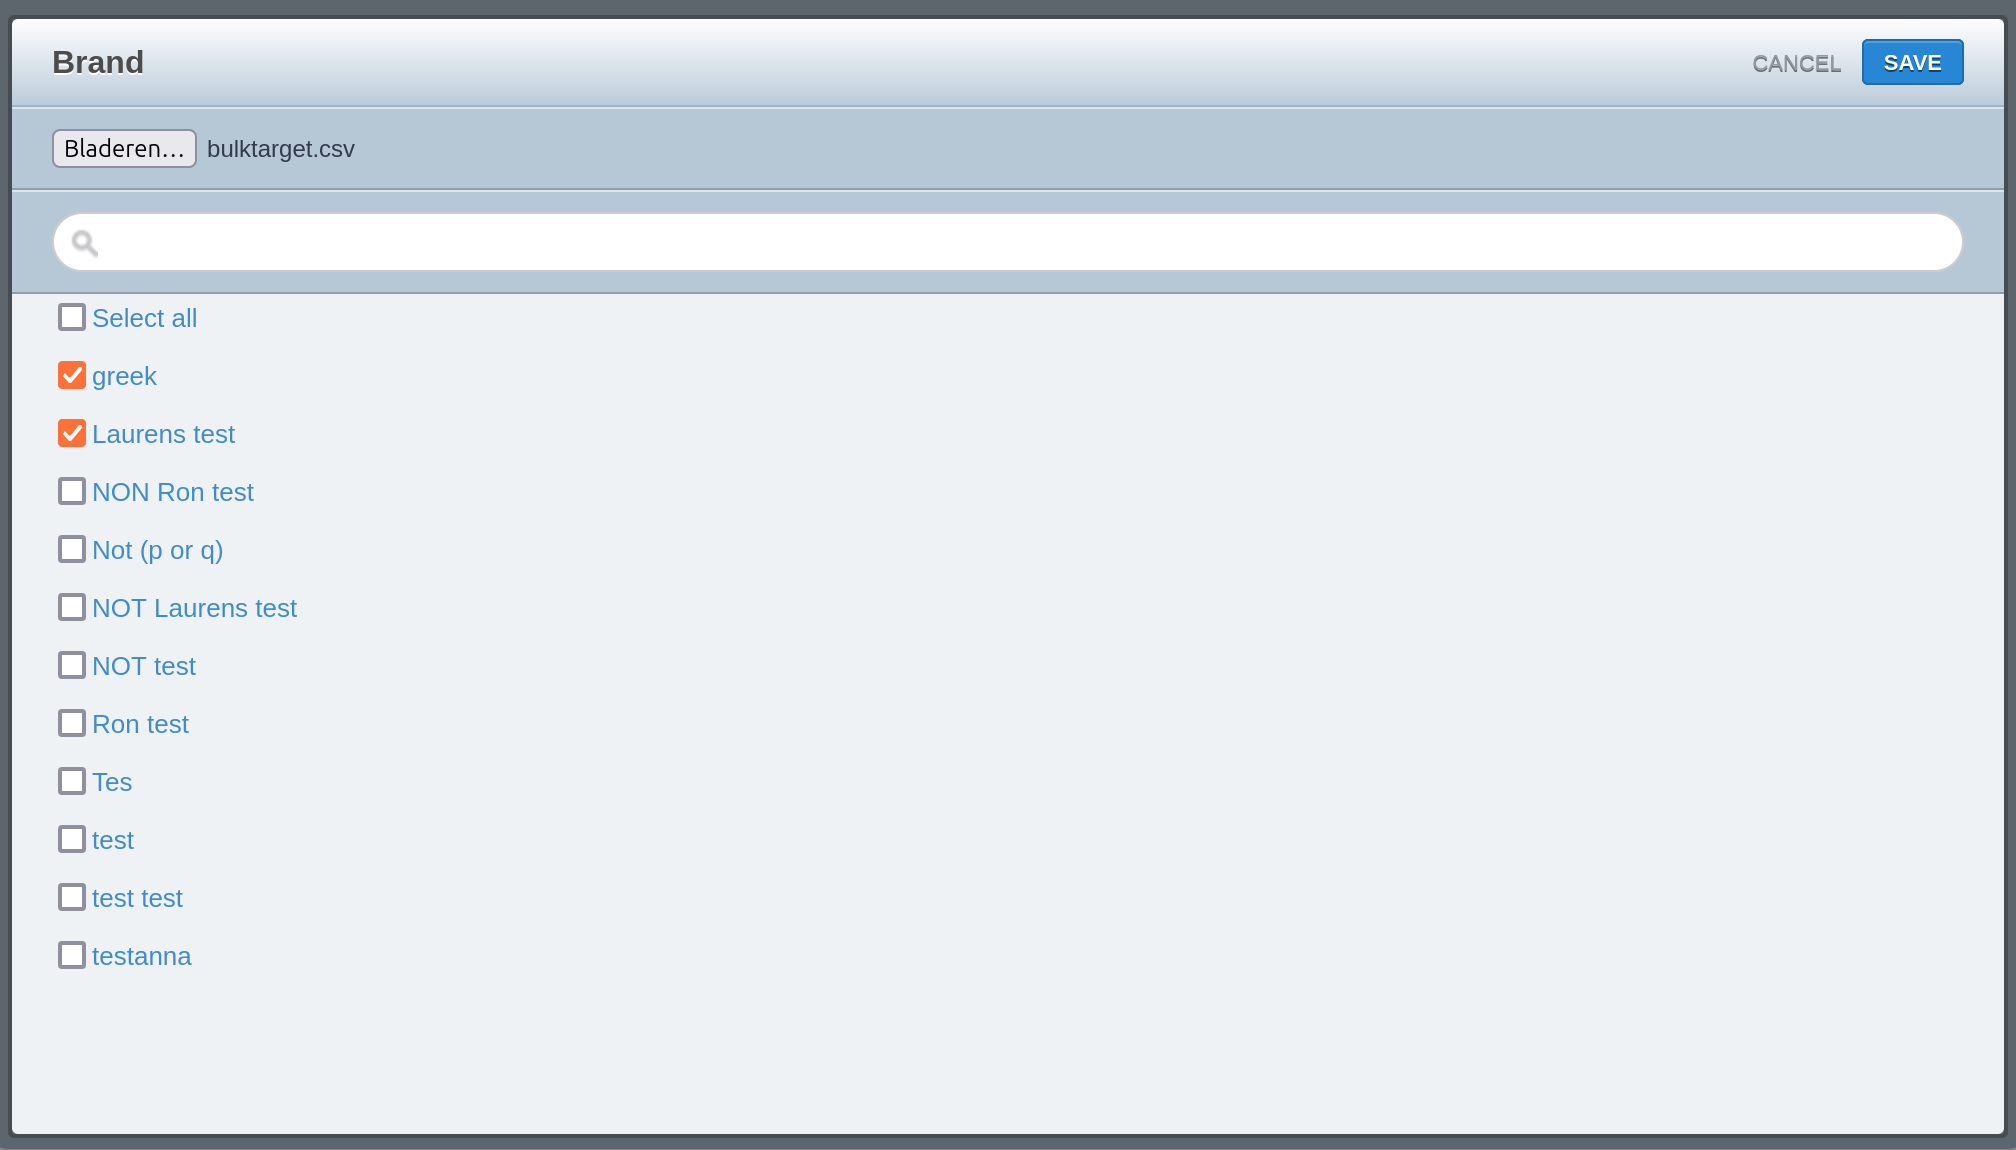
- Select Bladeren (Browse), and your file manager will open.
- Select a CSV file that contains the IDs or target codes for the target values you want to activate. The IDs/codes should be listed underneath each other under the first column of the CSV file:


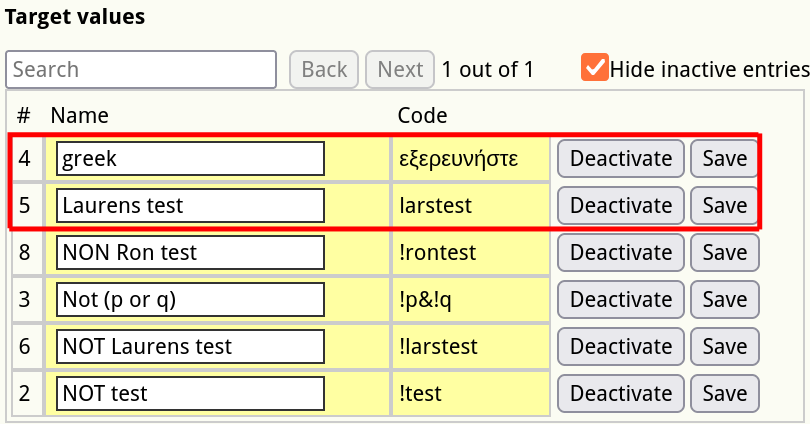

Whether your target uses the ID (#) or target code (Code) depends on the target in question and how it was configured.
For the best results when bulk uploading targets, create a .csv file in a spreadsheet program like LibreOffice Calc or Microsoft Excel.
- As soon as the CSV file is selected, the requested target values will be selected:

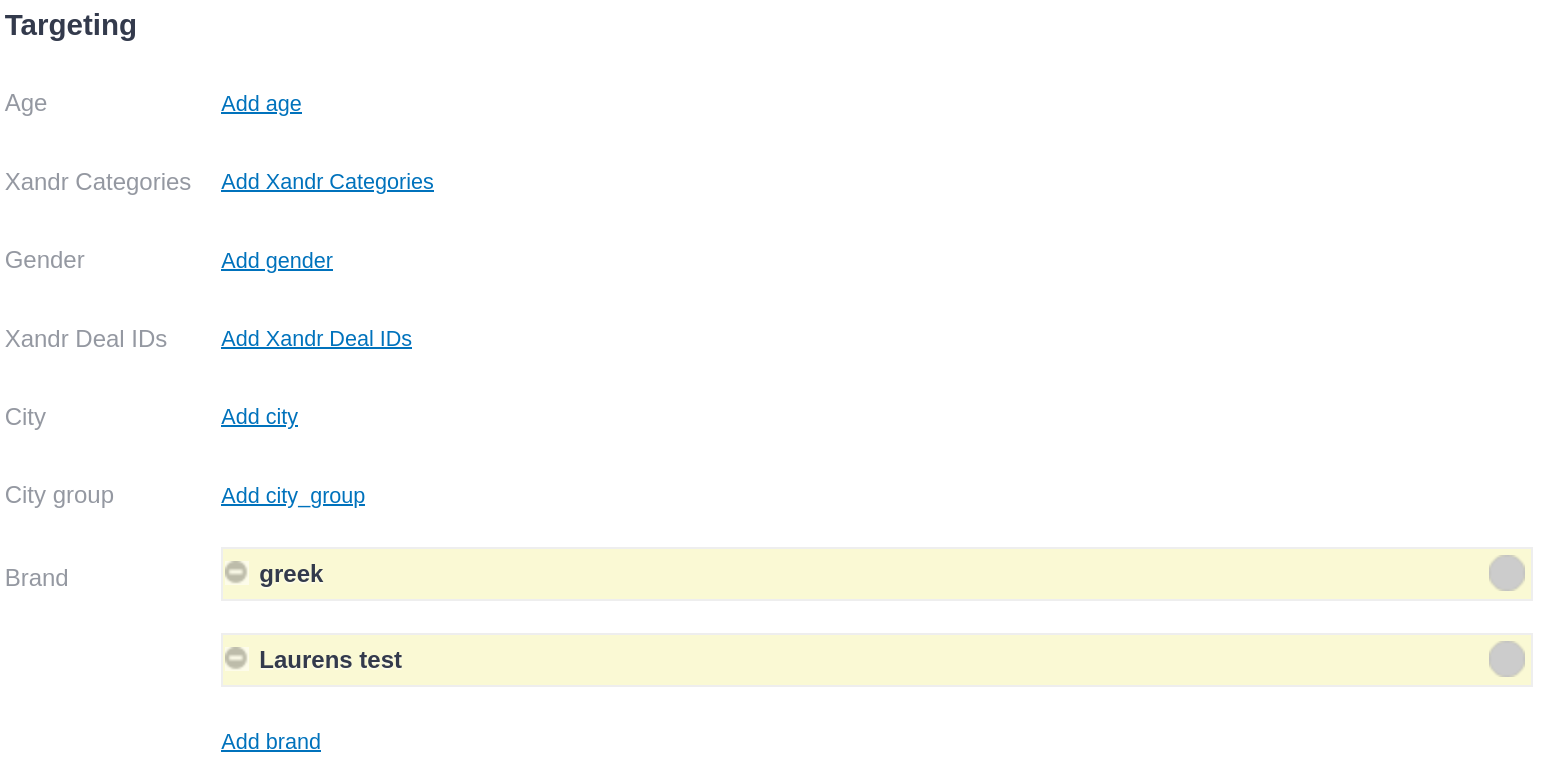
- Click Save, and the bookings will be selected in the bookings interface:

Booking price
By default, CPM has no effect on priority. If you want higher CPM to increase priority and thus booking share instead of the booking end date, see this page.
The Price section in the Booking header lets you specify the pricing details of a booking, including the pricing model and the corresponding unit price.
The input fields below are optional and do not impact the start or delivery of a campaign.
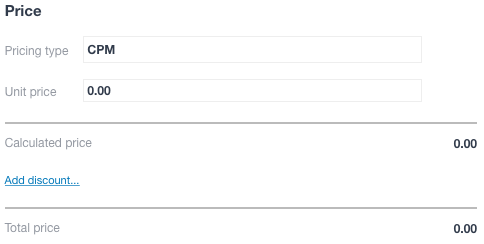
- Select the pricing model you want to use to charge a client from the Pricing type drop-down list. The available options are:
- CPM or cost per mille, the cost per thousand impressions for an ad.
- CPC or cost per click, the cost for a single click on an ad.
- CPL or cost per lead, the cost per action, such as a download, subscription to a newsletter, request of a brochure, …
- CPP or cost per period is the cost for a fixed delivery period, independent of the number of impressions or clicks.
- ADM or administrative cost, a cost that is unrelated to a volume or time.
- In the Unit price field, set the price a client will pay per thousand impressions, per day, per click, per lead or per purchase.
- The Calculated price field multiplies the unit price by the reached volume of the pricing type.
- Click the Add discount link to add a discount or surplus (as a percentage or fixed number). This will open the Add discount modal window, where you can select the Discount type and add a comment. Discounts are typically applied for high volumes of impressions purchased or specific packages.
- The Total price is calculated by subtracting the discount or adding the surplus to the base price.
- The Campaign budget field displays the budget of the campaign.
Bid Optimisation
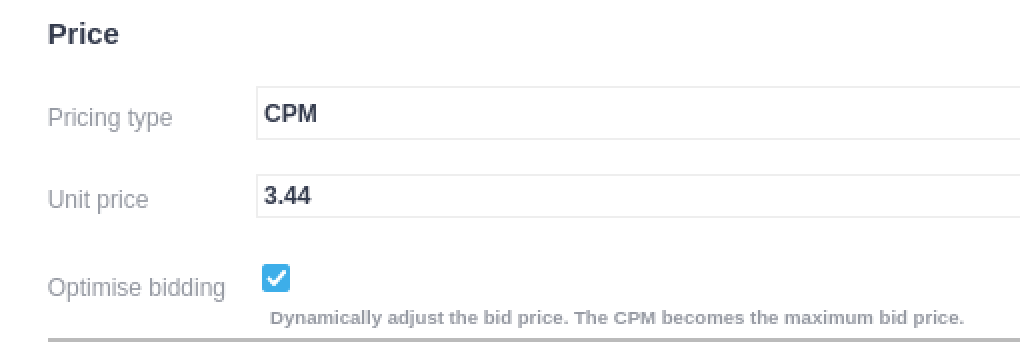
Bid optimisation is a custom feature that requires setup. Please contact support if you're interested in this feature.
Bid Optimisation does not work with "Clicks" as a to reach value or any pricing types that aren't "CPM"
Bid optimisation is a buy-side feature that allows the ad server to dynamically change the CPM of an ad to bid as low as possible. The ad server lowers the CPM until bids are lost, at which point the CPM will rise again. The bid optimisation feature aims to keep the CPM as low as possible while losing a minimal amount of bids.
Bid optimisation can be enabled by clicking the Optimise bidding checkbox in the Price section of the booking screen.
Booking info & metadata
Info
- (Optional) In the Booking Name field, you can enter a name for the booking.
- (Optional) In the External key field, enter an external ID or key if there is a link to an external party or system, such as a third-party ad server or accounting system.
To upload creatives via the Hotfolder, you must provide a unique external key that connects a creative with a booking.
- (Optional) Provide a comment in the Comment field.
Metadata
You can create custom metadata fields to add to a booking. Metadata provides additional information about the booking, facilitating comparison and benchmarking of similar bookings. Additionally, metadata can prevent the display of competitive advertisers, such as two car brands, on the same web page.
To add metadata to a booking, you must first create a booking property in your Adhese account. This feature is restricted to users with Admin rights.
- Go to the Administration screen. Click Admin in the left navigation menu.
- Under General, click Booking properties.
- Enter the name of the booking property in the first (or left) Group field.
- Enter a code or ID for the booking property in the second (or right) Group field. The code should be equivalent to the property's name.
- Click the Save button.
- In the Elements field, enter the different options of the booking property. Enter a name in the left field and a code or ID in the right field.
- Click the Save button. You can now add an additional option to the booking property.
After creating a booking property, a new section appears in the Header tab of a booking: User Metadata. You can now add a booking property by choosing an option from the drop-down menu.
Saving a booking
To save the booking, click on the Save button. If you click on the arrow next to this button, a drop-down menu of saving options will appear:
|
Save and create booking |
Saves the current booking and opens a new create booking screen |
|
Save and create Image Creative |
Saves the current booking and opens a create Image Creative screen |
|
Save and create 3rd party Creative |
Saves the current booking and opens a create 3rd party Creative screen |
|
Save and create Advar Creative |
Saves the current booking and opens a create Advar Creative screen |
|
Save and create HTML5 Creative |
Saves the current booking and opens a create HTML5 Creative screen |
|
Save and go to traffic screen |
Saves the current booking and goes to the traffic screen for that booking |
Booking dashboard
Each overview of an individual booking is equipped with a booking dashboard. This dashboard is located beneath the Campaign dashboard.

This dashboard shows the following booking data and metrics:
- Start and end date of the booking;
- Total number of days the booking is running, together with a progress bar indicating the number of days that have passed;
- Total number of booked impressions;
- Reached impressions or the total number of served impressions, up until the last hour;
- Percentage of served impressions in relation to the booked impressions, with a pie chart indicating the progress. If the percentage is higher than 100%, it indicates that more impressions have been served than initially requested;
- Total number of impressions for the past seven days
- A bar chart denotes the daily impressions. The weekends are indicated with a darker colour, while today is coloured orange;
- Below this bar chart, you see the number of impressions that have already been served today;
- Delivery rate (DR), or the total number of delivered impressions, is served as a percentage of the expected impressions to date. The DR indicates the speed of the delivery of a booking. For more information about the delivery rate, refer to Delivery overview;
- % Inventory or the inventory share: the percentage of the position's available inventory reserved by the selected booking.
- Total number of delivered clicks;
- Total number of contacts;
- Total number of clicks for the past seven days
- A bar chart denotes the daily number of clicks. The weekends are indicated with a darker colour, while today is coloured orange;
- Below this bar chart, you see the number of daily clicks that have already been served today;
- Click-through rate: the number of clicks as a percentage of the total number of impressions;
- Click-through rate/contacts: the number of clicks as a percentage of the total number of contacts;
- Total budget;
- The estimate of today's budget;
- eCPM, or the effective cost per 1000 impressions. The eCPM is calculated by dividing the total earnings by the total number of thousands of impressions. The eCPM gives an idea of how much a booking would have cost if sold on a CPM basis. This allows for comparisons between different bookings or campaigns;
- eCPC, or the effective cost per click. The eCPC is calculated by dividing the total earnings by the total number of clicks.
Edit a Booking
Once you have created and saved a booking, you can modify its properties at any time.
To edit a booking:
- Go to the Campaign overview. Click Campaigns in the left navigation menu of Adhese.
- Click the campaign for which you want to modify a booking.
- Click the Bookings tab. The Booking overview opens.
- Click the booking you want to edit. The Header tab of the booking opens.
- Change any of the properties in the Header tab.
- Click Save. A confirmation message briefly appears.
When editing the position of a booking, the creative format may no longer match the new position. The Search publication, location & format modal window will warn you if a creative is decoupled from the booking:
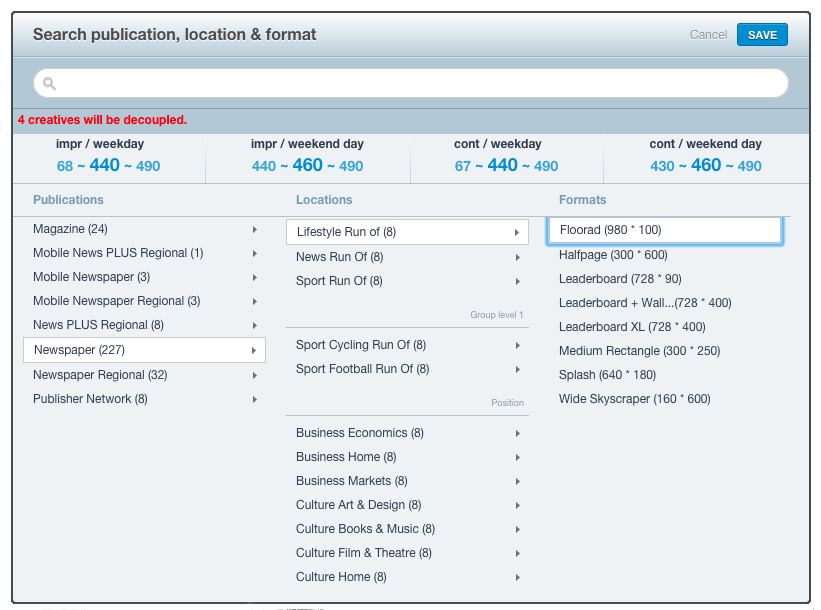
Edit multiple bookings
Multiple bookings can be edited in bulk for start and end dates, running hours, days of the week, targeting, and capping in a single operation.
To modify multiple bookings at once:
-
Go to the Campaign overview. Click Campaigns in the left navigation menu of Adhese.
-
Click the campaign for which you want to edit multiple bookings. The Header tab of the campaign opens.
-
Click the Bookings tab. This displays the Booking overview. The Booking overview lists all bookings created for the selected campaign.
-
In the Booking overview, select the bookings you want to edit.
-
Click the Edit multiple bookings button located above the Booking overview.

The Change multiple bookings simultaneously window opens. Adhese displays the common values of all selected bookings. In the example below, these bookings share the same start and end dates, running hours, days of the week, and targeting:

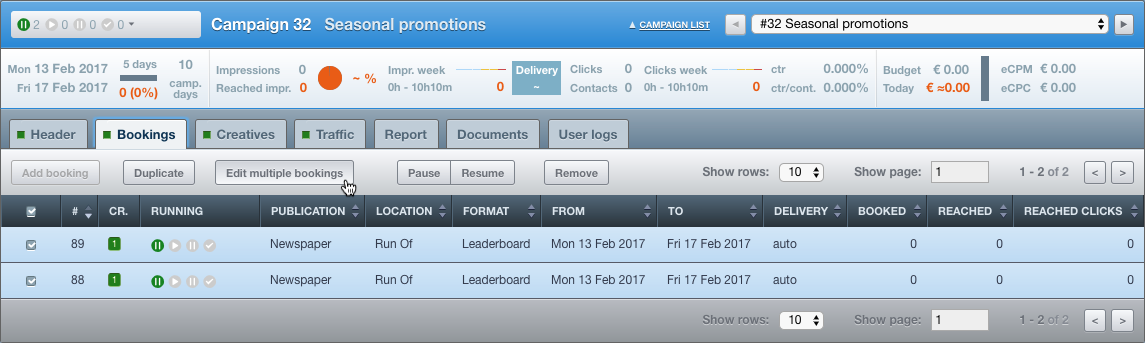
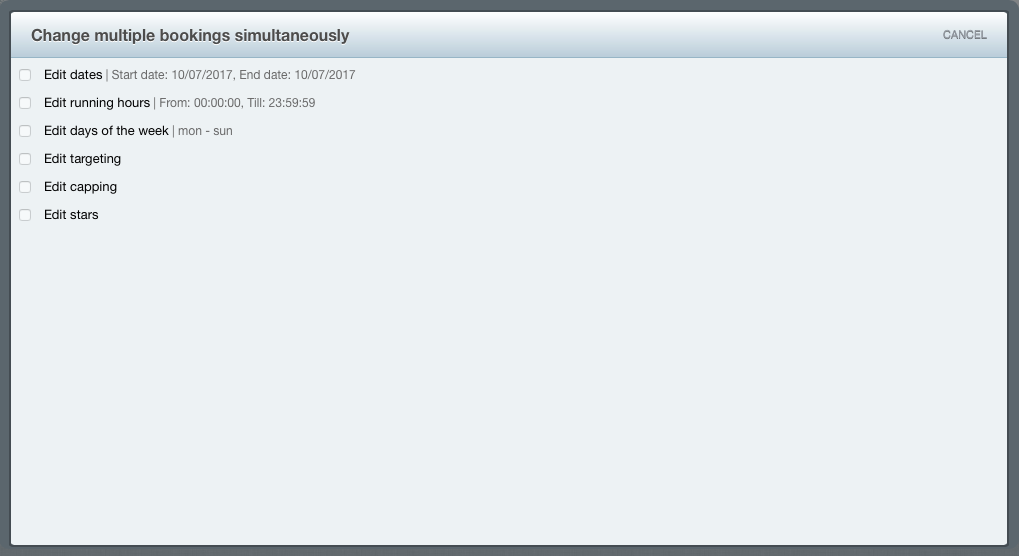
Edit dates
To change the start and/or end dates of the selected bookings:
-
In the Change multiple bookings simultaneously window, click Edit dates.
If any of the selected bookings have already started, you can only modify the end dates of those bookings. It is impossible to change the start or end dates to a date before the day you are editing the bookings. If you attempt to move bookings to a date prior to today, Adhese will notify you that the relevant dates will be adjusted to the current date. For example, 'One or more end dates were set to before today; they will be set to today.' It is not possible to end bookings before they begin. If you attempt to move the end date of bookings to a time before they started, Adhese will notify you that the end date will be set to the day after the starting day (or to today if the starting day is in the past): 'One or more end dates were set to before the starting date, they will be set to the day after the starting day or to today.' Bookings cannot start after they end. If you attempt to move the start date of bookings to after the end date, Adhese will notify you that the start date will be set to the day before the end date: 'One or more start dates were set to after the ending date; they will be set to the day before the ending date.'
-
To adjust the start and/or end dates of all selected bookings forward or back by a number of days, weeks, months or years:

- select Set date relatively;
- choose start of the bookings to only adjust the start of all selected bookings, or
choose end of the bookings to only adjust the end of all selected bookings, or
choose entire bookings to adjust both start and end of all selected bookings; - choose days to adjust a number of days, or
choose weeks to adjust a number of weeks, or
choose months to adjust a number of months, or
choose years to adjust a number of years; - to adjust all selected bookings, enter the number of days, weeks, months, or years. Enter a positive number for forward adjustment and a negative number for backward adjustment.
-
To set an absolute start and/or end date for all selected bookings:

- select Set date absolutely;
- enter a date in Start date to change the start date of all selected bookings;
- enter a date in End date to change the end date of all selected bookings;
-
Click Save.
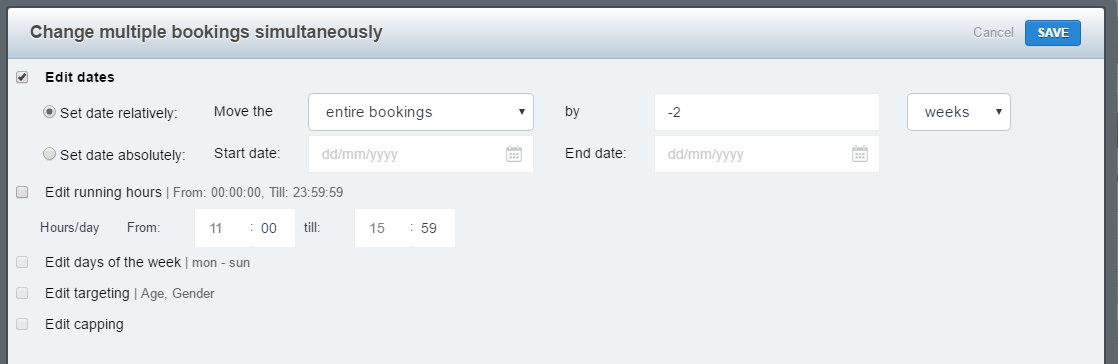
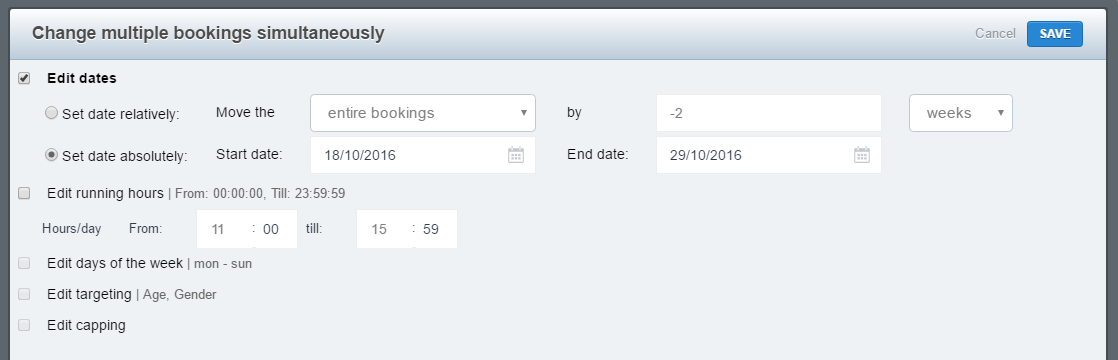
Edit running hours
To edit the running hours of all selected bookings:
- In the Change multiple bookings simultaneously window, click Edit running hours.
- To change the start time, enter a start time in the From field.
- To change the end time, enter an end time in the till field.

- Click Save.
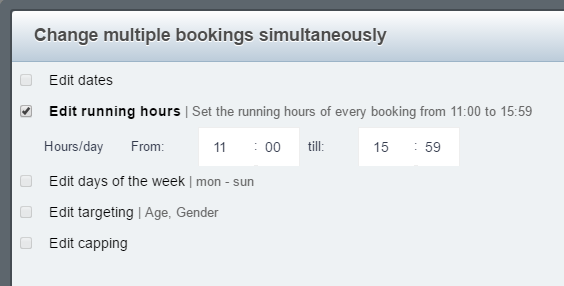
Edit days of the week
To edit the days of the week that all selected bookings run on:
- In the Change multiple bookings simultaneously window, click Edit days of the week.
- Select the days of the week on which you want all bookings to run.

- Click Save.
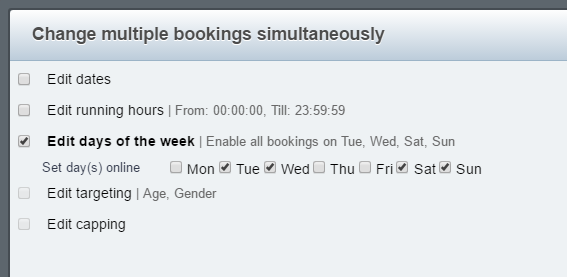
Edit targeting
To edit the targeting of all selected bookings:
- In the Change multiple bookings simultaneously window, click Edit Targeting.
- To remove all targeting, select Remove all targeting.

- Select Modify (specific targeting option) to modify the targeting for all selected bookings
- Select Add (targeting option) to add new targeting for all selected bookings.

- To remove all targeting, select Remove all targeting.
- Click Save.

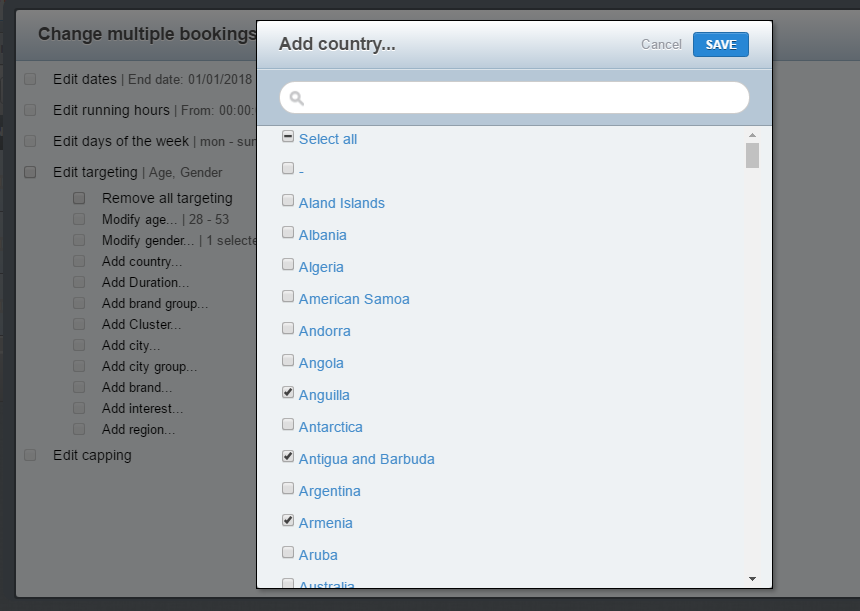
Edit capping
To edit the capping of all selected bookings:
- In the Change multiple bookings simultaneously window, click Edit capping.
- To remove capping from all selected bookings, select Remove all capping.
- To add capping to all selected bookings, select Add capping... and enter the capping information.

- Click Save.
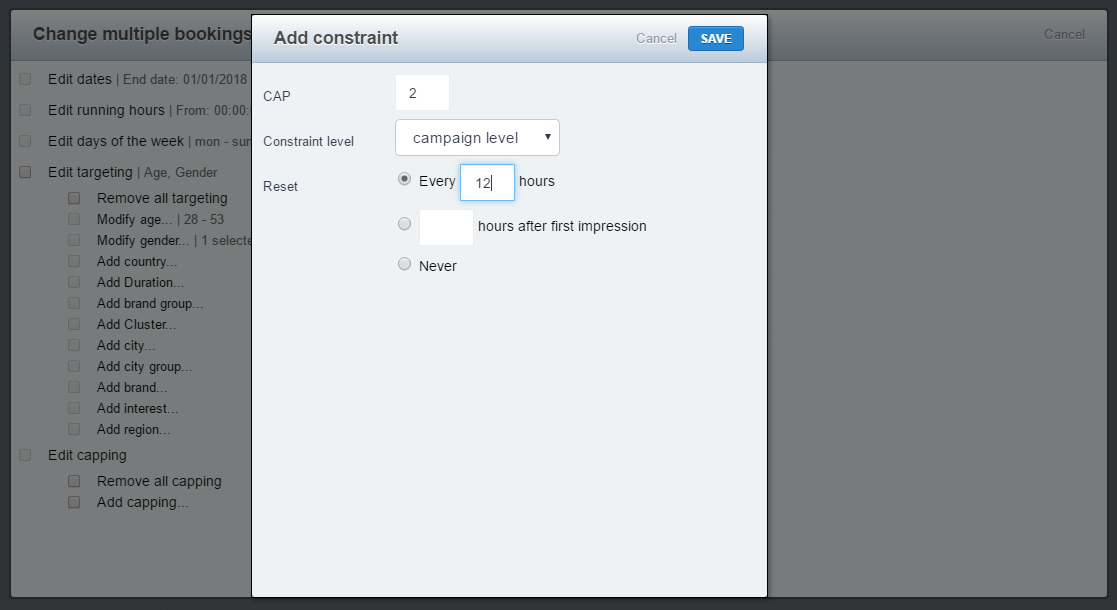
Edit stars
To change the star status of more than one booking:
- In the Change multiple bookings simultaneously window, click Edit stars.
- To start the selected bookings, select Star these bookings.
- To unstar the selected bookings, select Unstar these bookings.

- Click Save.

Duplicate a booking
If you duplicate a booking, you will get an exact copy of the original booking. The status of the duplicated booking is automatically set to pause.
To duplicate or copy a booking:
- Go to the Campaign overview. Click Campaigns in the left navigation menu of Adhese.
- Click the campaign for which you want to duplicate a booking.
- Click the Bookings tab.
- Select the booking you want to duplicate by ticking its box in the overview.
- Click the Duplicate button above the overview.

- Click OK on the confirmation screen. This duplicates the booking

- The overview briefly highlights the duplicated booking.
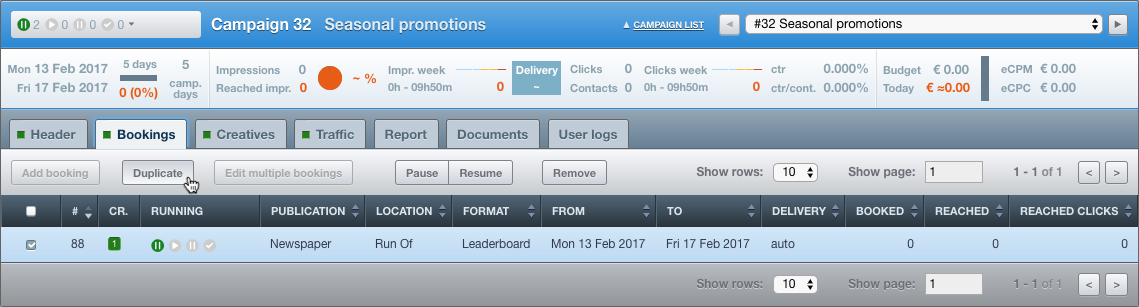
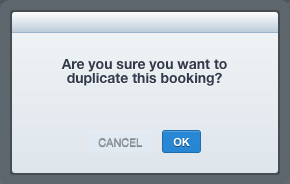
Or,
- Go to the Campaign overview. Click Campaigns in the left navigation menu of Adhese.
- Click the campaign for which you want to duplicate a booking.
- Click the Bookings tab.
- Click the booking you want to duplicate.
- Click on the small triangle next to the Running status, left to the title of the booking. A list appears.

- Click Duplicate booking.
- Click OK on the confirmation screen. This duplicates the booking.
- The overview briefly highlights the duplicated booking.


Pause a booking
There are two ways to pause a booking.
To pause a booking:
- Go to the Campaign overview. Click Campaigns in the left navigation menu of Adhese.
- Click the campaign for which you want to pause a booking.
- Click the Bookings tab.
- Select the booking you wish to pause by ticking its box in the overview.
- Click the Pause button above the overview. The booking is paused.

- The Booking overview briefly highlights the paused booking.
- Pausing a running booking changes its status to paused. The paused tooltip within the paused icon of the Running status table column (see Booking status) indicates this.
- If you pause a booking that has already ended, its status will change to planned. The paused tooltip within the planned icon of the Running status table column (
 ) indicates this.
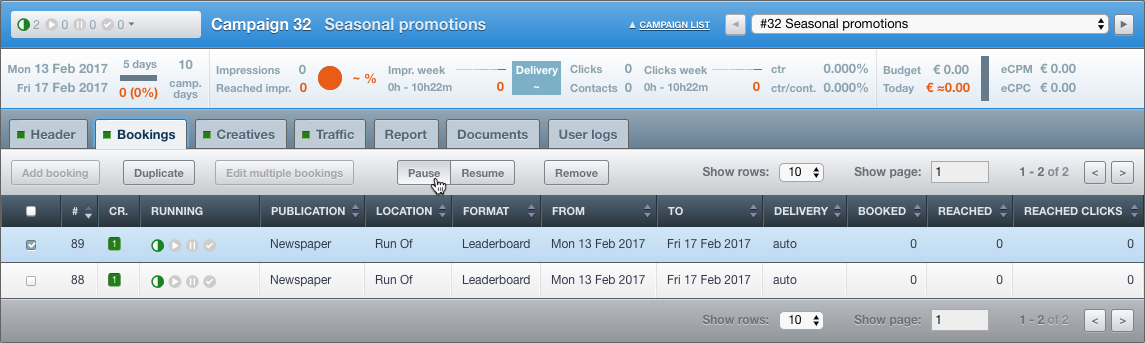
Or,
To pause a booking:
- Go to the Campaign overview. Click Campaigns in the left navigation menu of Adhese.
- Click the campaign for which you want to pause a booking.
- Click the Bookings tab.
- Select the booking you wish to pause by ticking its box in the overview.
- Click on the small triangle next to the Running status, left to the title of the booking. A list appears.
- Click Pause booking. This pauses the booking.
- The Booking overview briefly highlights the paused booking.
- Pausing a running booking changes its status to paused. The paused tooltip within the paused icon of the Running status table column (see Booking status) indicates this.
- If you pause a booking that has already ended, its status will change to planned. The paused tooltip within the planned icon of the Running status table column () indicates this.

Resume a booking
A booking can be resumed in two different ways.
To resume a paused booking:
- Go to the Campaign overview. Click Campaigns in the left navigation menu of Adhese.
- Click the campaign for which you want to resume a paused booking.
- Click the Bookings tab.
- Select the paused booking you want to resume by ticking its box in the overview.
- Click the Resume button above the overview. This resumes the booking and changes the status to its normal status.

- The Booking overview briefly highlights the resumed booking.
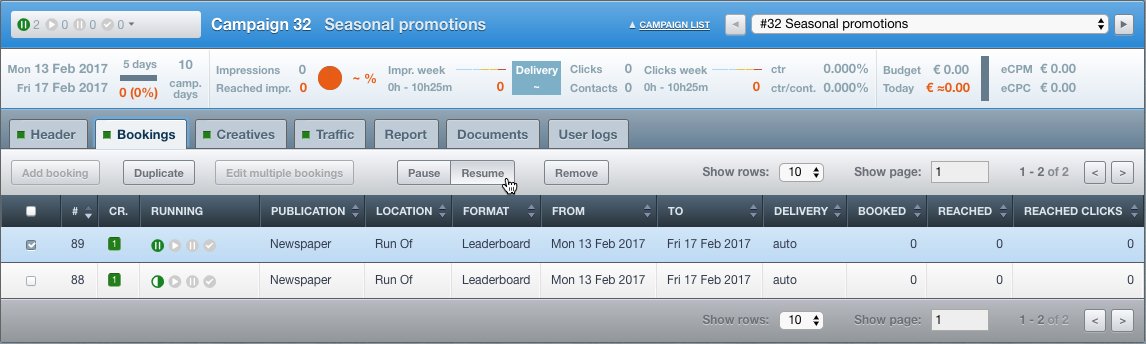
Or,
- Go to the Campaign overview. Click Campaigns in the left navigation menu of Adhese.
- Click the campaign for which you want to resume a paused booking.
- Click the Bookings tab.
- Click the booking you want to resume.
- Click on the small triangle next to the Running status, located to the left of the booking title. A list appears.
- Click Resume booking. This resumes the booking and changes its status to normal.

- The Booking overview briefly highlights the resumed booking.
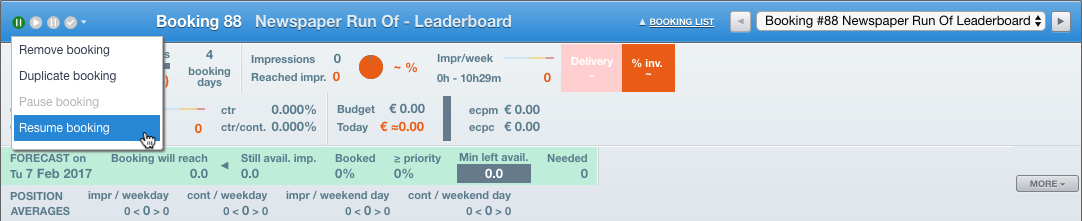
Stop a booking
There are two ways to stop a booking.
To stop a booking:
-
Go to the Campaign overview. Click Campaigns in the left navigation menu of Adhese.
-
Click the campaign for which you want to stop a booking.
-
Click the Bookings tab.
-
Select the booking you want to stop by ticking its box in the overview.
-
Click the Stop button above the overview:

-
Click OK on the confirmation screen. This stops the booking.


Or,
-
Go to the Campaign overview. Click Campaigns in the left navigation menu of Adhese.
-
Click the campaign for which you want to stop a booking.
-
Click the Bookings tab.
-
Click the booking you want to stop.
-
Click on the small triangle next to the Running status, located to the left of the booking title. A list appears.
-
Click Stop booking.

-
Click OK on the confirmation screen. This stops the booking.
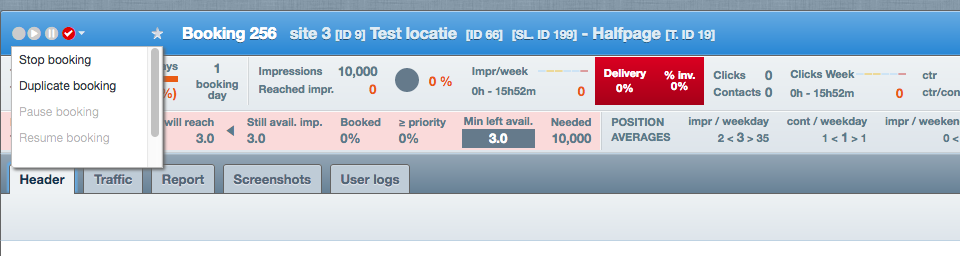

The booking gets the status Stopped. By default, only stopped bookings that have measured impressions will remain visible in the interface. If Adhese has measured impressions, the booking receives the status Stopped (the status indicator is displayed as a black circle in the Running status). Bookings that have not measured impressions are hidden by default. See the screenshot below for an example. No stopped bookings (with no impressions measured) are visible.

When you hit the Show hidden bookings button, stopped bookings (with no impressions measured) become visible:
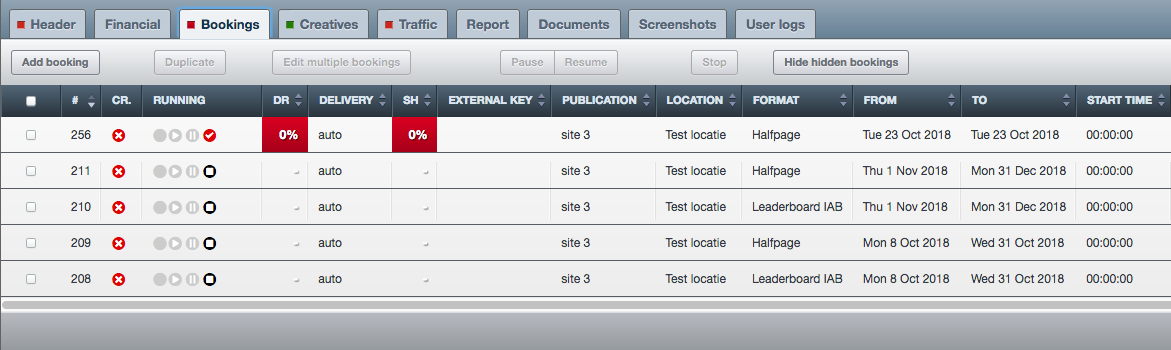
Once a booking has the status Stopped, you cannot resume the booking.
Pacing Options
When you select Auto as the delivery method on the booking screen, the Pacing Options option will appear. These options determine how many impressions of the booking will be delivered during the first half of the delivery period.
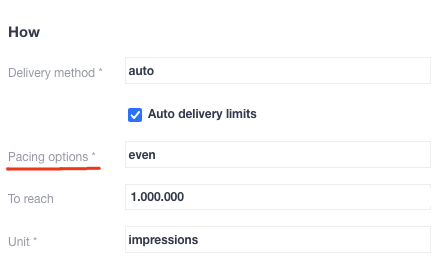
There are four pacing options:
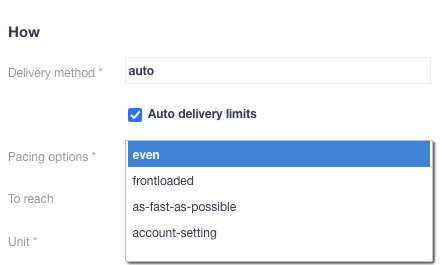
Even
50% of the booked impressions will be delivered in the first half of the delivery period, with the remaining 50% delivered in the second half. Select this option if you would prefer a consistent delivery rate throughout the entire booking period.
Frontloaded
62,5% of the booked impressions will be delivered in the first half of the delivery period, with the remaining 37,5% in the second half. Choose this option if you would prefer the majority of impressions to be delivered during the first half of the booking period.
As fast as possible
75% of the total number of booked impressions will be delivered in the first half of the delivery period, with the remaining 25% being delivered in the second half. Select this option if you want the majority of your impressions to be delivered in the first half of the booking period.
The difference between as-fast-as-possible and SOV 100% is that the former is still an automated delivery method that takes the delivery period and competing bookings into account, whereas SOV 100% does not (which can cause delivery problems for competing bookings).
Account setting
account-setting is only relevant for existing accounts that have both the deliveryDistributionParameter in their configuration file and the Classic UI. If you are unsure whether your account has the required setup, please contact support.
Account-setting uses the deliveryDistributionParameter from the configuration file of your Adhese instance, which can be set to any value between 50% and 75% for the first half of the delivery period.
Auto Delivery Limits
To see the current delivery limit, fill in a to reach impressions value in the booking. Otherwise, the actual delivery limit for the booking will not be displayed.
When Auto is selected as the delivery method, the Auto delivery limits will be visible.

Selecting this option will grey out and deactivate the option to set a Delivery limit :
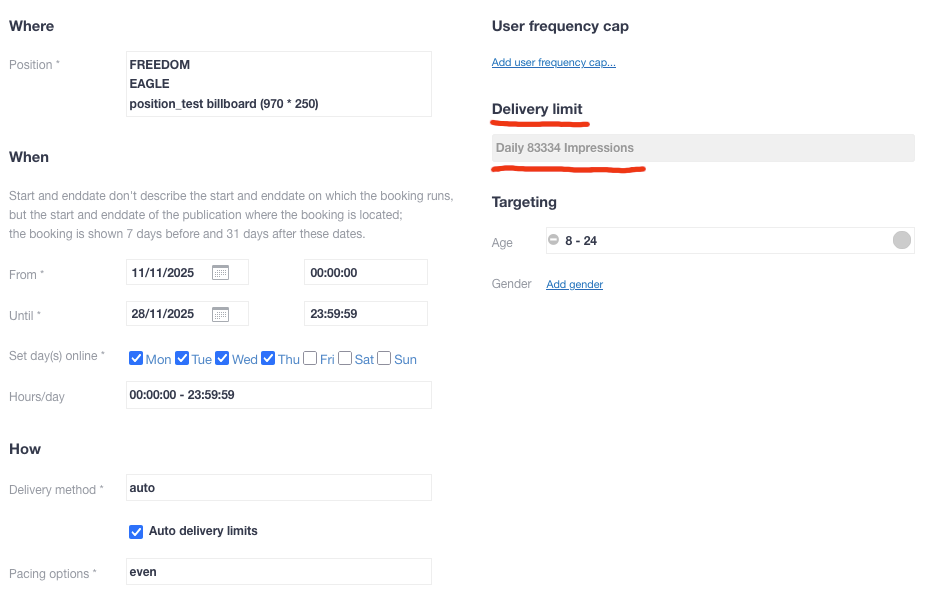
Auto Delivery Limits is a smarter delivery limit system. Rather than imposing a fixed daily or hourly cap, it recalculates the limit regularly to ensure bookings are delivered in line with the chosen pacing option, helping to ensure the set goal is reached. If a booking falls behind its target, the limit increases; if it is being delivered too quickly, the limit decreases. In effect, it eliminates delivery peaks while maintaining the set booking goals.
The calculation of the Auto delivery limit is done on a daily basis.
Creatives
Once a new booking has been saved, you can upload a creative. A creative is the visual element of an advertising campaign that is displayed to visitors on your platform.
Upload a creative
You can upload different kinds of creatives in Adhese. Adhese supports the following format types:
- Image files (JPG, GIF, or PNG)
- HTML5 files
- Video files (MP4 and FLV)
- Audio files (MP3 and MPEG)
- Text
- Third-party JavaScript tags.
In addition, Adhese has developed its own format, Advar, to simplify the creation of complex creatives. Advar templates can be customised to take various forms, including video advertising formats, text ads, or content.
It depends on the client which fields are compulsory to complete. To save a creative, you must select a format. If a mandatory field is left blank, the creative can still be saved, but the mandatory fields will be set to their default values.
Add an HTML5 creative
To add an HTML5 creative:
- Go to the Campaign overview, click Campaigns in the left navigation menu of Adhese.
- Click the campaign for which you want to upload an HTML5 creative.
- Click the Creatives tab. The Creative overview opens. The Creative overview lists all creatives t uploaded for the selected campaign.
- Click the Add HTML5 button. The New creative screen opens.
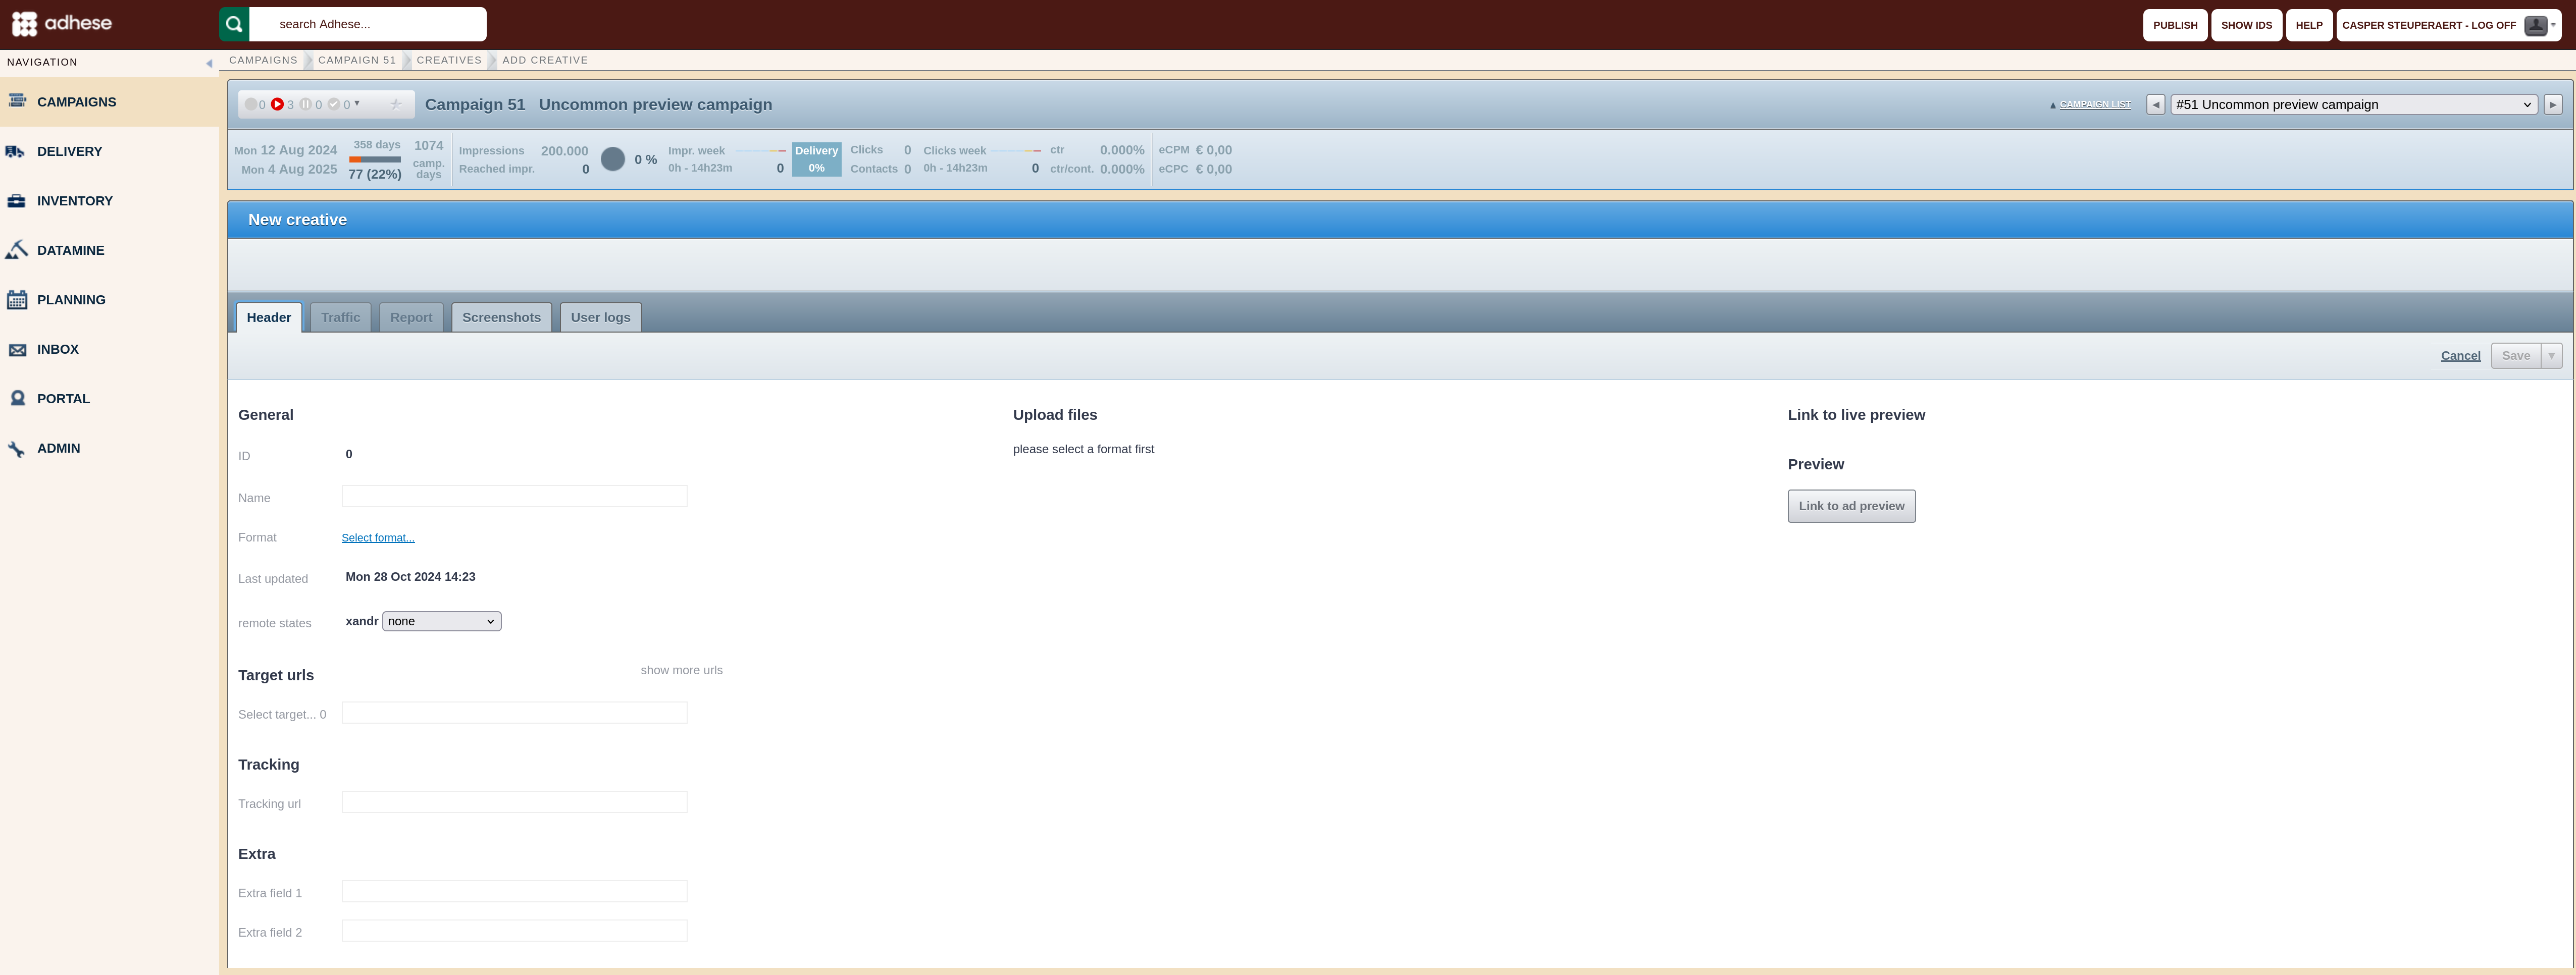
Specify the details of the creative under the following headings:
General
- The ID is automatically generated by Adhese after the creative is saved.
- Give the creative a meaningful and clear name in the Name field. A distinct name will make it easier to recognise the creative in the next step when it is attached to a booking.
- In the Format field, click the Select format link. This opens the List of formats modal window. Select the appropriate format with the correct dimensions from the list and click on the Save button.
- The Last updated field indicates the most recent update of the creative.
Target URLs
- In the Select target field, determine the target URL or the URL of the landing page. Click the show more URLs link to add multiple target URLs to the creative.
You may omit http:// from the target URL, as Adhese will automatically add it. If the target URL is over a secure connection, you must add httpS:// to it.
Tracking
- Adhese monitors every campaign, booking, and creative, and reports are available in the interface. It is also possible to let a third party monitor a creative. The client needs to provide a tracking URL, which is inserted in the Tracking URL field. For more information about the tracking URL, refer to Third-party tracking.
Extra

- The Extra field 1 and 2 input fields are custom input fields depending on the chosen format and template. These fields are used to add extra functions, such as changing the background colour of a wallpaper ad.
SKU
- Creative managers can associate one or more product IDs (such as SKUs or company-specific identifiers that refer to an article) with a specific creative. These IDs are stored as metadata and can be used to calculate Return on Advertising Spend (ROAS) when linked to company sales data. The SKU field functionality is account-specific.
No input validation has been implemented for this field. It is the user's responsibility to ensure that the IDs entered are accurate and correspond to the data required for ROAS calculations.
Upload files
A format needs to be selected before you can upload an HTML5 creative.
To upload an HTML5 creative, click the Main file button. You need to choose a correct .zip HTML5 creative file. For details, see the HTML5 Creative file section below.
While uploading a .zip file, Adhese verifies various potential issues, including file size and proper implementation of the clickTag.
If there is an issue, the .zip file is not uploaded and Adhese gives an error message.
If you are convinced that an error notification is not justified, you can disregard it by simply checking the Ignore errors (only for me) box under the Alternative creative section and upload the file again.
Next to the .zip file, you can upload up to five additional files. This enables you to upload HTML5 creatives with additional material, such as a wallpaper.
Please note that if you do not provide a clickTag and select Ignore errors (only for me), Adhese will not track your Clicks.
Click the Save button after the .zip file is uploaded.
HTML5 Creative file
The HTML5 creative file is a .zip file that defines the creative or advertisement. You can either receive such a .zip file from the advertiser or prepare it yourself.
To create it by yourself, make sure:
- The .zip file contains at least an index.htm or index.html file or another unique .htm or .html file. This file will be used as the starting point for the HTML5 ad.
Ensure that the filename only contains alphanumeric characters, dots, and underscores. Other characters may cause issues when Adhese processes the file.! - The main.html file contains a clickTag. Adhese relies on it to track clicks correctly.
- The main .html file relatively refers to all code and assets. This means that all links in the HTML5 creative, such as the link to an image within the ad, need to use a relative path, for example,/graphics/ad-image.png or
<img src="/graphics/ad-image.png">. This enables the ad to be self-contained and, therefore, to run independently or to render without a network connection. External libraries and web fonts are exceptions to this guideline.
Some additional guidelines:
- There are no specific rules for the folder structure inside the .zip file. You can organise all files in different subfolders or within the root folder.
- The number of files should be kept to a minimum because each different file results in a single request that affects the web page's performance where the ad is being loaded.
All links in the HTML5 creative, such as the link to an image within the ad, must use a relative path, e.g. /graphics/ad-image.png or img src="/graphics/ad-image.png". This enables the advertisement to run independently. External libraries and web fonts are exceptions to this guideline.
The use of Adhese macros, such as [adheseReplace:xx] or <ADHESE_X>, from within the HTML5 file is not possible. An Adhese value will not replace these macros.
clickTag
To let Adhese measure the clicks of the banner, some extra work is required:
-
We require a JavaScript variable to be present in the code. This variable has to be named clickTag in order to be picked up.
The value of the clickTag variable needs to be a string literal within single quotes:Example
<a id="clickThroughBtn" target='_new' href="">Register click</a> <script> var clickTag = ''; document.querySelector('#clickThroughBtn').href = clickTag; </script> ...
The HTML code above is only an example of how to use the clickTag variable. Simply copying and pasting this code into your file will not suffice! The clickTag variable needs to be integrated into the already existing click logic.
3. Place this variable in the **main HTML** file. This is the only file that will be parsed. 4. The Adhese UI will provide the landing page URL. Once the banner is uploaded, this URL, together with our click tracker, will be assigned to the clickTag variable.
Make sure to make use of this variable when implementing the click-through logic!
...
var clickTag = '';
var clickTag2 = '';
var clickTag3 = '';
...
All clicks will be counted collectively to calculate the total number of clicks on a specific banner. However, in the more detailed reports, you can view the clicks per URL.
Adhese detects the clickTag in compressed code, which reduces file sizes by removing line breaks, tabs, and double spaces. Although the clickTag variable is present in the code and the click URL is correctly filled in by Adhese, it is still possible that Adhese will not measure clicks. If this is the case, you will have to contact the supplier of the HTML5 file. It is possible that the clickTag variable is not being used or is being overwritten.
Save
To save the file, click the Save button. When you click the arrow next to the button, additional saving options are available in a drop-down menu.

|
Save and create a booking |
Saves the current creative and opens a new create booking screen |
|
Save and create Image Creative |
Saves the current creative and opens a create Image Creative screen |
|
Save and create 3rd party Creative |
Saves the current creative and opens a create 3rd party Creative screen |
|
Save and create Advar Creative |
Saves the current creative and opens a create Advar Creative screen |
|
Save and create HTML5 Creative |
Saves the current creative and opens a create HTML5 Creative screen |
|
Save and go to traffic screen |
Saves the current creative and goes to the traffic screen for that creative |
More files
If a creative consists of more than one file, e.g., a background image and a video clip, you can add these individual files to the creative. After a format is selected, a new section becomes available: More files. This section enables you to add up to six files to a creative. Click More files... to expand this section. Five buttons appear, allowing you to upload additional files.

Additional creatives
Once you have selected a format, you can upload the main HTML5 creative file. You must save the main creative before uploading any additional creatives, which are variants of the main creative, such as images with different dimensions for various platforms.
Preview
After the file is uploaded, a visual preview of the creative appears. Check if there are no errors.
You can switch between the creative's actual size and its thumbnail. To show the exact size, click the [show actual size] link, or click the [show thumbnail] link to show the thumbnail.
If the HTML5 contains an action script with an HTTP request, various browsers may block the preview because the Adhese interface connects through HTTPS. It depends on the kind of browser, and what should be done to preview the creative:
-
In Google Chrome, click the shield button situated on the right of the browser's address bar. Click the Load unsafe script button to enable the preview of the HTML5 creative.

-
In Mozilla Firefox, click the shield button situated on the left of the browser's address bar. In the drop-down menu, select Disable protection for now.

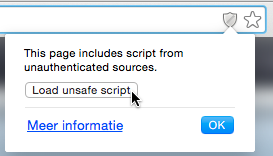

Link to live preview
You can preview the creative in its context after the file is uploaded and saved. Use this feature to check for errors (see the next paragraph). We recommend checking the live preview in multiple browsers. No impressions will be counted while previewing a creative in the live-preview mode. For more information on live previewing a creative, refer to Live preview a creative.
The preview link will only be available if the booked position has the same dimensions as the selected format for the creative.
The live preview URL can be copied and shared with the advertiser to ensure that the creative is displayed as desired.
Adhese has a safety feature to secure live preview links. There are randomised strings after the Creative ID in the live preview link. Changing the Creative ID will not allow you to view the creative associated with that ID. You will have to navigate to that creative and view it's live preview from there.
Checking the URL of the uploaded creative
After you have uploaded and saved the HTML5 creative, the URL of the landing page needs to be verified. To verify the URL:
-
Do one of the following:
- Click on the preview of the creative in the Adhese interface, or
- Click on the creative in the live-preview mode.
A new page is opened. If the URL is correct, the following message appears:

If the above message does not appear, Adhese does not measure any clicks.
-
Click the link in the message to verify that the URL directs you to the actual landing page.
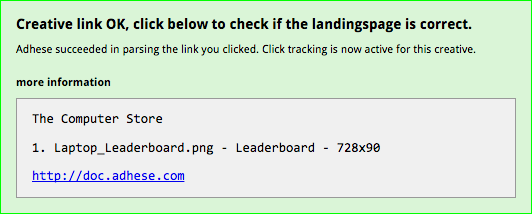
If the preview does not click through, the HTML5 creative may not contain the clickTAG. For information on how to add a clickTAG correctly, refer to the above Upload files paragraph.
Add an image
Adhese enables users to upload image files in formats such as JPG, GIF, and PNG.
To add an image file:
- Go to the Campaign overview and click Campaigns in the left navigation menu of Adhese.
- Click the campaign for which you want to upload a creative.
- Click the Creatives tab. The Creative overview opens.
- Click the Add Image button. The New creative screen opens.
Specify the details of the creative under the following headings:
General
- The ID is automatically generated by Adhese after the creative is saved.
- Give the creative a meaningful and clear name in the Name field. A distinct name makes it easy to recognise the creative in the next step when the creative is attached to a booking. If no name is provided, the filename of the uploaded image file is used as the name.
- In the Format field, click the Select format link. This opens the List of formats modal window. Select the appropriate format with the correct dimensions from the list and click on the Save button.
- (Optional) In the Alternative Text field, provide text that will appear if the image cannot be displayed or if someone hovers over the image.
- The Last updated field indicates the most recent update of the creative.
Target URLs
- In the Target field, you can choose whether the URL of the target or landing page should open in a new browser tab or in the same browser tab of the visitor. The default setting is set at new window. To change this default setting:
- Click new window. The Target of link modal window opens.
- Select same window to open the landing page within the same browser tab.
- Click the Save button.
- In the URL field, determine the target URL or the URL of the landing page. Click the show more URLs link to add multiple target URLs to the creative. The URL can contain a maximum of 500 characters.
You may omit http:// from the target URL, as Adhese will automatically add it. If the target URL is over a secure connection, you must add httpS:// to it.
Tracking
- Adhese monitors every campaign, booking, and creative, and reports are available in the interface. It is also possible to let a third party monitor a creative. The client needs to provide a tracking URL, which is inserted in the Tracking URL field. For more information about the tracking URL, refer to Third-party tracking.
Extra
- The Extra field 1 and 2 input fields are custom input fields depending on the chosen format and template. These fields are used to add extra functions, such as changing the background colour of a wallpaper ad.
SKU
- Creative managers can associate one or more product IDs (such as SKUs or company-specific identifiers that refer to an article) with a specific creative. These IDs are stored as metadata and can be used to calculate Return on Advertising Spend (ROAS) when linked to company sales data. The SKU field functionality is account-specific.
No input validation has been implemented for this field. It is the user's responsibility to ensure that the IDs entered are accurate and correspond to the data required for ROAS calculations.
Upload files
A format needs to be selected before you can upload an image file.
To upload an image file, click the Main file button. The file should have a .jpg, .gif or .png filename extension.
Adhese analyses uploaded image files based on their dimensions and file size. If an image file exceeds the predefined maximum values, Adhese rejects the creative and displays an error message.
Save
To save the file, click the Save button. When you click the arrow next to the button, additional saving options are available in a drop-down menu.

|
Save and create booking |
Saves the current creative and opens a new create booking screen |
|
Save and create Image Creative |
Saves the current creative and opens a create Image Creative screen |
|
Save and create 3rd party Creative |
Saves the current creative and opens a create 3rd party Creative screen |
|
Save and create Advar Creative |
Saves the current creative and opens a create Advar Creative screen |
|
Save and create HTML5 Creative |
Saves the current creative and opens a create HTML5 Creative screen |
|
Save and go to traffic screen |
Saves the current creative and goes to the traffic screen for that creative |
More files
If a creative consists of more than one file, e.g. a background image and a video clip, you can add these individual files to the creative. After a format is selected, a new section becomes available: More files. This section enables you to add up to six files to a creative. Click More files... to expand this section. Five buttons appear, allowing you to upload additional files.
Additional creatives
Once you have selected a format, you can upload the main creative file. You must save the main creative before uploading any additional creatives, which are variants of the main creative, such as images with different dimensions for various platforms.
Preview
After the file is uploaded, a visual preview of the creative appears. Check if there are no errors.
You can switch between the creative's actual size and its thumbnail. To show the exact size, click the [show actual size] link, or click the [show thumbnail] link to show the thumbnail.
Link to live preview
You can preview the creative in its context after the file is uploaded and saved. Use this feature to check for errors (see the next paragraph). We recommend checking the live preview in multiple browsers. No impressions will be counted while previewing a creative in the live-preview mode. For more information on live previewing a creative, refer to Live preview a creative.
The preview link will only be available if the booked position has the same dimensions as the selected format for the creative.
The live preview URL can be copied and shared with the advertiser to ensure that the creative is displayed as desired.
Adhese has a safety feature that secures live preview links. Randomised strings are added to the end of the Creative ID in the live preview link. If you change the Creative ID, you will not be able to view the creative associated with that ID. Instead, navigate to the creative and view its live preview there.
Checking the URL of the uploaded creative
After you have uploaded and saved the image, the URL of the landing page needs to be verified. To verify the URL:
-
Do one of the following:
- Click on the preview of the creative in the Adhese interface, or
- Click on the creative in the live-preview mode.
A new page is opened. If the URL is correct, the following message appears:
If the above message does not appear, Adhese does not measure any clicks. Verify the syntax of the URL for potential errors.
-
Click the link in the message to verify that the URL directs you to the actual landing page.

Add a third-party tag
Advertisers and advertising agencies frequently use their own ad servers. Adhese allows for the integration of third-party ad tags from multiple external ad servers and networks. Refer to the List of third-party ad servers and marketplaces for an overview of third-party ad servers.
To add a third-party tag:
- Go to the Campaign overview and click Campaigns in the left navigation menu of Adhese.
- Click the campaign for which you want to upload a creative.
- Click the Creatives tab. The Creative overview opens.
- Click the Add 3rd party button. The New creative screen opens.

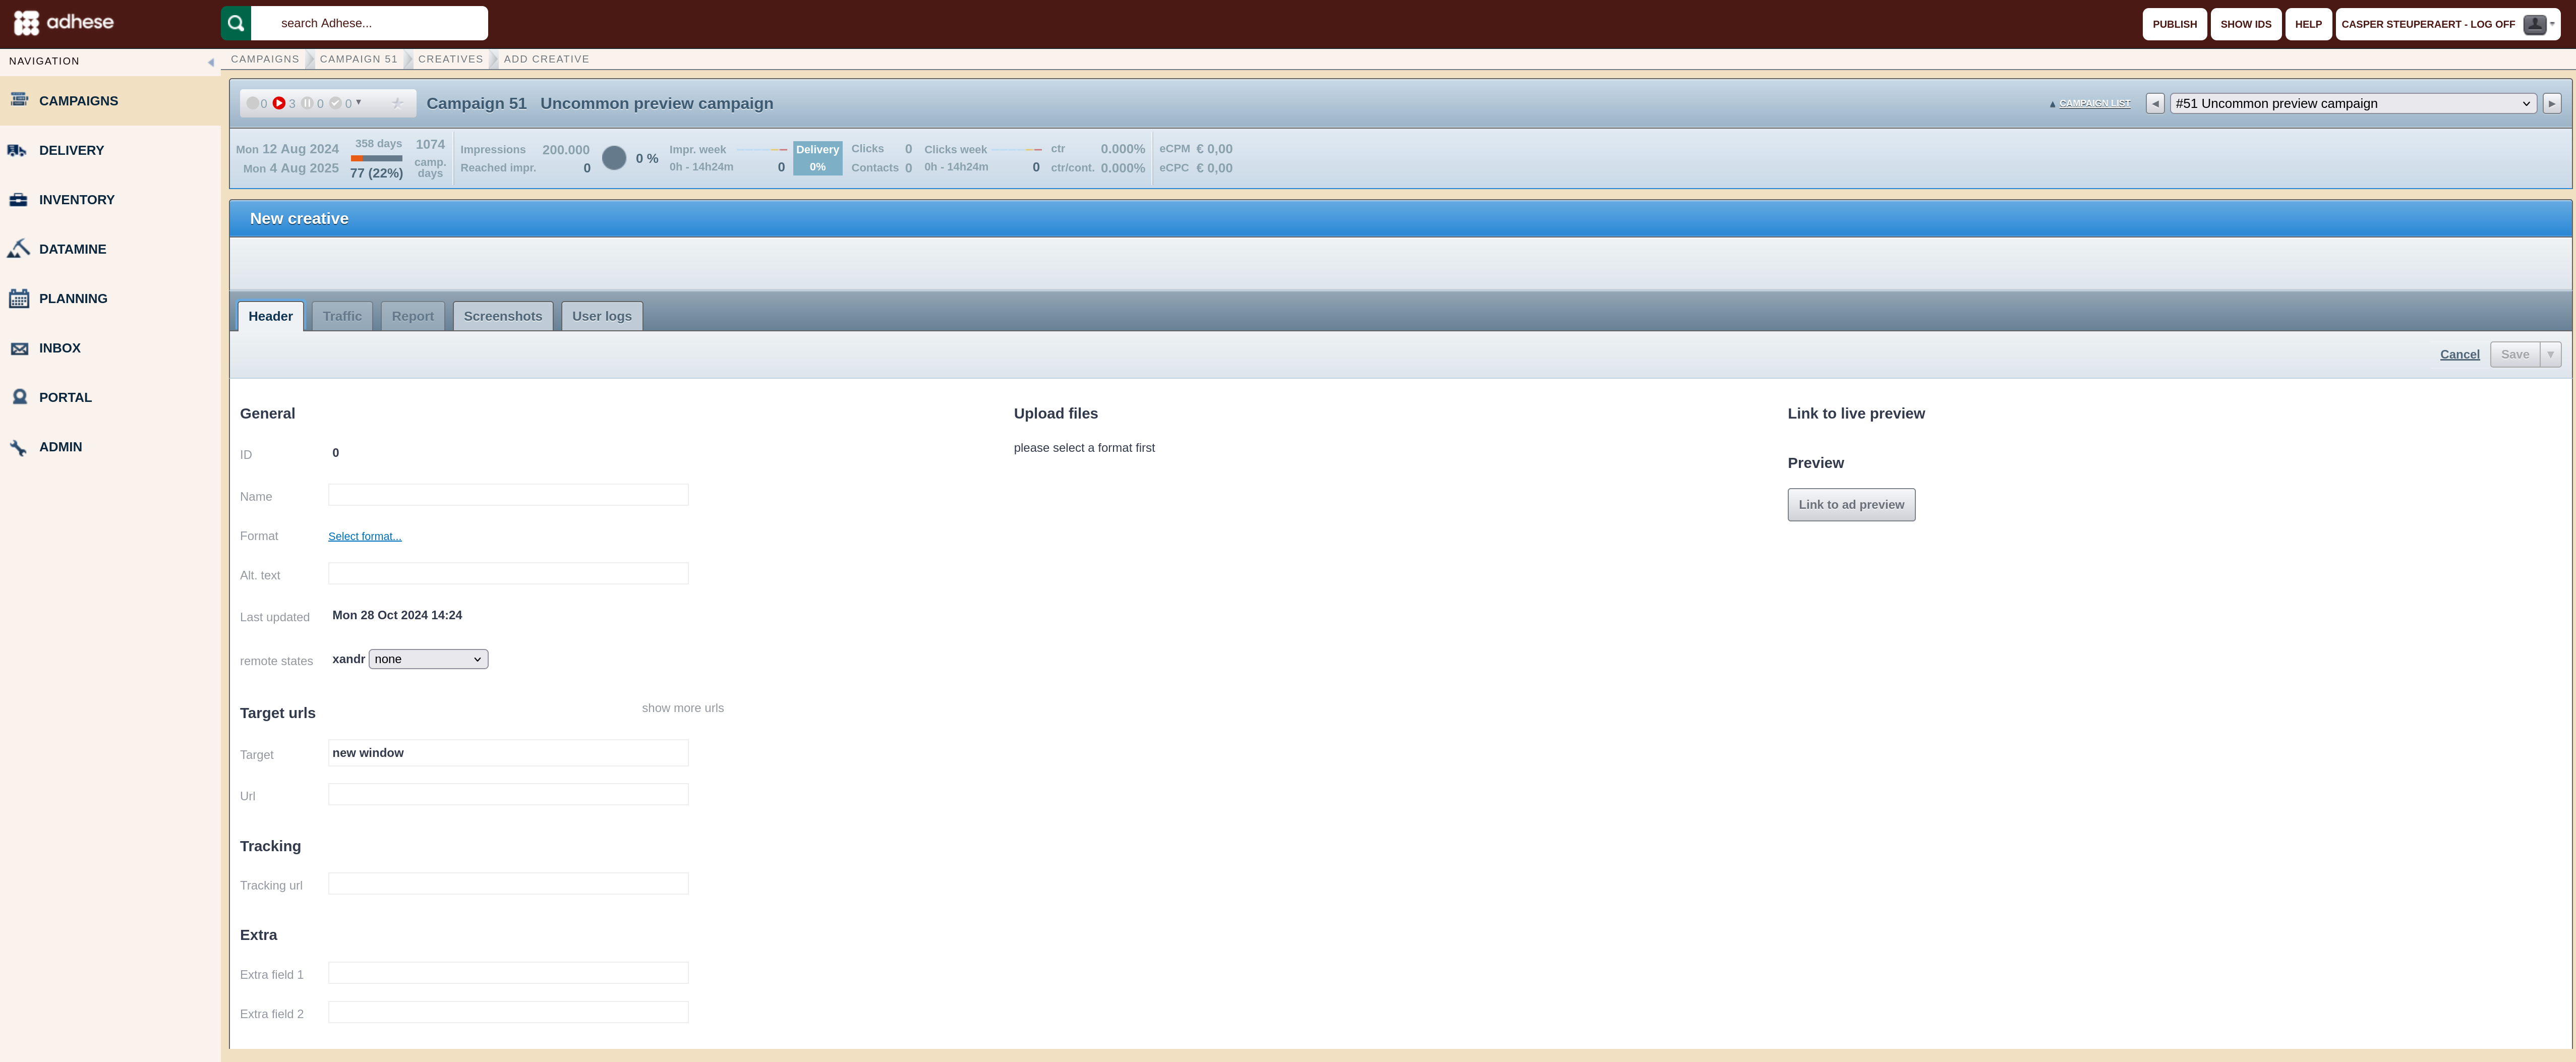
Specify the details of the creative under the following headings:
General
- The ID is automatically generated by Adhese after the creative is saved.
- In the Name field, give the creative a meaningful and clear name. A distinct name makes it easy to recognise the creative in the next step when it is attached to a booking.
- In the Format field, click the Select format link. This opens the List of formats modal window. Select the appropriate format with the correct dimensions from the list and click on the Save button.
- The Last updated field indicates the most recent update of the creative.
Target URLs
- The URL of the target or landing page for a third-party tag is typically included in the code by the third party. As a result, you don't need to provide the target URL in the URL field.
Tracking
- Adhese monitors every campaign, booking, and creative, and reports are available in the interface. It is also possible to let a third party monitor a creative. The client needs to provide a tracking URL, which is inserted in the Tracking URL field. For more information about the tracking URL, refer to Third-party tracking.
Extra

- The Extra field 1 and 2 input fields are custom input fields depending on the chosen format and template. These fields are used to add extra functions, such as changing the background colour of a wallpaper ad
SKU
- Creative managers can associate one or more product IDs (such as SKUs or company-specific identifiers that refer to an article) with a specific creative. These IDs are stored as metadata and can be used to calculate Return on Advertising Spend (ROAS) when linked to company sales data. The SKU field functionality is account-specific.
No input validation has been implemented for this field. It is the user's responsibility to ensure that the IDs entered are accurate and correspond to the data required for ROAS calculations.
3rd party code
- The JavaScript code of the third-party tag needs to be inserted in the Original code field.
Adhese checks the code when the creative is saved. If Adhese recognises the external server and its specific code, it will process and adjust it accordingly. The adjusted code will then appear in the Parsed code and Parsed for JSON fields.
If Adhese does not automatically detect and parse the third-party tag, the unmodified third-party tag will be copied as is.
To ensure accurate tracking of impressions and clicks and reduce third-party discrepancies in reporting, inserting the appropriate Adhese tokens into the placeholders of the third-party tag code provided is crucial. Adhese will replace placeholders when the third-party tag is recognised. If the tag is not recognised, replace a timestamp placeholder with %n and a click-tracking placeholder with %c. Adhese will then replace these placeholders with the corresponding values while saving the creative. For example, a third-party tag could look like this:
<script src="https://someadserver.com/ad/1234-223-dde22-click-timestamp"> </script>
Once you have correctly inserted the tokens into their respective placeholders, the third-party tag will look like this:
<script src="https://someadserver.com/ad/1234-223-dde22-%c-%n"> </script>
When pasting the above line in the original code field, Adhese will parse the code correctly and replace the %n and %c with the specific creative and campaign values.
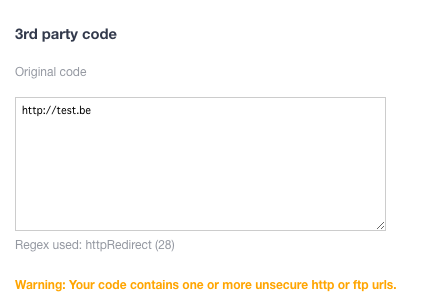
Adhese gives a warning when you try to paste an HTTP URL instead of an HTTPS one.
Save
To save the file, click the Save button. When you click the arrow next to the button, additional saving options are available in a drop-down menu.

|
Save and create booking |
Saves the current creative and opens a new create booking screen |
| Save and create Image Creative
|
Saves the current creative and opens a create Image Creative screen |
| Save and create 3rd party Creative
|
Saves the current creative and opens a create 3rd party Creative screen |
| Save and create Advar Creative
|
Saves the current creative and opens a create Advar Creative screen |
| Save and create HTML5 Creative
|
Saves the current creative and opens a create HTML5 Creative screen |
| Save and go to traffic screen
|
Saves the current creative and goes to the Traffic screen for that creative |
Upload files
If a third-party tag consists of more than one file, you can add these additional files to the third-party tag. Once you have selected a format, a new section will become available for uploading files. You will see five buttons that allow you to upload up to five extra files.
Additional creatives
Once you have selected a format, you can upload the main creative file. You must save the main creative before uploading any additional creatives, which are variants of the main creative, such as images with different dimensions for various platforms.
Preview
After the tag is inserted and the creative is saved, a visual preview of the creative will appear. Check if there are no errors.
You can switch between the creative's actual size and its thumbnail. To show the exact size, click the [show actual size] link, or click the [show thumbnail] link to show the thumbnail.
If the tag contains an action script with an HTTP request, various browsers may block the preview because the Adhese interface connects through HTTPS. It depends on the kind of browser, what should be done to preview the creative:
- In Google Chrome, click the shield button situated on the right of the browser's address bar. Click the Load unsafe script button to enable the preview of the third-party creative.
- In Mozilla Firefox, click the shield button situated on the left of the browser's address bar. In the drop-down menu, select Disable protection for now to enable the preview of the third-party creative.

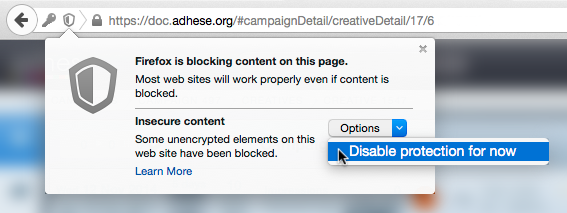
Link to live preview
You can preview the creative in its context after the file is uploaded and saved. Use this feature to check for errors (see the next paragraph). We recommend checking the live preview in multiple browsers. No impressions will be counted while previewing a creative in the live-preview mode. For more information on live previewing a creative, refer to Live preview a creative.
The majority of third parties enable Adhese to display a preview or live preview.
The preview link will only be available if the booked position has the same dimensions as the selected format for the creative.
The live preview URL can be copied and shared with the advertiser to ensure that the creative is displayed as desired.
Adhese has a safety feature to secure live preview links. There are randomised strings after the Creative ID in the live preview link. Changing the Creative ID will not allow you to view the creative associated with that ID. You will have to navigate to that creative and view it's live preview from there.
Checking the URL of the uploaded creative
After you have uploaded and saved the third-party file, the URL of the landing page needs to be verified. To verify the URL:
-
Do one of the following:
- Click on the preview of the creative in the Adhese interface, or
- Click on the creative in the live-preview mode.
A new page is opened, and if the URL is correct, the following message will appear:

If the above message does not appear, Adhese does not measure any clicks. Refer to Clicks for more information about possible solutions.
-
Click the link in the message to verify that the URL directs you to the actual landing page.
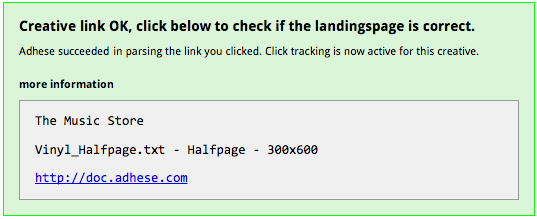
Add an Advar creative
An Advar template is a custom template created by Adhese. The template can consist of multiple components (images, videos, texts and URLs) that form a sophisticated creative. The user provides these elements when uploading a new Advar creative. There is no need for the user to know HTML or JavaScript code, as these are predefined in the template itself. Refer to the Advar templates section for more information.
To add an Advar template:
- Go to the Campaign overview and click Campaigns in the left navigation menu of Adhese.
- Click the campaign for which you want to upload a creative.
- Click the Creatives tab, the Creative overview opens.
- Click the Add Advar button. The New creative screen opens.

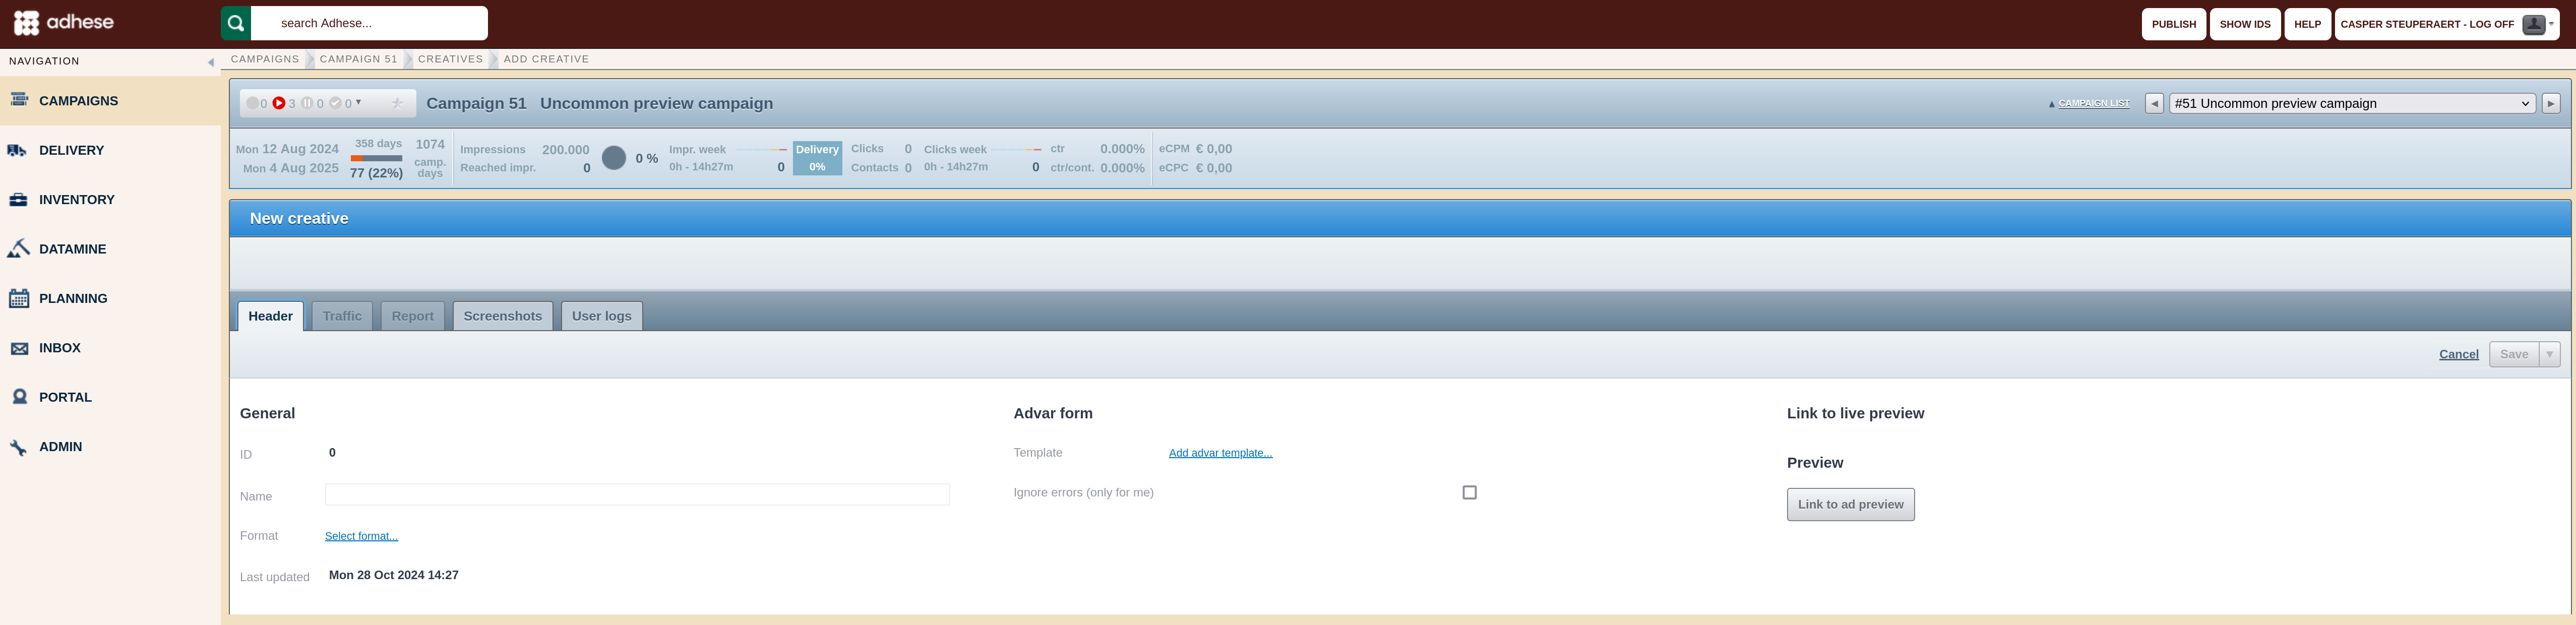
Specify the details of the creative under the following headings:
General
- The ID is automatically generated by Adhese after the creative is saved.
- Give the creative a meaningful and clear name in the Name field. A distinct name will make it easier to recognise the creative in the next step when it is attached to a booking.
- In the Format field, click the Select format link. This opens the List of formats modal window. Select the appropriate format with the correct dimensions from the list and click on the Save button.
- The Last updated field indicates the most recent update of the creative.
Advar form
- In the Template field, click the Add advar template link. The List of Advar Templates modal window opens. Select a template from the list and click the Save button. The template's accompanying fields (for example, the title, target URL, and image file) become visible and must be completed to design the ad.
Once the Advar template has been created, Adhese will perform a series of checks to identify any potential issues. If an error occurs, the file will not be uploaded, and an error notification will be displayed. If you are convinced that an error notification is not justified, you can disregard it by simply checking the Ignore errors (only for me) box under the Alternative creative section and upload the file again.
Save
To save the file, click the Save button. When you click the arrow next to the button, additional saving options are available in a drop-down menu.

|
Save and create booking |
Saves the current creative and opens a new create booking screen |
|
Save and create Image Creative |
Saves the current creative and opens a create Image Creative screen |
|
Save and create 3rd party Creative |
Saves the current creative and opens a create 3rd party Creative screen |
|
Save and create Advar Creative |
Saves the current creative and opens a create Advar Creative screen |
|
Save and create HTML5 Creative |
Saves the current creative and opens a create HTML5 Creative screen |
|
Save and go to traffic screen |
Saves the current creative and goes to the traffic screen for that creative |
Additional creatives
Once you have selected a format, you can upload the main creative file. You must save the main creative before uploading any additional creatives, which are variants of the main creative, such as images with different dimensions for various platforms.
Preview
After the file is uploaded, a visual preview of the creative appears. Check if there are no errors.
You can switch between the creative's actual size and its thumbnail. To show the exact size, click the [show actual size] link, or click the [show thumbnail] link to show the thumbnail.
Link to live preview
You can preview the creative in its context after the file is uploaded and saved. Use this feature to check for errors (see the next paragraph). We recommend checking the live preview in multiple browsers. No impressions will be counted while previewing a creative in the live-preview mode. For more information on live previewing a creative, refer to Live preview a creative.
The preview link will only be available if the booked position has the same dimensions as the selected format for the creative.
The live preview URL can be copied and shared with the advertiser to ensure that the creative is displayed as desired.
Adhese has a safety feature to secure live preview links. There are randomised strings after the Creative ID in the live preview link. Changing the Creative ID will not allow you to view the creative associated with that ID. You will have to navigate to that creative and view it's live preview from there.
Checking the URL of the uploaded creative
After you have uploaded and saved the Advar template, the URL of the landing page needs to be verified. To verify the URL:
-
Do one of the following:
- Click on the preview of the creative in the Adhese interface, or
- Click on the creative in the live-preview mode (see the previous paragraph: Link to live preview).
A new page opens. If the URL is correct, the following message appears:

If the above message does not appear, Adhese does not measure any clicks. Verify the syntax of the URL for potential errors.
-
Click the link in the message to verify that the URL directs you to the actual landing page.
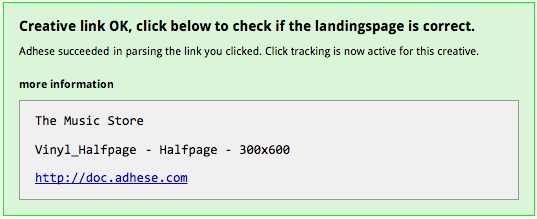
Additional creatives
Adhese enables users to add additional creatives to a main creative, such as images with different dimensions for different platforms. An additional creative is a variant of the main creative.
This chapter provides further details on how to add additional creatives and describes the implementation method.
Add an additional creative
To add an additional creative:
-
From the Creatives overview, select the main creative to which you'd like to add an additional creative. This will open the Header tab of the creative.
You can only add additional creatives to a main creative that is already saved.
-
The Header tab of the main creative contains a new section: Additional creative. This section displays four URLs that enable you to add a new additional image, 3rd party, HTML5, or an advar.

-
Click the URL of the type of creative you wish to add to the main creative. This opens the Header tab of the new additional creative of the main creative. The main format properties, such as the Name, Format, and Target URL, are duplicated for the additional creative.

-
For a description of the different fields in the Header tab of the additional image, HTML5 creative, 3rd party tag, or Advar template, refer to Add an image, Add an HTML5 creative, Add a third-party tag, or Add an Advar creative, respectively.
-
Click the Save button. The additional creative is now visible in the Header tab of the main creative under the Uploaded additional creatives section.

-
Just repeat the above process if you wish to add another additional creative.
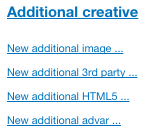
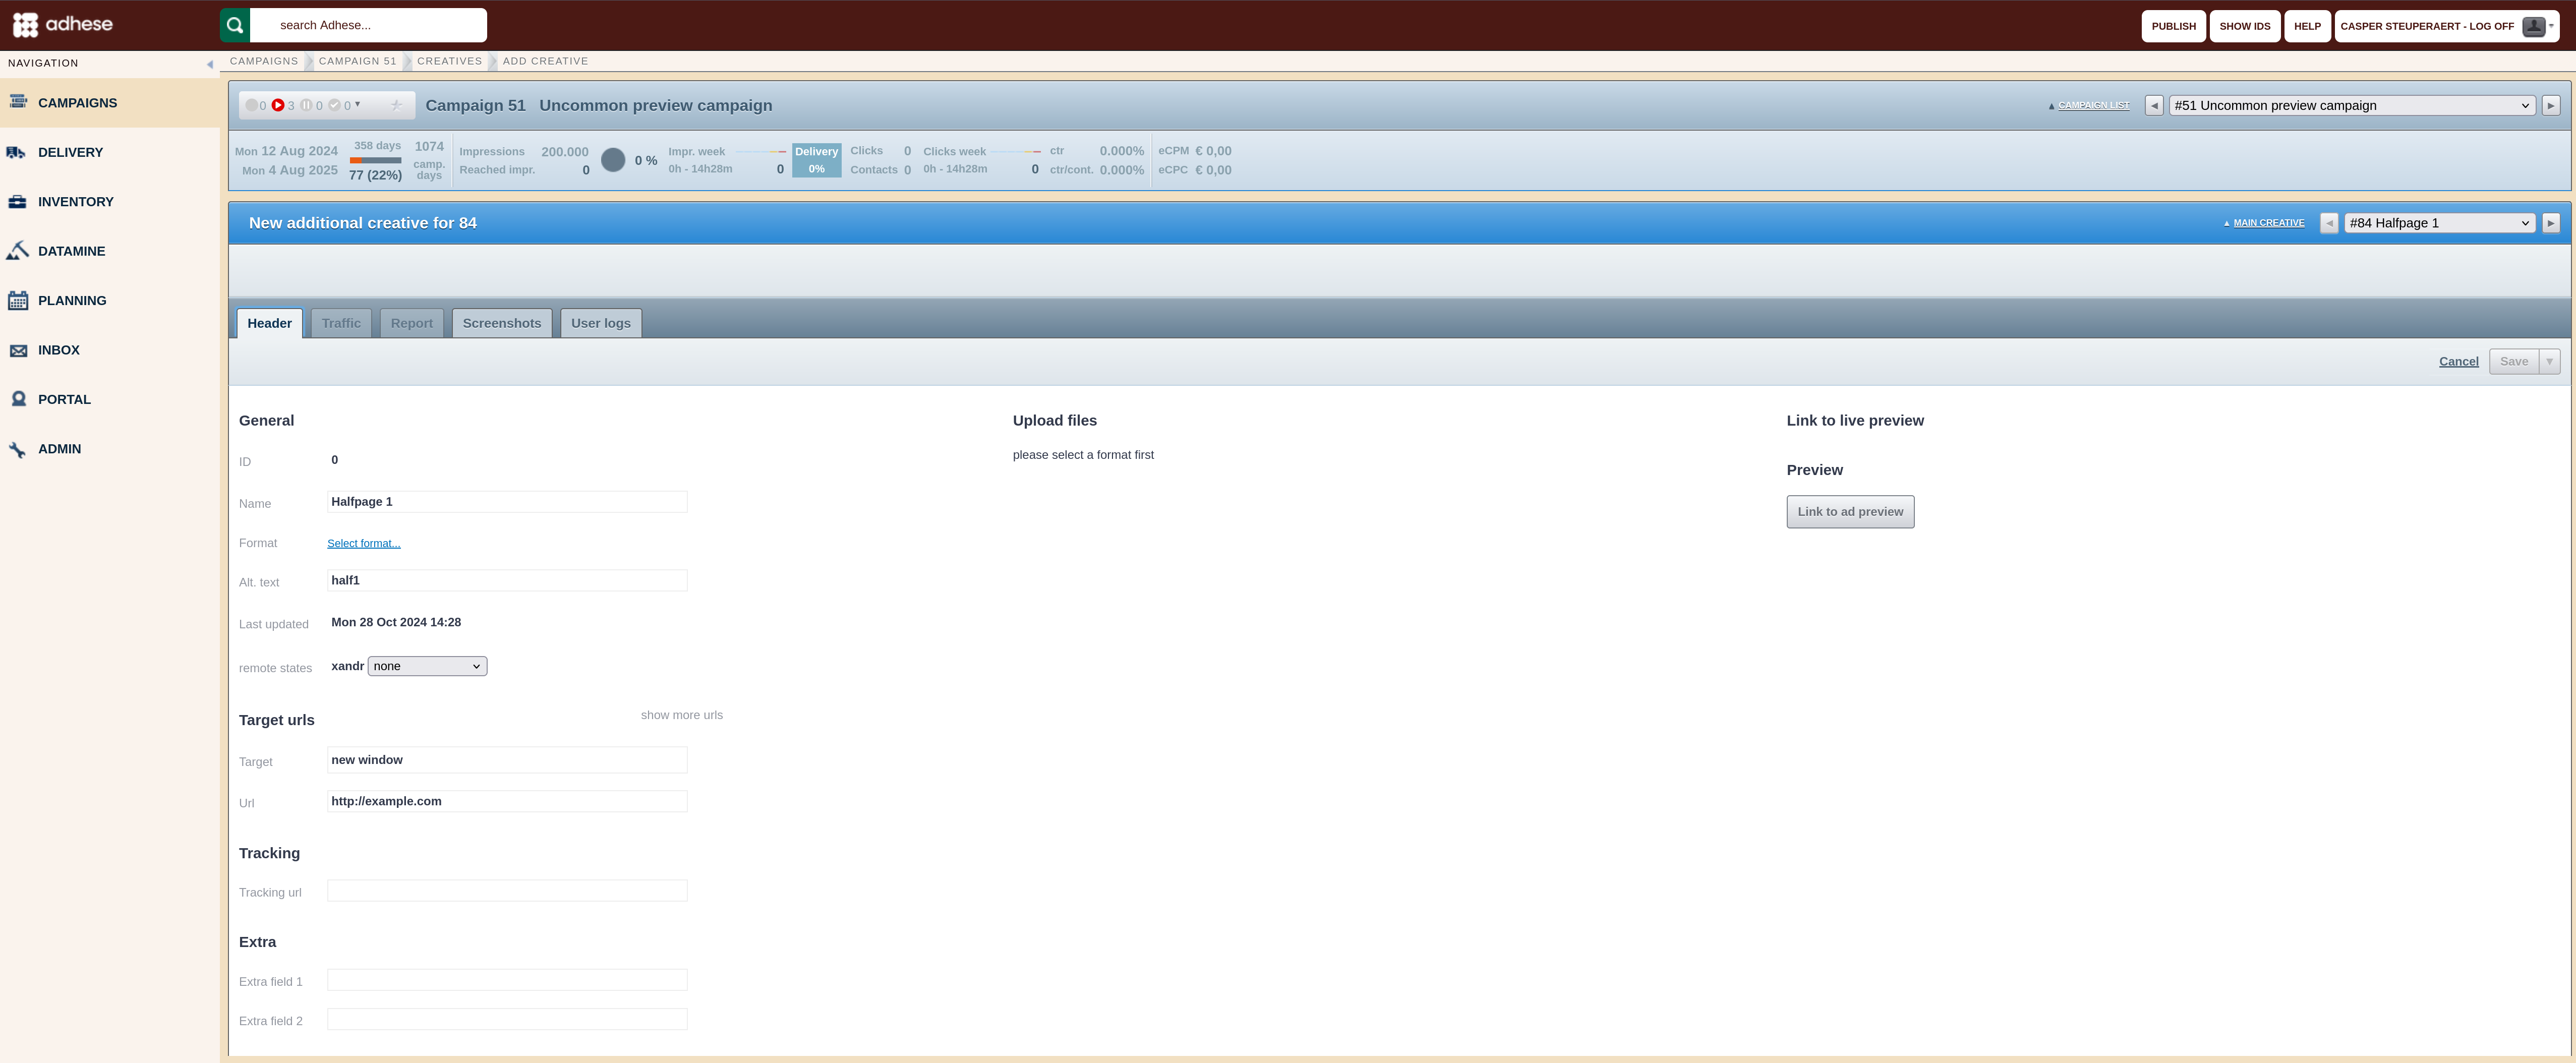
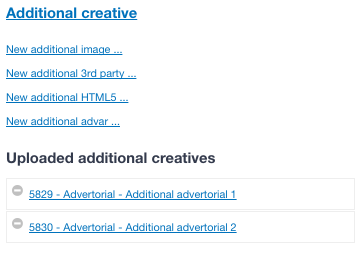
Save additional creative
To save the additional creative, click the Save button. When you click the arrow next to the button, additional saving options are available in a drop-down menu.

|
Save and create booking |
Saves the current creative and opens a new create booking screen |
|
Save and create Image Creative |
Saves the current creative and opens a create Image Creative screen |
|
Save and create 3rd party Creative |
Saves the current creative and opens a create 3rd party Creative screen |
|
Save and create Advar Creative |
Saves the current creative and opens a create Advar Creative screen |
|
Save and create HTML5 Creative |
Saves the current creative and opens a create HTML5 Creative screen |
|
Save and go to traffic screen |
Saves the current creative and goes to the traffic screen for that creative |
Edit an additional creative
To edit an additional creative:
- From the Creatives overview, select the main creative to which the additional creative belongs. The Header tab of the main creative opens.
- From the Uploaded additional creative(s) section, select the additional creative you wish to edit. The Header tab of the additional creative opens.
- Edit the additional creative.
- Click the Save button to save your modifications.
Technical implementation of JSON
When calling the main creative in JSON, the JSON content contains an extra array: additionalCreatives This array contains the JSON content of the additional creatives. By using this approach, developers can efficiently review the array of additional creatives and select the one that suits their needs. Next to the additional creatives, the array always contains the main creative. As a consequence, you can loop through the array. This approach enables easier development, as you only need to perform a single request and then select the desired creative.
{
"dm": "[adheseAdditionalRequestParameters:dmADV2488]",
"adType": "advertorial",
"adFormat": "",
"timeStamp": "1463480160000",
"share": "0",
"priority": "0",
"orderId": "1927",
"adspaceId": "7597",
"adspaceKey": "",
"body": "",
"trackingUrl": "http://main.html5.be",
"tracker": "https://[adheseEnv:HTTP_HOST]/track/[adheseLogID]/[adheseRequestDataFlat]/?t=[adheseTimestampNowMs]",
"extraField1": "main html5 creative",
"extraField2": "",
"altText": "",
"height": "260",
"width": "468",
"tag": "<IFRAME SRC='http://pool.stage.adhese.com/pool/lib/5833/web/640x150_fr.html?adheselogid=[adheseLogID]&adheserequestdata=[adheseRequestDataFlat]' WIDTH='468' HEIGHT='260' ALT='' FRAMEBORDER='0' SCROLLING='NO'></IFRAME>",
"tagUrl": "http://pool.stage.adhese.com/pool/lib/5833.zip",
"heightLarge": "0",
"widthLarge": "0",
"libId": "5833",
"id": "60481",
"advertiserId": "2488",
"orderProperty": "",
"ext": "zip",
"swfSrc": "http://pool.stage.adhese.com/pool/lib/5833.zip",
"url": "http://clicks.stage.adhese.com/raylene/[adheseRequestDataFlat]/ad60481/URhttp://www.target.be",
"clickTag": "http://clicks.stage.adhese.com/raylene/[adheseRequestDataFlat]/ad60481/UR",
"swfSrc2nd": "",
"swfSrc3rd": "",
"swfSrc4th": "",
"poolPath": "http://pool.stage.adhese.com/pool/lib/",
"comment": "",
"adDuration": "0",
"adDuration2nd": "0",
"adDuration3rd": "0",
"adDuration4th": "0",
"orderName": "Demo Campaign",
"creativeName": "MAIN HTML5",
"deliveryMultiples": "free",
"deliveryGroupId": "o1927g0c0",
"adspaceStart": "1463436000000",
"adspaceEnd": "1463695199000",
"swfSrc5th": "",
"swfSrc6th": "",
"adDuration5th": "0",
"adDuration6th": "0",
"width3rd": "0",
"width4th": "0",
"width5th": "0",
"width6th": "0",
"height3rd": "0",
"height4th": "0",
"height5th": "0",
"height6th": "0",
"slotName": "[adheseReplace:SL]",
"additionalCreatives": [
{
"dm": "[adheseAdditionalRequestParameters:dmADV2488]",
"adType": "advertorial",
"adFormat": "advertorialDesktop",
"timeStamp": "1463480206000",
"share": "0",
"priority": "0",
"orderId": "1927",
"adspaceId": "7597",
"adspaceKey": "",
"body": "",
"trackingUrl": "http://additional.image.be",
"tracker": "https://[adheseEnv:HTTP_HOST]/track/[adheseLogID]/[adheseRequestDataFlat]/?t=[adheseTimestampNowMs]",
"extraField1": "additional image creative",
"extraField2": "",
"altText": "",
"height": "90",
"width": "728",
"tag": "<A TARGET='_blank' HREF='http://clicks.stage.adhese.com/raylene/[adheseRequestDataFlat]/ad60481/URhttp://www.target2.be' TITLE=''><IMG SRC='http://pool.stage.adhese.com/pool/lib/5834.gif?t=1463480206000' WIDTH='728' HEIGHT='90' ALT='' BORDER=0/></A>",
"tagUrl": "http://pool.stage.adhese.com/pool/lib/5834.gif",
"heightLarge": "0",
"widthLarge": "0",
"libId": "5834",
"id": "60481",
"advertiserId": "2488",
"orderProperty": "",
"ext": "gif",
"swfSrc": "http://pool.stage.adhese.com/pool/lib/5834.gif",
"url": "http://clicks.stage.adhese.com/raylene/[adheseRequestDataFlat]/ad60481/URhttp://www.target2.be",
"clickTag": "http://clicks.stage.adhese.com/raylene/[adheseRequestDataFlat]/ad60481/UR",
"swfSrc2nd": "",
"swfSrc3rd": "",
"swfSrc4th": "",
"poolPath": "http://pool.stage.adhese.com/pool/lib/",
"comment": "",
"adDuration": "0",
"adDuration2nd": "0",
"adDuration3rd": "0",
"adDuration4th": "0",
"orderName": "Demo Campaign",
"creativeName": "Additional image creative",
"deliveryMultiples": "free",
"deliveryGroupId": "o1927g0c0",
"adspaceStart": "1463436000000",
"adspaceEnd": "1463695199000",
"swfSrc5th": "",
"swfSrc6th": "",
"adDuration5th": "0",
"adDuration6th": "0",
"width3rd": "0",
"width4th": "0",
"width5th": "0",
"width6th": "0",
"height3rd": "0",
"height4th": "0",
"height5th": "0",
"height6th": "0",
"slotName": "[adheseReplace:SL]",
"additionalCreatives": "<ADDITIONAL_CREATIVES_ARRAY>"
},
{
"dm": "[adheseAdditionalRequestParameters:dmADV2488]",
"adType": "advertorial",
"adFormat": "advertorialMobile",
"timeStamp": "1463480160000",
"share": "0",
"priority": "0",
"orderId": "1927",
"adspaceId": "7597",
"adspaceKey": "",
"body": "",
"trackingUrl": "http://main.html5.be",
"tracker": "https://[adheseEnv:HTTP_HOST]/track/[adheseLogID]/[adheseRequestDataFlat]/?t=[adheseTimestampNowMs]",
"extraField1": "main html5 creative",
"extraField2": "",
"altText": "",
"height": "260",
"width": "468",
"tag": "<IFRAME SRC='http://pool.stage.adhese.com/pool/lib/5833/web/640x150_fr.html?adheselogid=[adheseLogID]&adheserequestdata=[adheseRequestDataFlat]' WIDTH='468' HEIGHT='260' ALT='' FRAMEBORDER='0' SCROLLING='NO'></IFRAME>",
"tagUrl": "http://pool.stage.adhese.com/pool/lib/5833.zip",
"heightLarge": "0",
"widthLarge": "0",
"libId": "5833",
"id": "60481",
"advertiserId": "2488",
"orderProperty": "",
"ext": "zip",
"swfSrc": "http://pool.stage.adhese.com/pool/lib/5833.zip",
"url": "http://clicks.stage.adhese.com/raylene/[adheseRequestDataFlat]/ad60481/URhttp://www.target.be",
"clickTag": "http://clicks.stage.adhese.com/raylene/[adheseRequestDataFlat]/ad60481/UR",
"swfSrc2nd": "",
"swfSrc3rd": "",
"swfSrc4th": "",
"poolPath": "http://pool.stage.adhese.com/pool/lib/",
"comment": "",
"adDuration": "0",
"adDuration2nd": "0",
"adDuration3rd": "0",
"adDuration4th": "0",
"orderName": "Demo Campaign",
"creativeName": "MAIN HTML5",
"deliveryMultiples": "free",
"deliveryGroupId": "o1927g0c0",
"adspaceStart": "1463436000000",
"adspaceEnd": "1463695199000",
"swfSrc5th": "",
"swfSrc6th": "",
"adDuration5th": "0",
"adDuration6th": "0",
"width3rd": "0",
"width4th": "0",
"width5th": "0",
"width6th": "0",
"height3rd": "0",
"height4th": "0",
"height5th": "0",
"height6th": "0",
"slotName": "[adheseReplace:SL]",
"additionalCreatives": "<ADDITIONAL_CREATIVES_ARRAY>"
}
]
}
Upload expandable creatives
An expandable creative increases beyond the original dimensions of the creative upon a user-initiated action, such as a click or a (delayed) mouse hover. This enables interaction with your audience.
To create an expandable creative, use two image files.
If you want to upload an expandable creative, you need two different creatives. The following clarification on how to upload an expandable creative uses a medium rectangle (300*250) that expands into an overlayer as an example.
To upload an expandable creative:
- Go to the Campaign overview, click Campaigns in the left navigation menu of Adhese.
- Create a new campaign or click the campaign for which you wish to upload an expandable creative.
- Click the Creatives tab. The Creative overview opens.
- Click the Add Image button to add a creative.
- Give the creative a name, choose the correct format, and determine the target URL.
- Upload the image file of the medium rectangle as the main file.
- Upload the image file of the medium rectangle (or the overlayer ad) as the second file.
- Click the Save button.
- Check the live preview by moving your mouse over the medium rectangle.
Creative dashboard
Each overview of an individual creative has a creative dashboard. This dashboard is located below the Campaign dashboard.

The Creative dashboard shows the following data and results:
- Start and end date of the creative;
- Total number of calendar days the creative is running, together with a progress bar indicating the number of days that have passed;
- Total number of "creative days". The total number of creative days equals the sum of the calendar days for each booking to which the creative is attached to.
- Total number of served impressions;
- Total number of impressions for the past seven days
- A bar chart denotes the daily impressions. The weekends are indicated with a darker colour, while today is coloured orange;
- Below this bar you can see the number of impressions already served today;
- Total number of delivered clicks;
- Total number of contacts or unique impressions.
- Total number of clicks for the past seven days
- A bar chart denotes the daily number of clicks. The weekends are indicated with a darker colour, while today is coloured orange;
- Below this bar you can see the number of impressions already served today;
- Click-through rate (CTR) or the number of clicks as a percentage of the total number of impressions;
- Click-through rate/contacts (CTR/cont.) or the number of clicks as a percentage of the total number of contacts;
- eCPM, or the effective cost per 1000 impressions. The eCPM is calculated by dividing the total revenue by the total number of thousands of impressions. The eCPM gives an idea of how much a booking would cost if sold on a CPM basis. This allows you to compare different bookings or campaigns;
- eCPC, or the effective cost per click. The eCPC is calculated by dividing the total earnings by the total number of clicks;
Editing a creative
To edit a creative:
- Go to the Campaign overview and click Campaigns in the left navigation menu of Adhese.
- Click the campaign for which you want to modify a creative.
- Go to the Creative overview and click the Creatives tab.
- Click the creative you want to edit. The Header tab of the creative opens.
- Change any of the properties in the Header tab.
- Click Save. A confirmation message briefly appears.
If two or more files are uploaded to a creative, and one of the files requires an adjustment, the other file(s) must also be uploaded again to implement the adjustment correctly.
Duplicate a creative
To duplicate or copy a creative:
- Go to the Campaign overview and click Campaigns in the left navigation menu of Adhese.
- Click the campaign for which you want to duplicate a creative.
- Go to the Creative overview and click the Creatives tab.
- Select the creative you want to duplicate by ticking its box in the overview.
- Click the Duplicate button above the overview.

- Click OK on the confirmation screen. The creative is duplicated

- The duplicated creative is briefly highlighted in the overview.


Or,
- Go to the Campaign overview and click Campaigns in the left navigation menu of Adhese.
- Click the campaign for which you want to duplicate a creative.
- Go to the Creative overview and click the Creatives tab.
- Click the creative you want to duplicate.
- Click on Options left to the title of the creative. A list appears.

- Click Duplicate creative.
- Click OK on the confirmation screen. The creative is duplicated
- The duplicated creative is named Copy of [original creative] and is briefly highlighted in the Creative overview.


The duplicated creative is an exact copy of the original creative.
Remove a creative
To remove a creative:
- Go to the Campaign overview and click Campaigns in the left navigation menu of Adhese.
- Click the campaign for which you want to remove a creative.
- Go to the Creative overview and click the Creatives tab.
- Select the creative you want to remove by ticking its box in the overview.
- Click the Remove button above the overview.

- Click OK on the confirmation screen. This removes the creative.

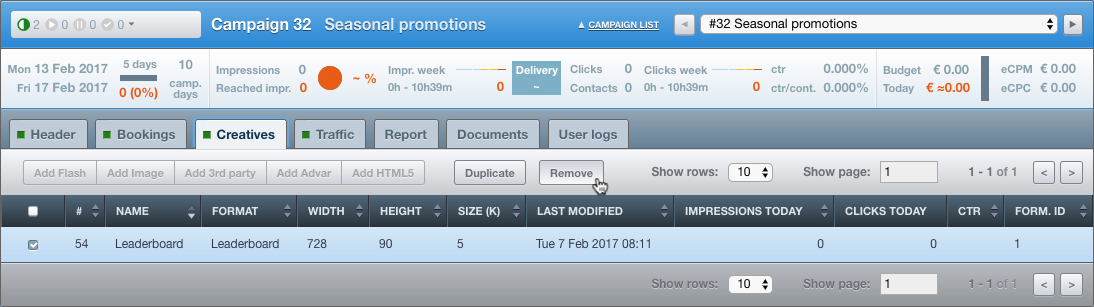
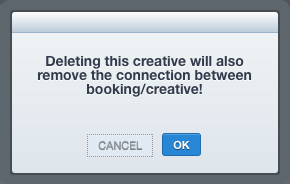
Or,
- Go to the Campaign overview and click Campaigns in the left navigation menu of Adhese.
- Click the campaign for which you want to remove a creative.
- Go to the Creative overview and click the Creatives tab.
- Click the creative you want to remove.
- Click on Options left to the title of the creative. A list appears.
- Click Remove creative.

- Click OK on the confirmation screen. The creative is removed.
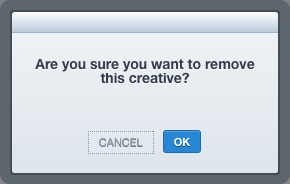

Note that a creative can only be removed if Adhese did not measure any impressions for the creative.
Live preview a creative
Once a campaign has been created and bookings are in order, live preview links will appear on the individual Creative screen. Each link contains a collection of parameters that can be used to perform a live preview request.
?adhesePreviewCreativeId=71578&
adhesePreviewSlotId=51512&
adhesePreviewCreativeTemplate=HALFP&
adhesePreviewWidth=300&
adhesePreviewHeight=250&
adhesePreviewTemplateFile=preview.html&
adhesePreviewCreativeKey=null
The next table describes the parameters from the above live preview URL:
|
Parameter |
Description |
|---|---|
|
The ID of the creative |
|
The ID of the booked position |
|
The code of the creative's format |
|
The width of the creative in pixels |
|
The height of the creative in pixels |
|
|
|
The key of the creative |
Requesting a preview of a creative can be done using one of the following languages:
JavaScript
http://[account]-preview.adhese.org/creatives/preview/tag.do?id=[adhesePreviewCreativeId]&slotId=[adhesePreviewSlotId]
This URL must be set as the source for a <script> tag. The URL will return regular JavaScript, which can contain document.write statements. This script should be called in the same place as a live ad would be called.
When making use of the JavaScript SDK, the SDK code generates the <script> tag and the URL.
JSON
https://[account]-preview.adhese.org/creatives/preview/json/tag.do?id=[adhesePreviewCreativeId]
JSONP
https://[account]-preview.adhese.org/creatives/preview/jsonp/tag.do?id=[adhesePreviewCreativeId]&callback=[callbackFunctionName]
The JSON / JSONP preview can be requested asynchronously. The returned JSON has the same structure as the live JSON and can be processed in the same way as the live JSON response.
Multiple creatives
The JSON / JSONP URLs also support multiple creatives. Repeating the id parameter will return multiple creatives:
.../tag.do?id=[adhesePreviewCreativeId]&id=[adhesePreviewCreativeId]
You can find more info on previewing multiple creatives at Composing a live preview with more than one creative here below. This method adds all necessary info to the page URL and displays a preview of more than one creative on the same page.
Preview domains
To preview XML files (such as VAST) correctly in the Adhese interface, a crossdomain.xml file must be added to the root server of the preview host domain. For security reasons, the process of previewing a creative is hosted on a different domain than your original Adhese admin domain. This inhibits the crossdomain.xml file from having free access to the admin host. The crossdomain.xml file is a cross-domain policy file that enables a web client to communicate with servers other than the one on which it is hosted.
Composing a live preview with more than one creative
To compose a live preview with more than one creative:
-
Select the preview URLs of two creatives, for instance:
-
Leaderboard + wallpaper live preview URL:
http://www.test.com/?adhesePreviewCreativeId=1404&adhesePreviewSlotId=24056&adhesePreviewCreativeTemplate=leaderboard&adhesePreviewWidth=984&adhesePreviewHeight=120&adhesePreviewTemplateFile=preview.html&adhesePreviewCreativeKey=null -
Rectangle live preview URL:
http://www.test.com/?adhesePreviewCreativeId=1405&adhesePreviewSlotId=24058&adhesePreviewCreativeTemplate=rectangle&adhesePreviewWidth=336&adhesePreviewHeight=280&adhesePreviewTemplateFile=preview.html&adhesePreviewCreativeKey=null
-
-
Copy both links into a text file.
-
In the second URL, replace
http://www.test.com/?with an ampersand ("&"):&adhesePreviewCreativeId=1405&adhesePreviewSlotId=24058&adhesePreviewCreativeTemplate=rectangle&adhesePreviewWidth=336&adhesePreviewHeight=280&adhesePreviewTemplateFile=preview.html&adhesePreviewCreativeKey=null -
To create the live-preview URL with both creatives, paste the adjusted second URL after the first URL:
http://www.test.coml/?adhesePreviewCreativeId=1404&adhesePreviewSlotId=24056&adhesePreviewCreativeTemplate=leaderboard&adhesePreviewWidth=984&adhesePreviewHeight=120&adhesePreviewTemplateFile=preview.html&adhesePreviewCreativeKey=null&adhesePreviewCreativeId=1405&adhesePreviewSlotId=24058&adhesePreviewCreativeTemplate=rectangle&adhesePreviewWidth=336&adhesePreviewHeight=280&adhesePreviewTemplateFile=preview.html&adhesePreviewCreativeKey=null
Repeat the above procedure to add additional creatives to a preview URL.
Third-party tracking
In addition to the Adhese reporting tools, it is also possible to have a third-party platform monitor your creatives. This process is also known as third-party tracking.
To add third-party tracking to creatives, you need to define the unique tracking URL provided by your third-party vendor.
Add third-party tracking to a creative
- When adding a creative in the New creative screen, go to the Header tab's Tracking section.
- Enter the tracking URL given by your vendor in the Tracking URL field.
- Click the Save button.
About tracking URLs and tags
The collection of letters and numbers at the end of a tracking URL is the tag. You can only use a transparent 1x1-pixel image or tracking pixel.
If Adhese recognises the third-party vendor and its specific tracking URL, Adhese replaces the placeholders with the correct value. If a tracking URL contains one of the following values, Adhese replaces it with a timestamp:
- [timestamp]
- [random]
- [cachebuster]
- %d
- %n
If Adhese is unable to automatically recognise the type of tracking URL of a specific third-party vendor, it is important to add the correct Adhese tokens within the placeholders of the given third-party tracking URL. This enables Adhese to accurately track the creative, thereby reducing discrepancies in third-party reporting.
Make sure you do not use duplicate URLs. Otherwise, your results will be counted twice.
Trafficking bookings and creatives
Once a creative has been saved, it can be trafficked with a booked position. It is possible to attach multiple creatives to one booking or assign a creative to several booked positions.
To traffick bookings and creatives with each other:
- Go to the Campaign overview. Click Campaigns in the left navigation menu of Adhese.
- Click the campaign for which you want to traffic bookings and creatives. The Header tab of the campaign opens.
- Click the Traffic tab. The Traffic screen of the campaign opens.
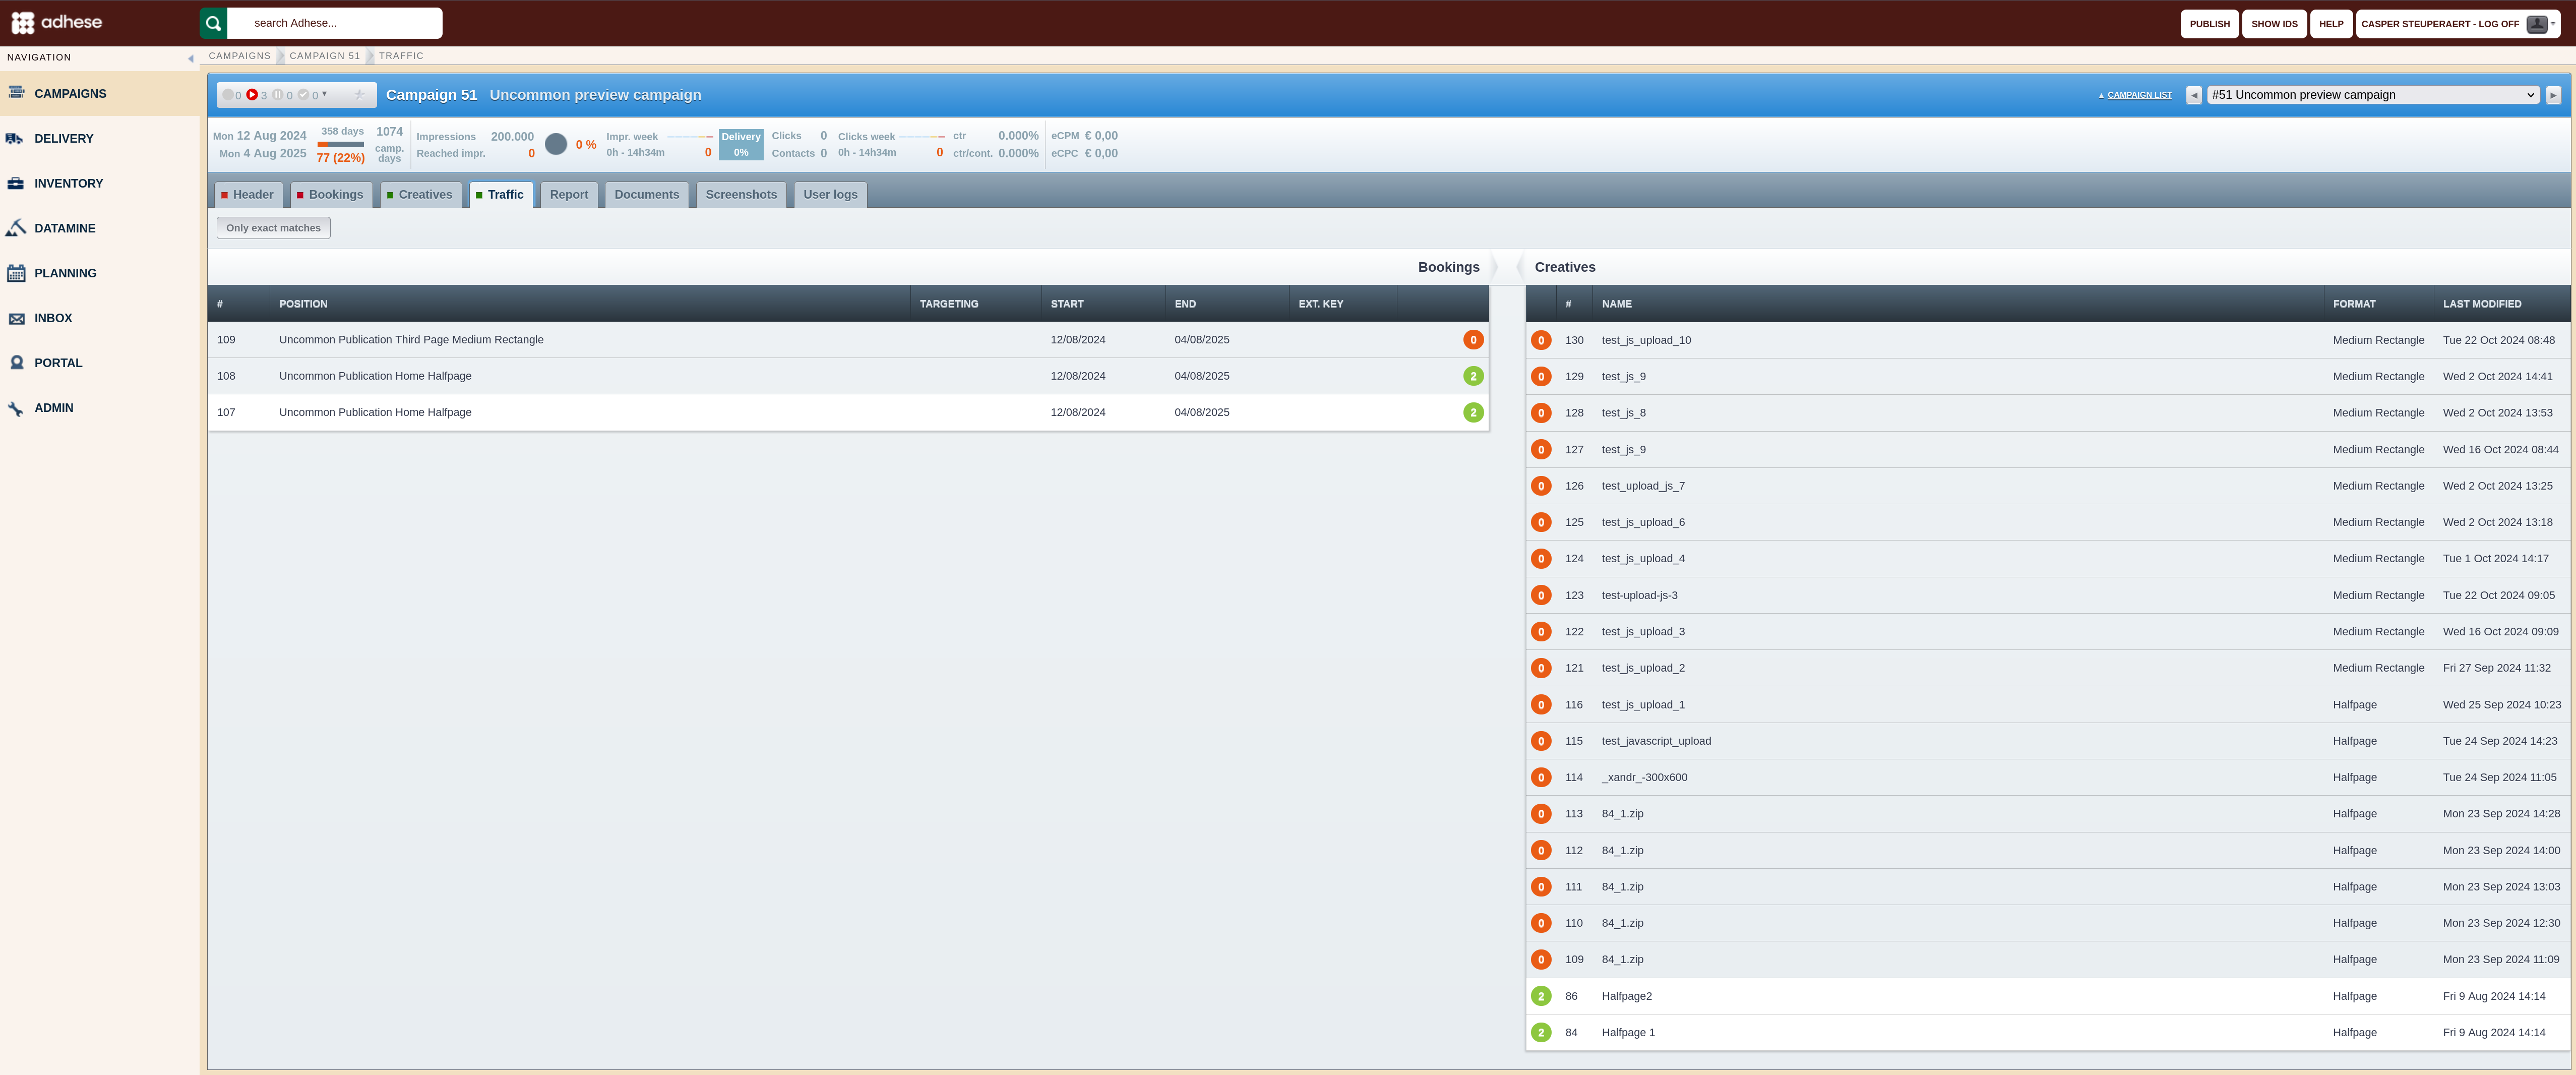
The left column shows the campaign's bookings. The coloured number next to each booking indicates the number of creatives attached to it.
The right column shows the uploaded creatives. The coloured number next to each creative indicates the number of bookings that are linked to it.
When hovering over a booking in the table, the creatives selected (as they match the booking's position) are highlighted. Similarly, when hovering over a creative in the table, the bookings that can be chosen are highlighted.

If bookings and creatives have already been combined, the Traffic tab will indicate which combinations are in existence when the user hovers over the table.
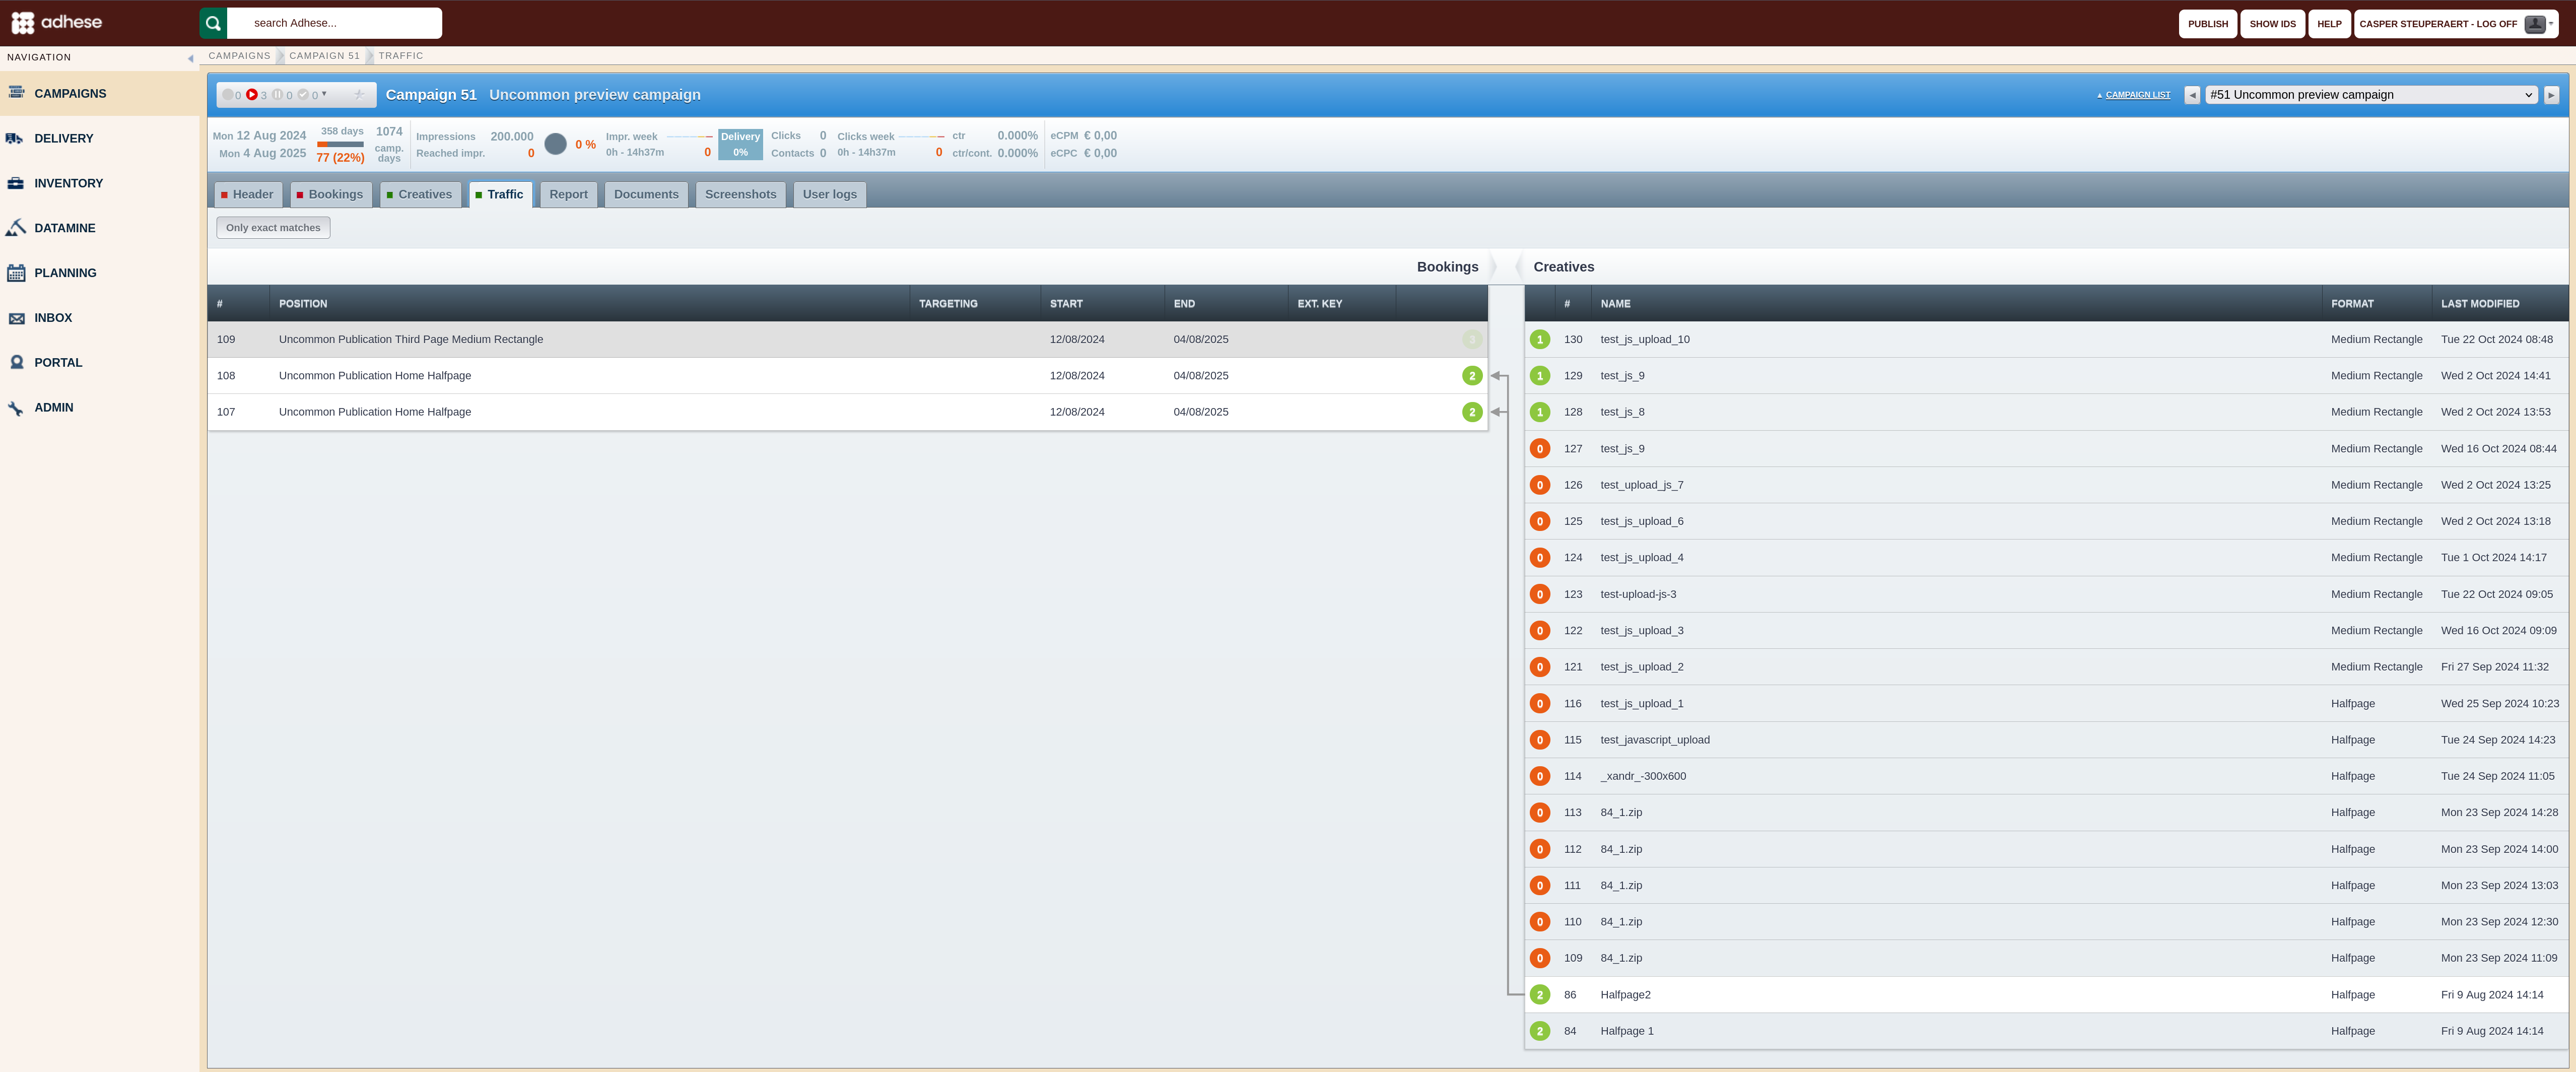
Attach a creative to a booking
To add a creative to a booking:
-
Select a booking in the campaign's Traffic tab. The Booking traffic tab opens.
-
In the right-hand column (next to the number indicating the number of bookings a creative is assigned to), a button indicates whether a combination exists ("ON") or not ("OFF"). This button connects a creative to a booking.

To connect a creative to the booking, click the OFF button. The button's text will change from OFF to ON, and an arrow will indicate the link between the booking and creative.

-
If you want to add another creative to the booking, repeat step 2.
-
To disconnect a creative from the booking, click the ON button. The button's text will now change from ON to OFF.

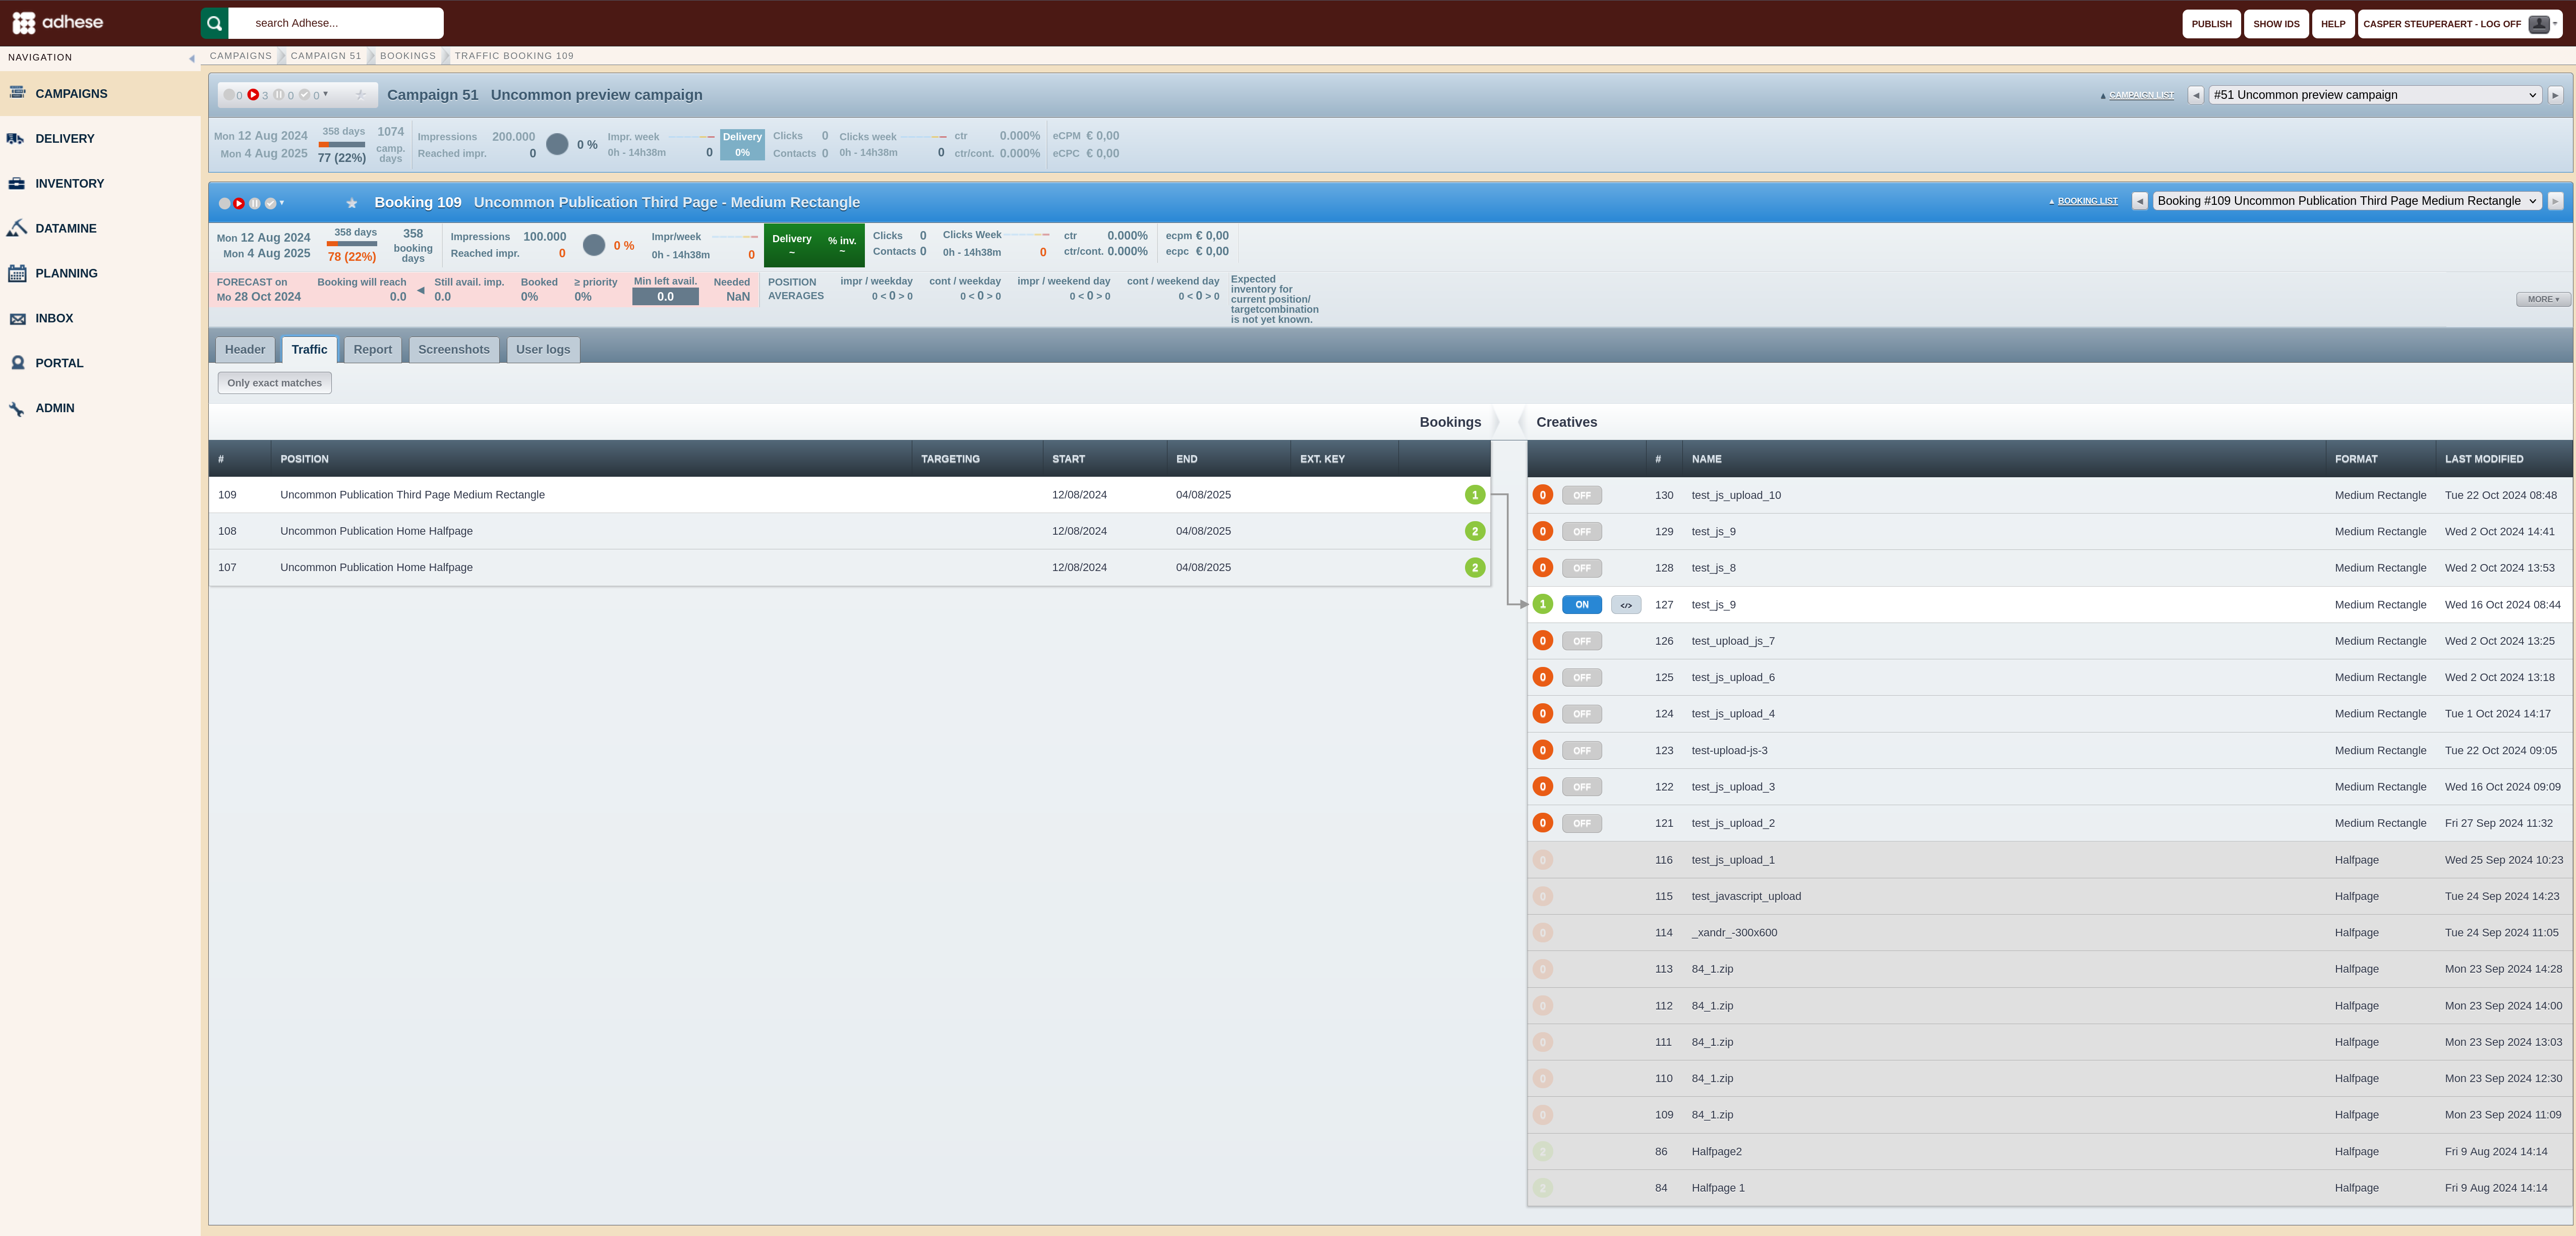
Weight per creative
If multiple creatives are attached to one booking, a button denoting the weight is shown displaying a percentage.
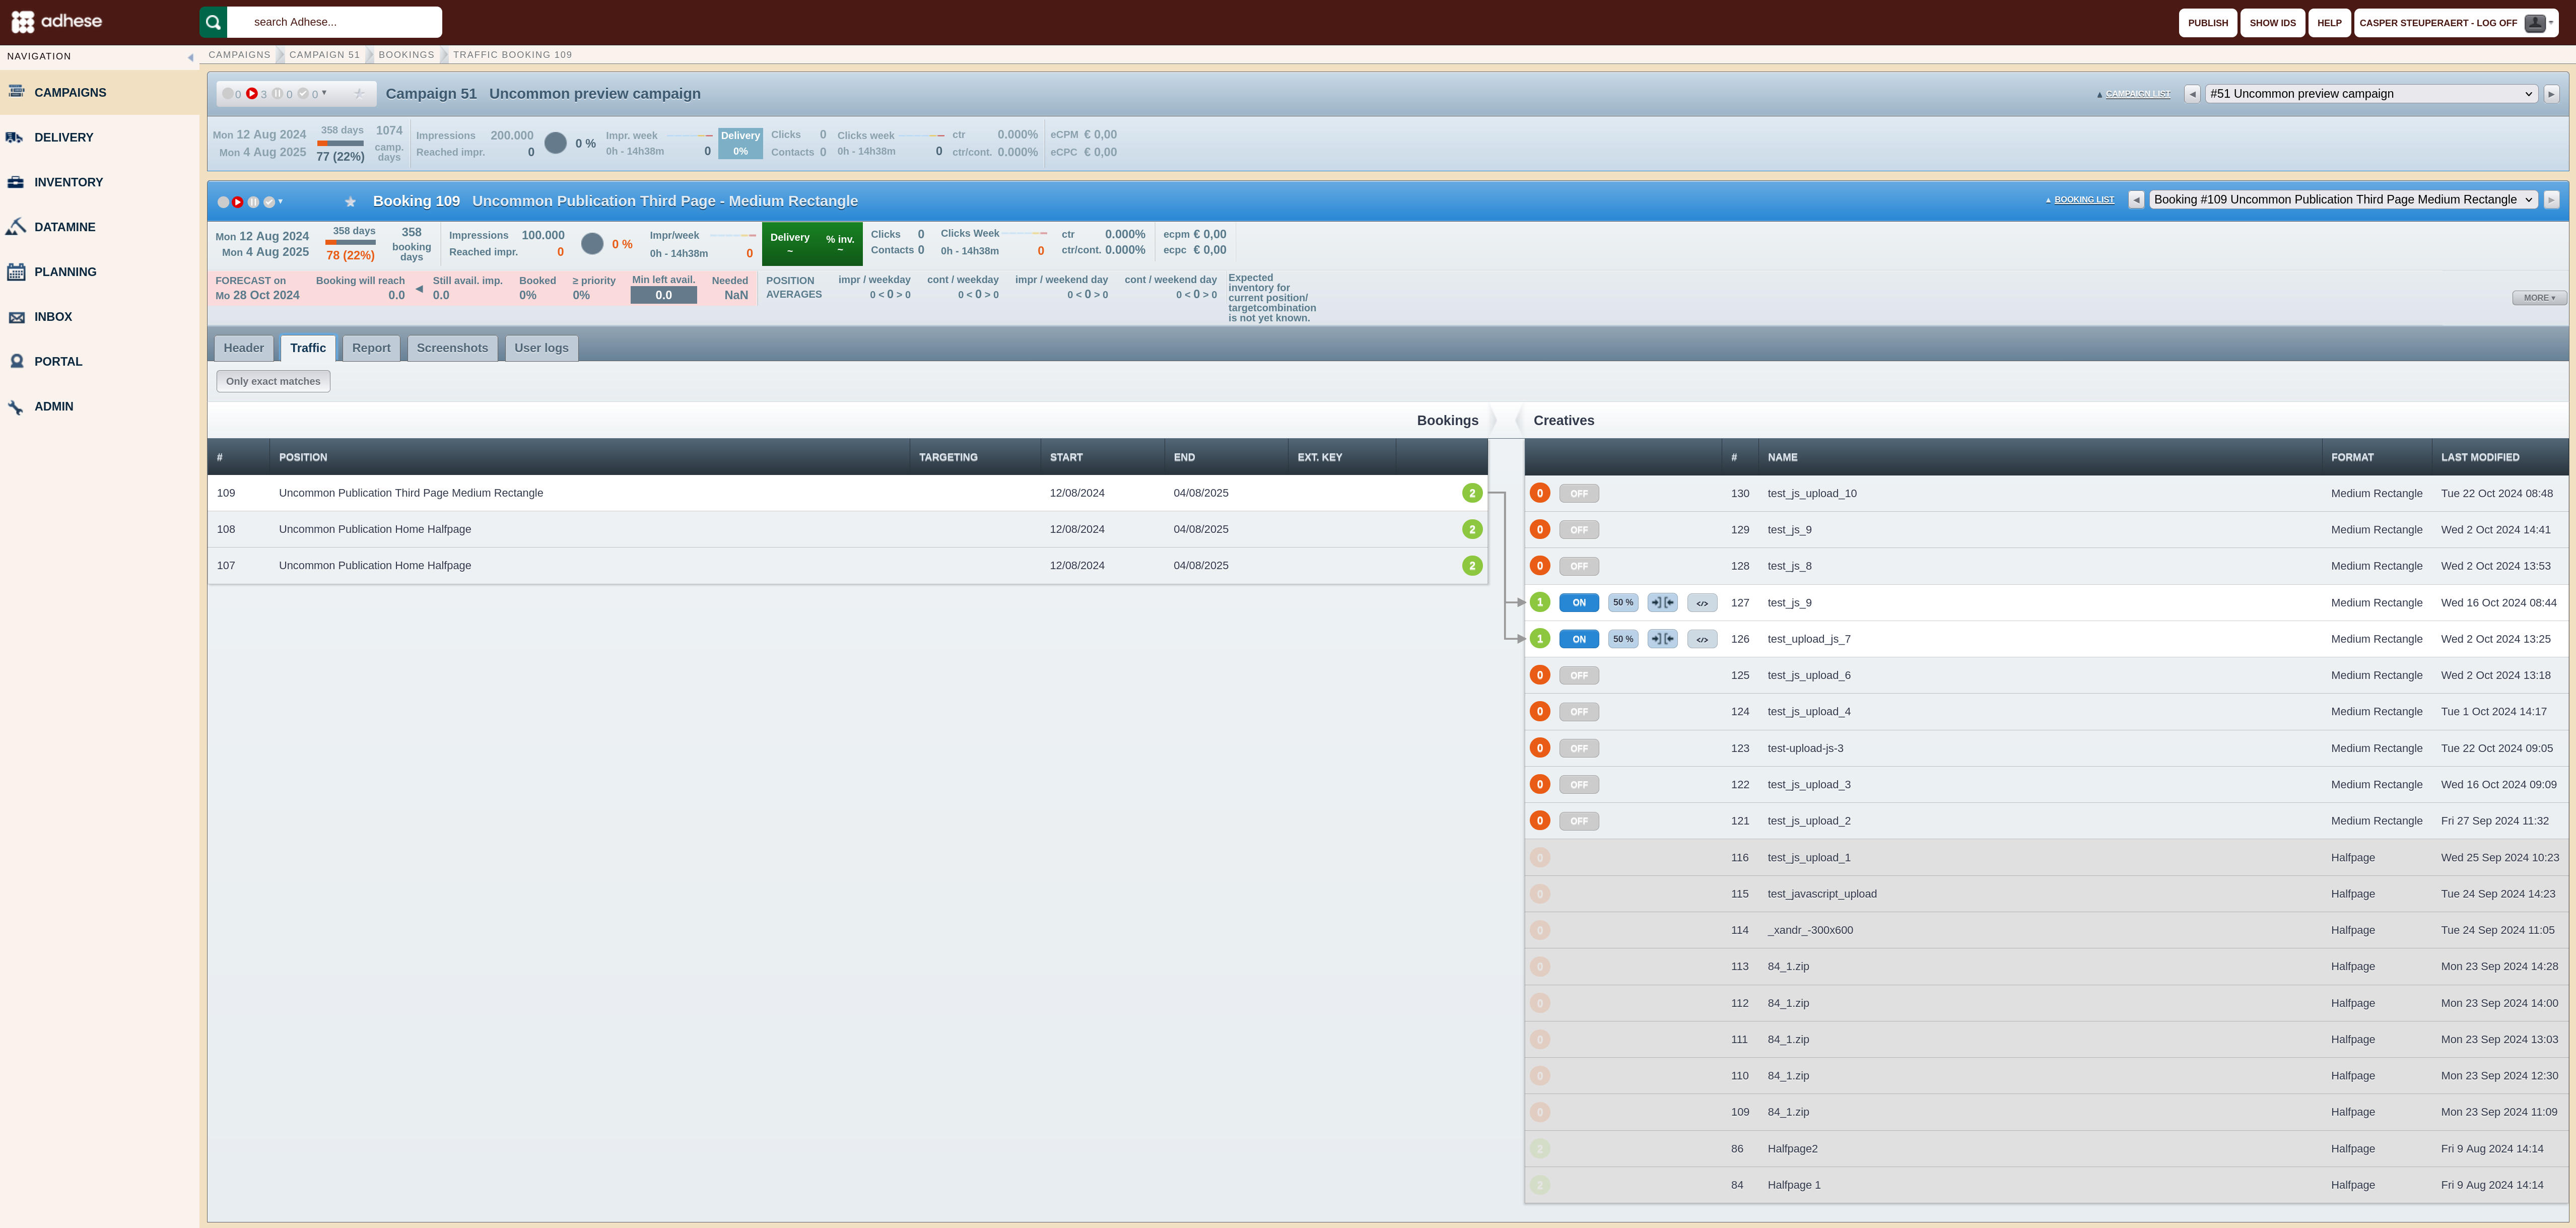
The weight of a creative indicates the distribution of delivery relative to other creatives attached to the same booking.
By default, each attached creative has the same weight. If two creatives are connected, each will be displayed half of the time. If three creatives are attached, each creative will be shown 33% of the time.
To change the distribution among the creatives:
-
Click the weight button. The Weight per creative modal window opens:

-
Enter an integer number to adjust the weight.
-
Click the Save button.
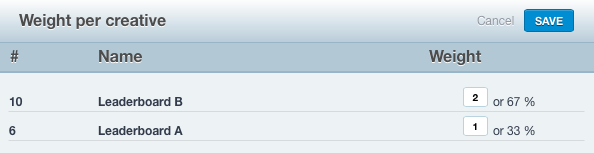
Time-specific creative
When different creatives must be shown throughout a campaign, you can set a time span for them instead of creating several bookings with different periods.
As outlined in the Attach a creative to a booking section, you may add as many creatives to a single booking as you require. Should you have multiple creatives, a button with two arrows will be displayed:
-
Select the creative that must be visible at a later date. When you click this button the time-specific creative modal window opens:

-
Set the start date and start hour when the alternative creative must be visible by clicking on the calendar icon. Set the end date and end hour of this creative by clicking on the calendar icon
-
Determine if the creative must be visible every day of the week or only on certain days
-
If more than one constraint (or period) is needed click on the plus button on the right
-
Click the save button
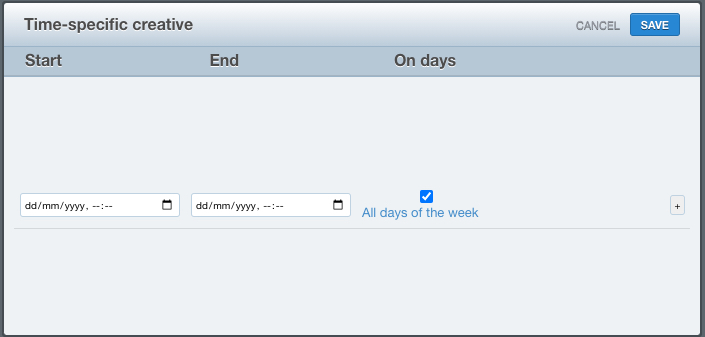
An example.
There is a booking running from September 1 until November 30, 2021. For most of the period, a (let’s call it) original creative is shown. For some dates, an alternative creative must be shown.
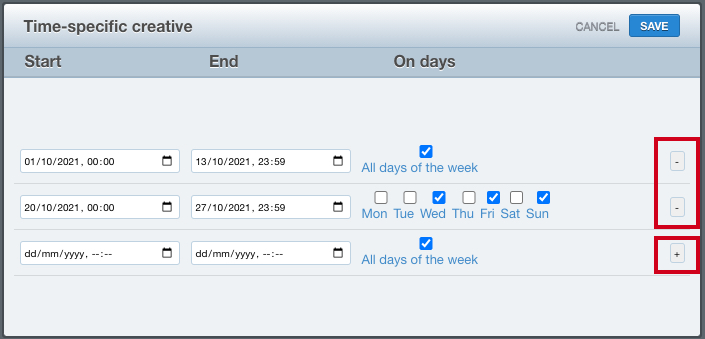
In the above screenshot, the alternative creative is shown all days of the week from 01/10/2021 at 00h00 until 13/10/2021 at 23h59. After that date, the other (original) creative will be visible again.
The second wave starts on 20/10/2021 at 00h00 and ends on 27/10/2022 at 23h59. During that period, the alternative creative is only shown on Wednesday, Friday, and Sunday, while the original creative is shown for the rest of the week.
You can easily add or delete a period by using the plus and minus buttons on the right.
It's not possible to have only time-constrained creatives on a booking. If you need all creatives to be time-constrained, attach a dummy creative (empty or fallback) to the booking. Constrained creatives will always take precedence over non-constrained creatives.
When trying to traffick bookings with all constrained creatives, or when trying to traffick a booking with creatives when there are still bookings with all constrained creatives, a warning will pop up. Remove time constraints on all constrained creatives before continuing trafficking bookings and creatives
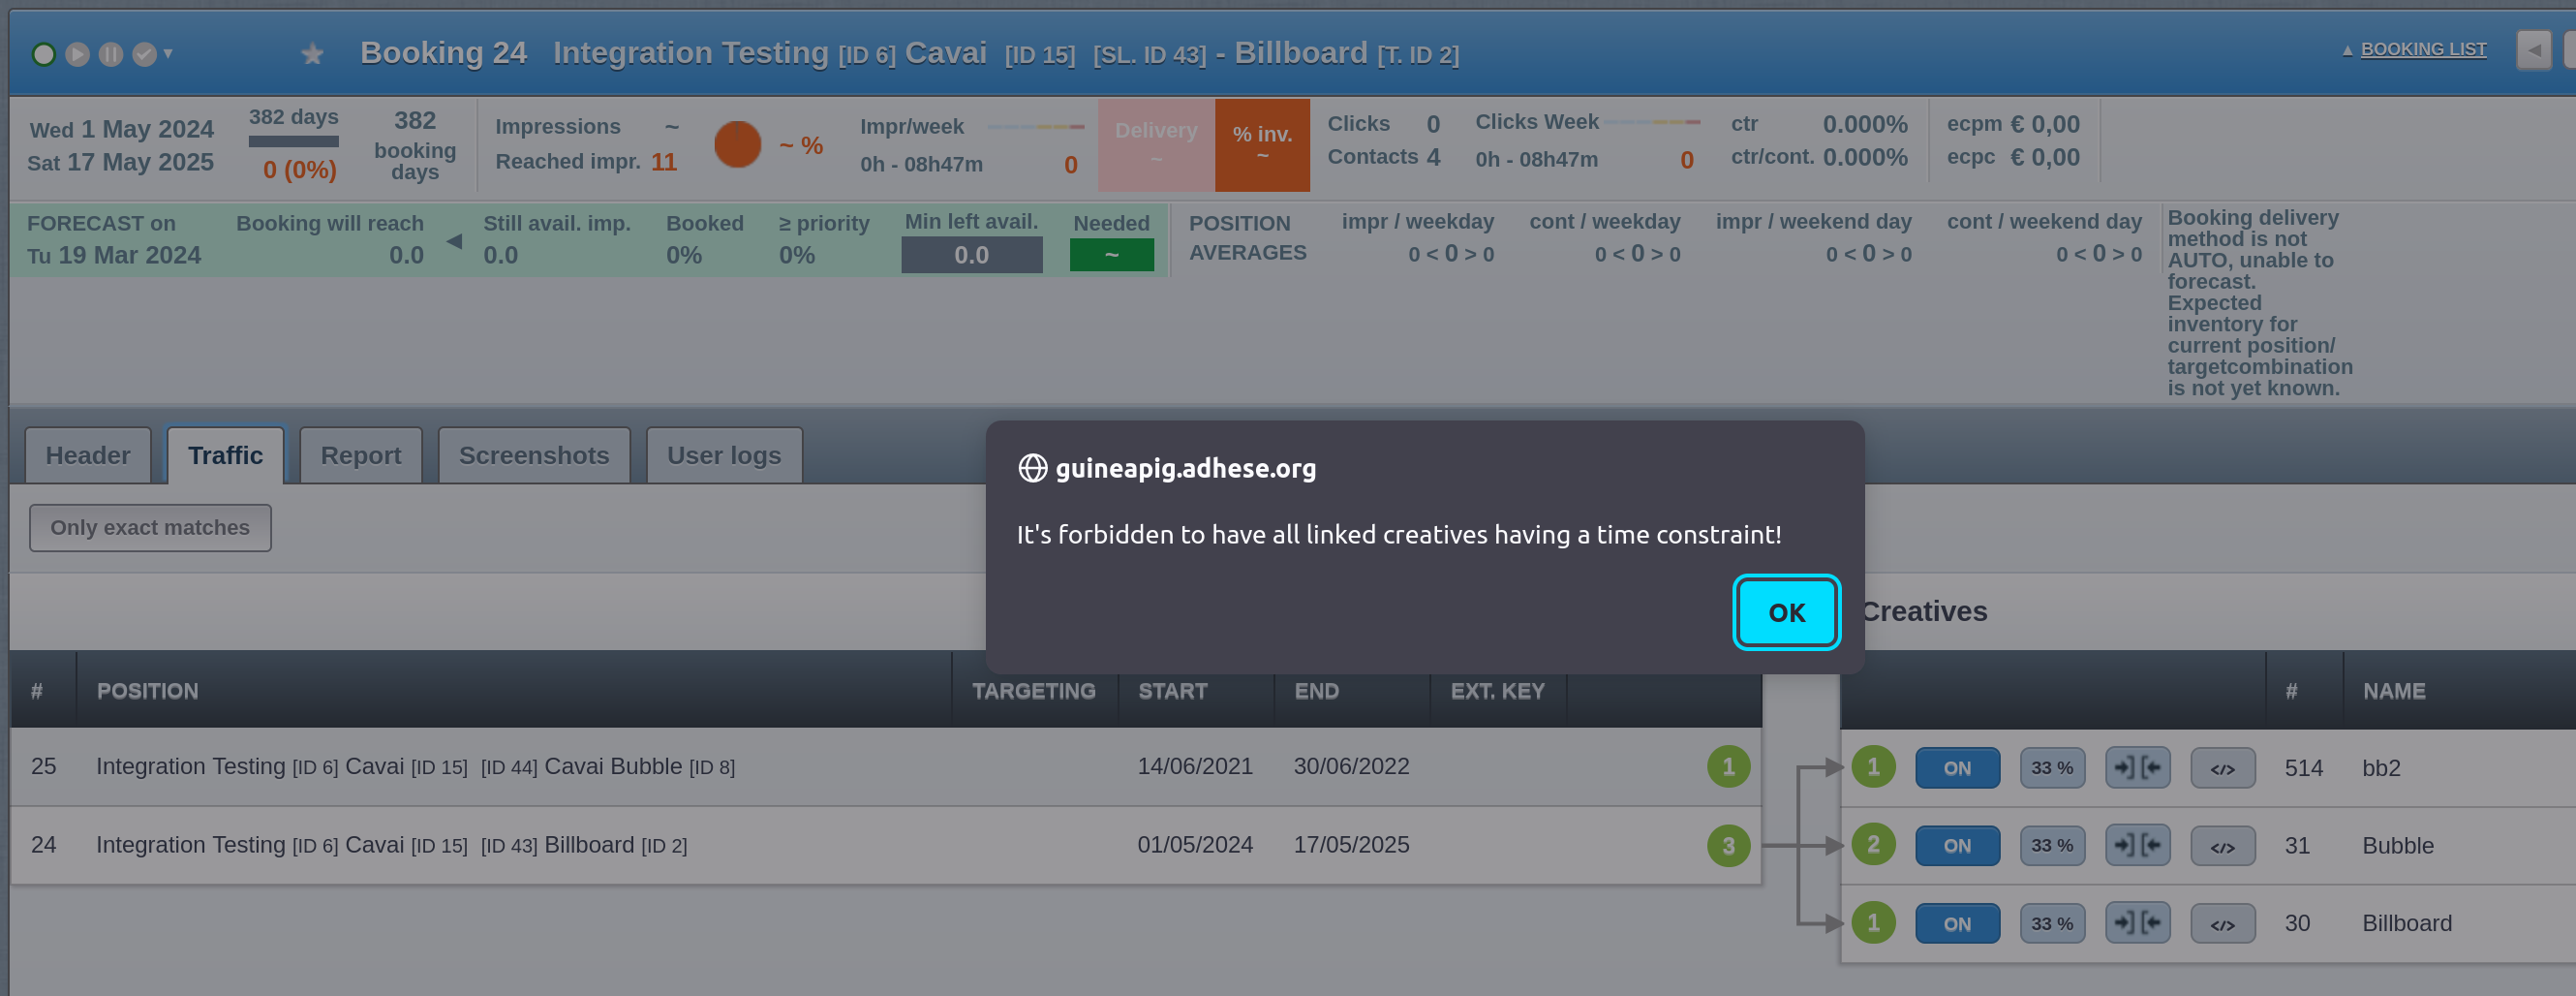
Assign a booking to a creative
To assign a booked position to a creative:
-
Select a creative in the campaign's Traffic tab. The creative traffic tab opens.
-
In the left column (next to the number indicating the number of creatives attached to a booking), a button indicates whether a combination exists ("ON") or not ("OFF"). This button assigns a booking to a creative.

-
To assign a booking to the creative, click the OFF button. The button's text will change from OFF to ON, and an arrow will indicate the link between the booking and creative.

-
If you want to assign another booking, repeat step 3.
-
If you're going to disconnect bookings and creatives from each other, click the ON button. The button's text will now change from ON to OFF.
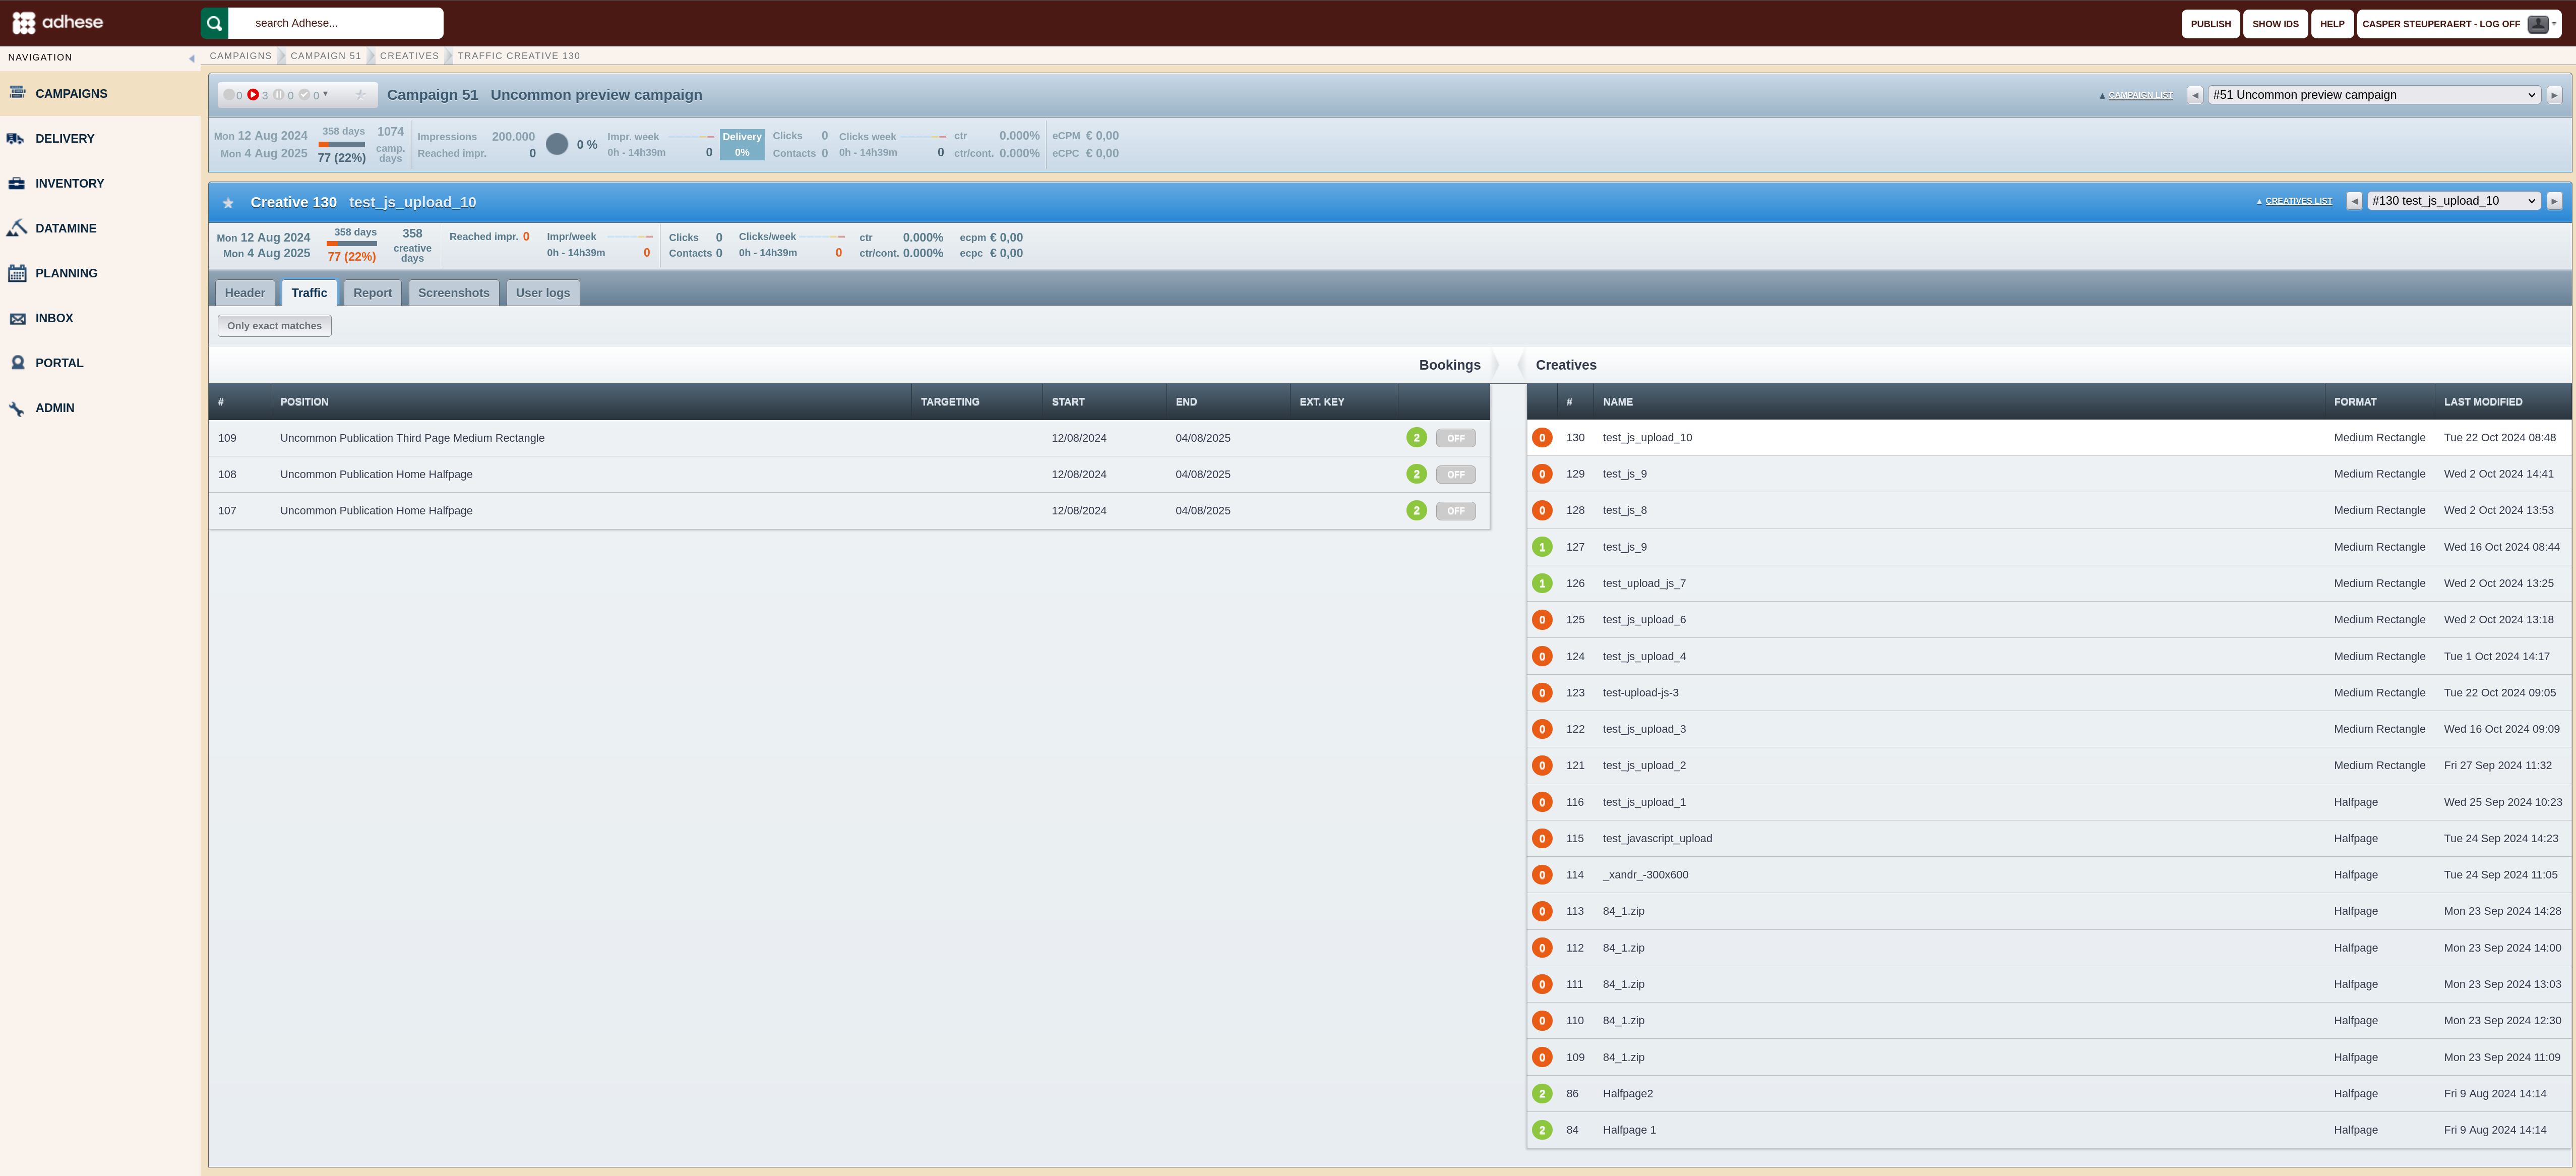
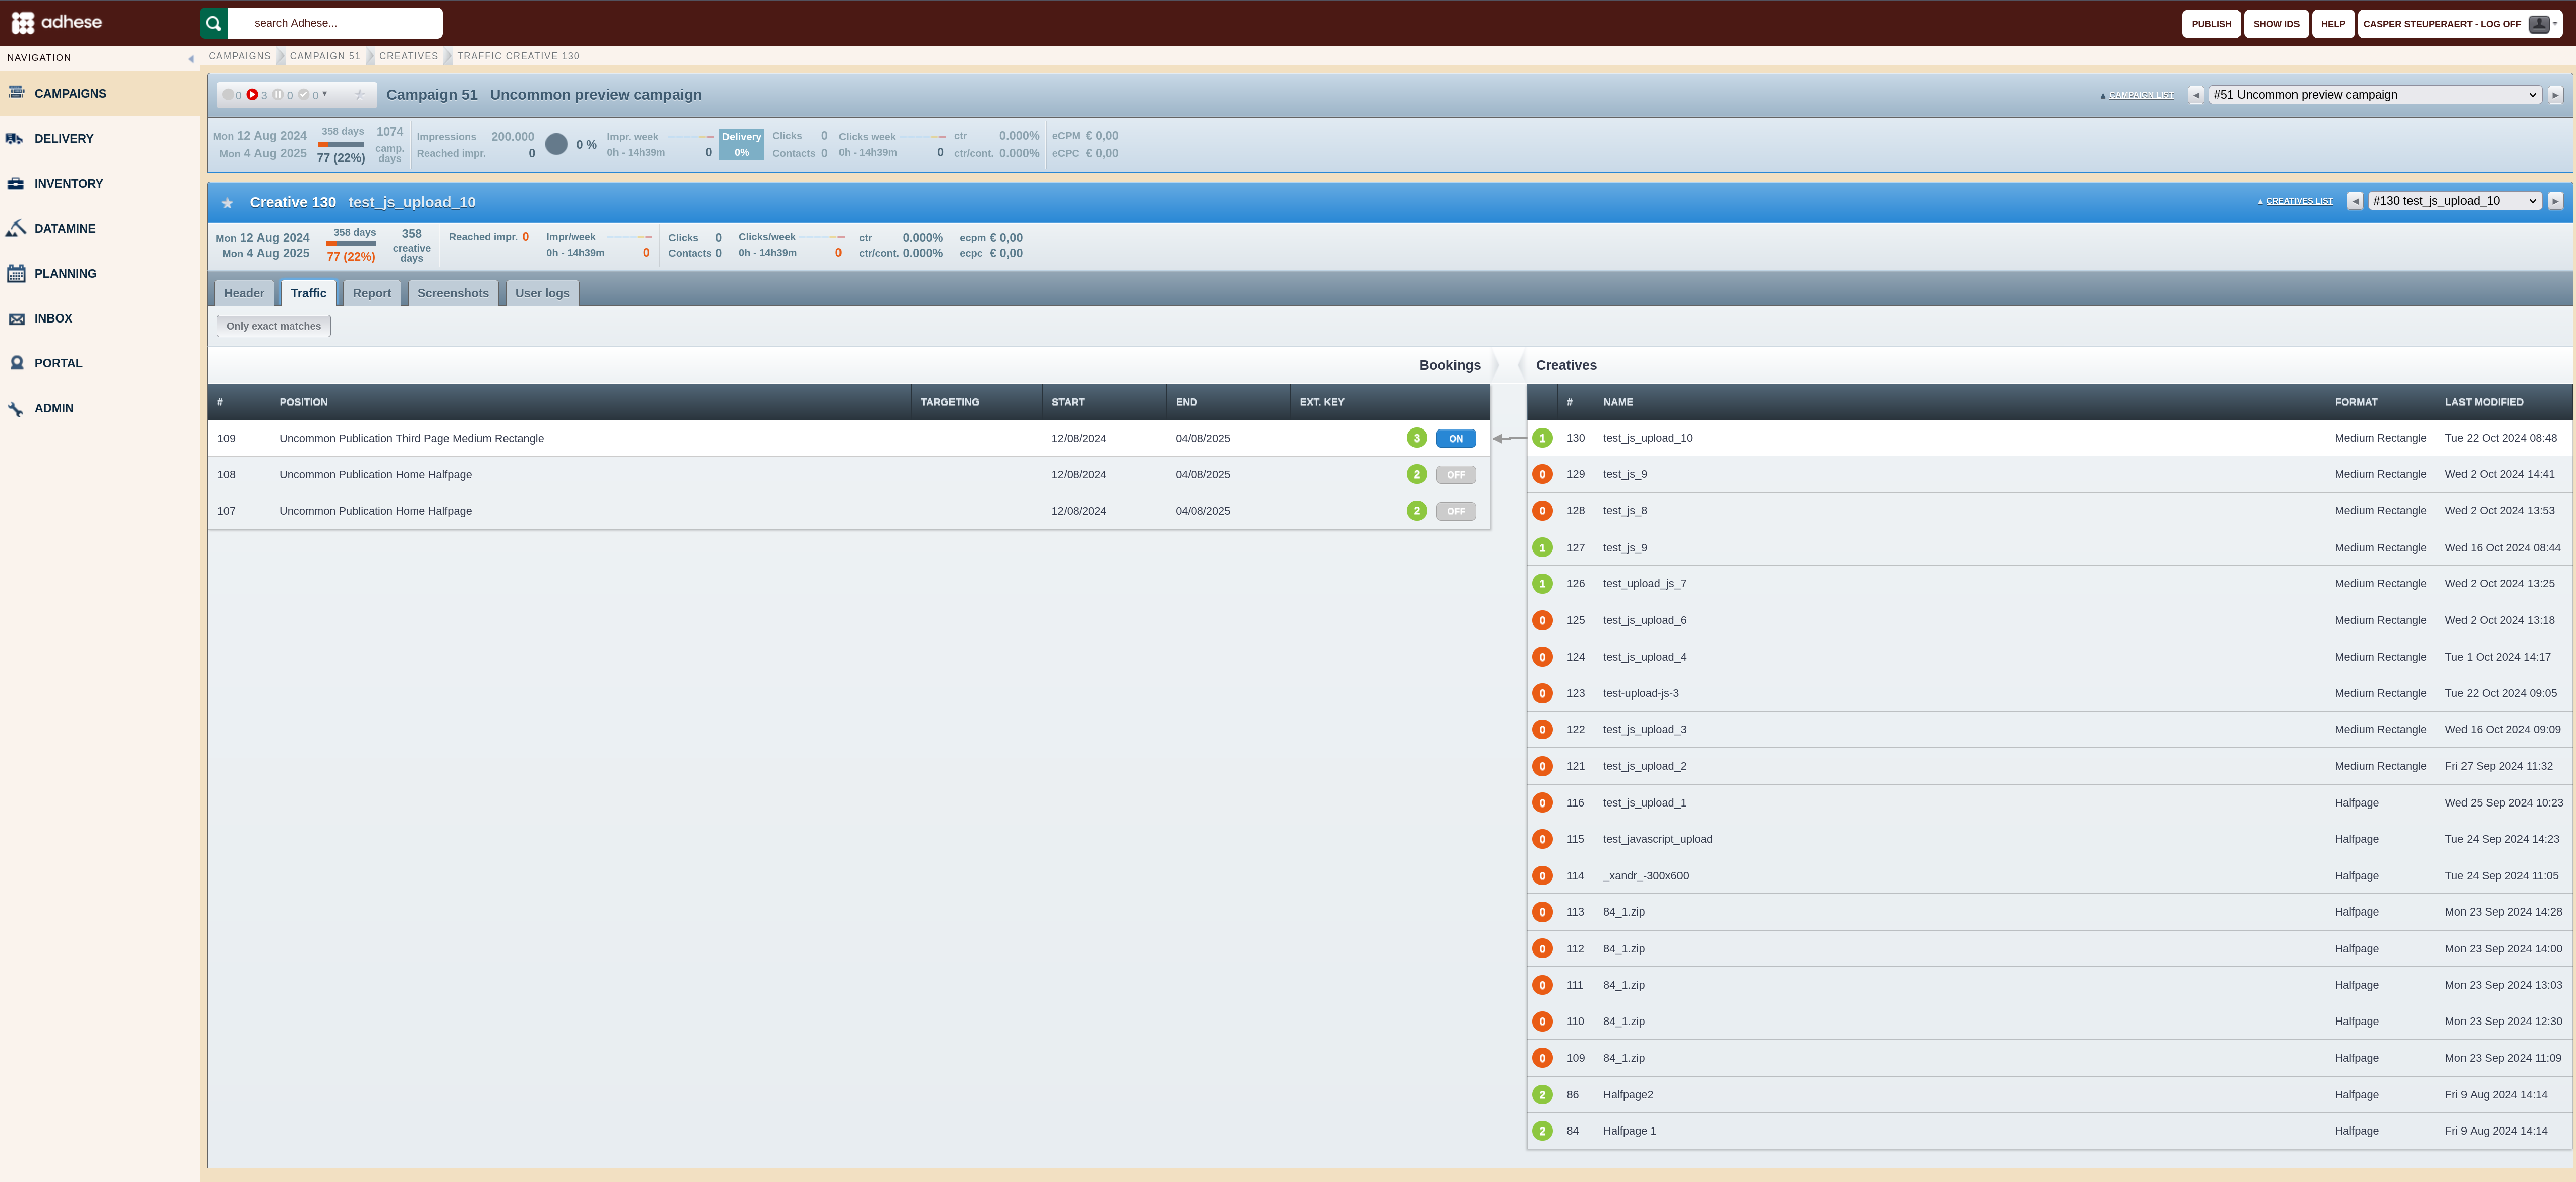
Exact formats
It is not possible to attach a creative to a booking if the dimensions of the creative and booked positions do not match. However, there are exceptions to this rule. For instance, a skyscraper format (120x600) can be attached to a wide skyscraper position (160x600).
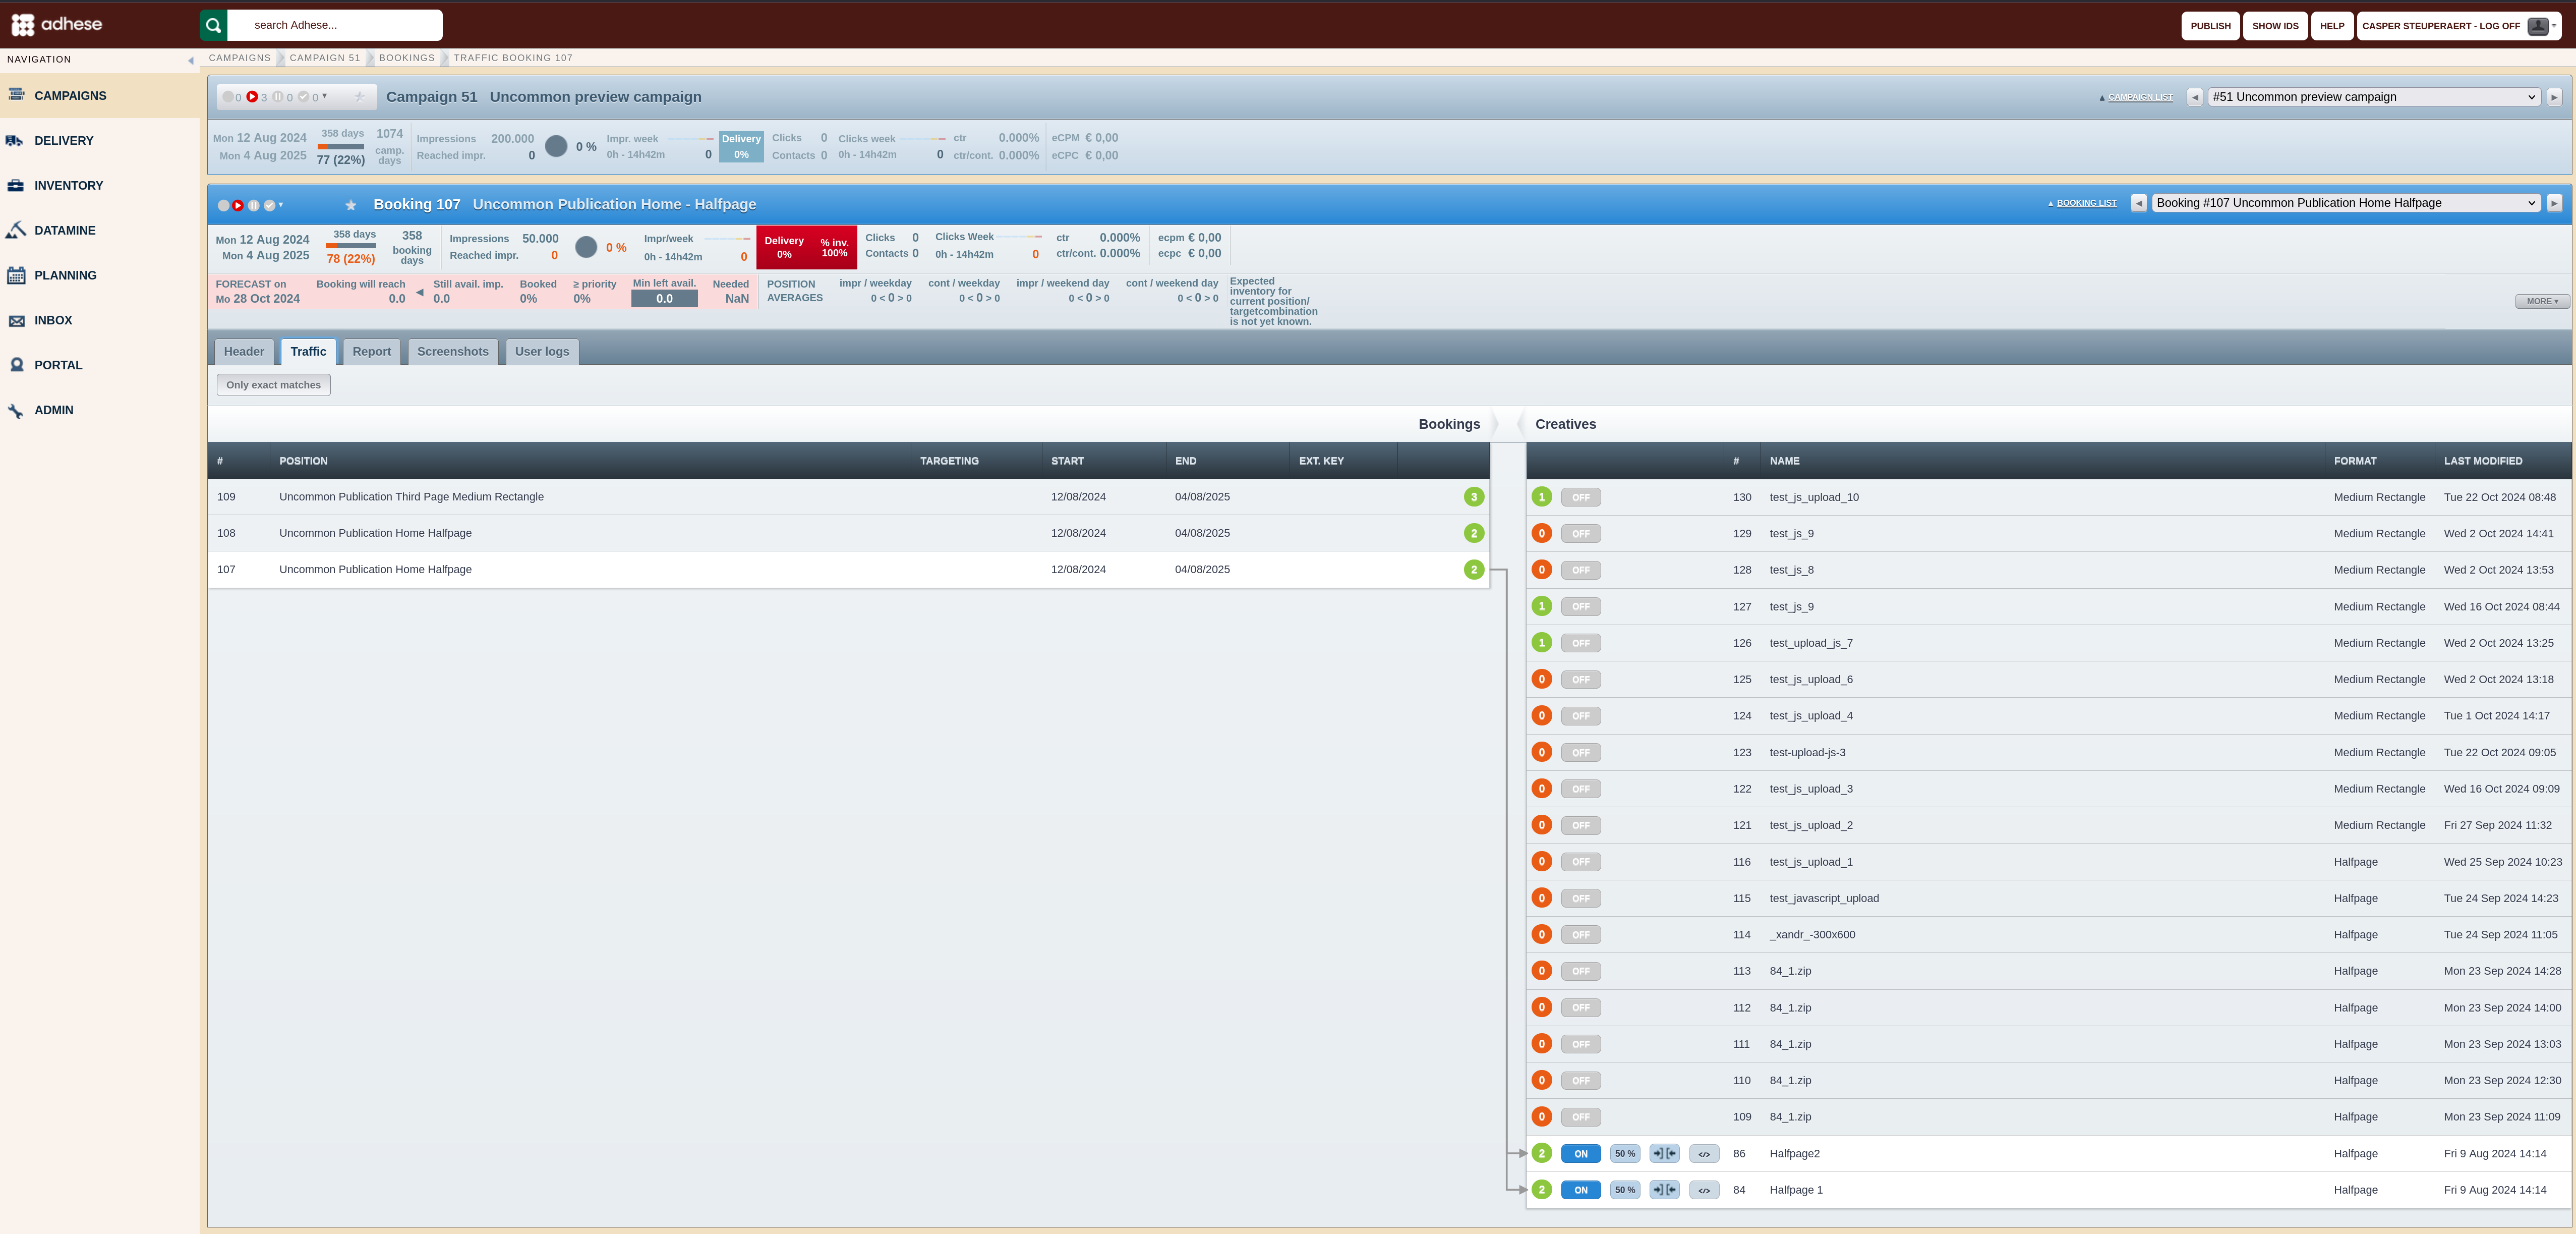
If you only want to view creatives with the exact dimensions as the selected booking, click the Only exact matches button above the booking table in the Booking traffic tab.
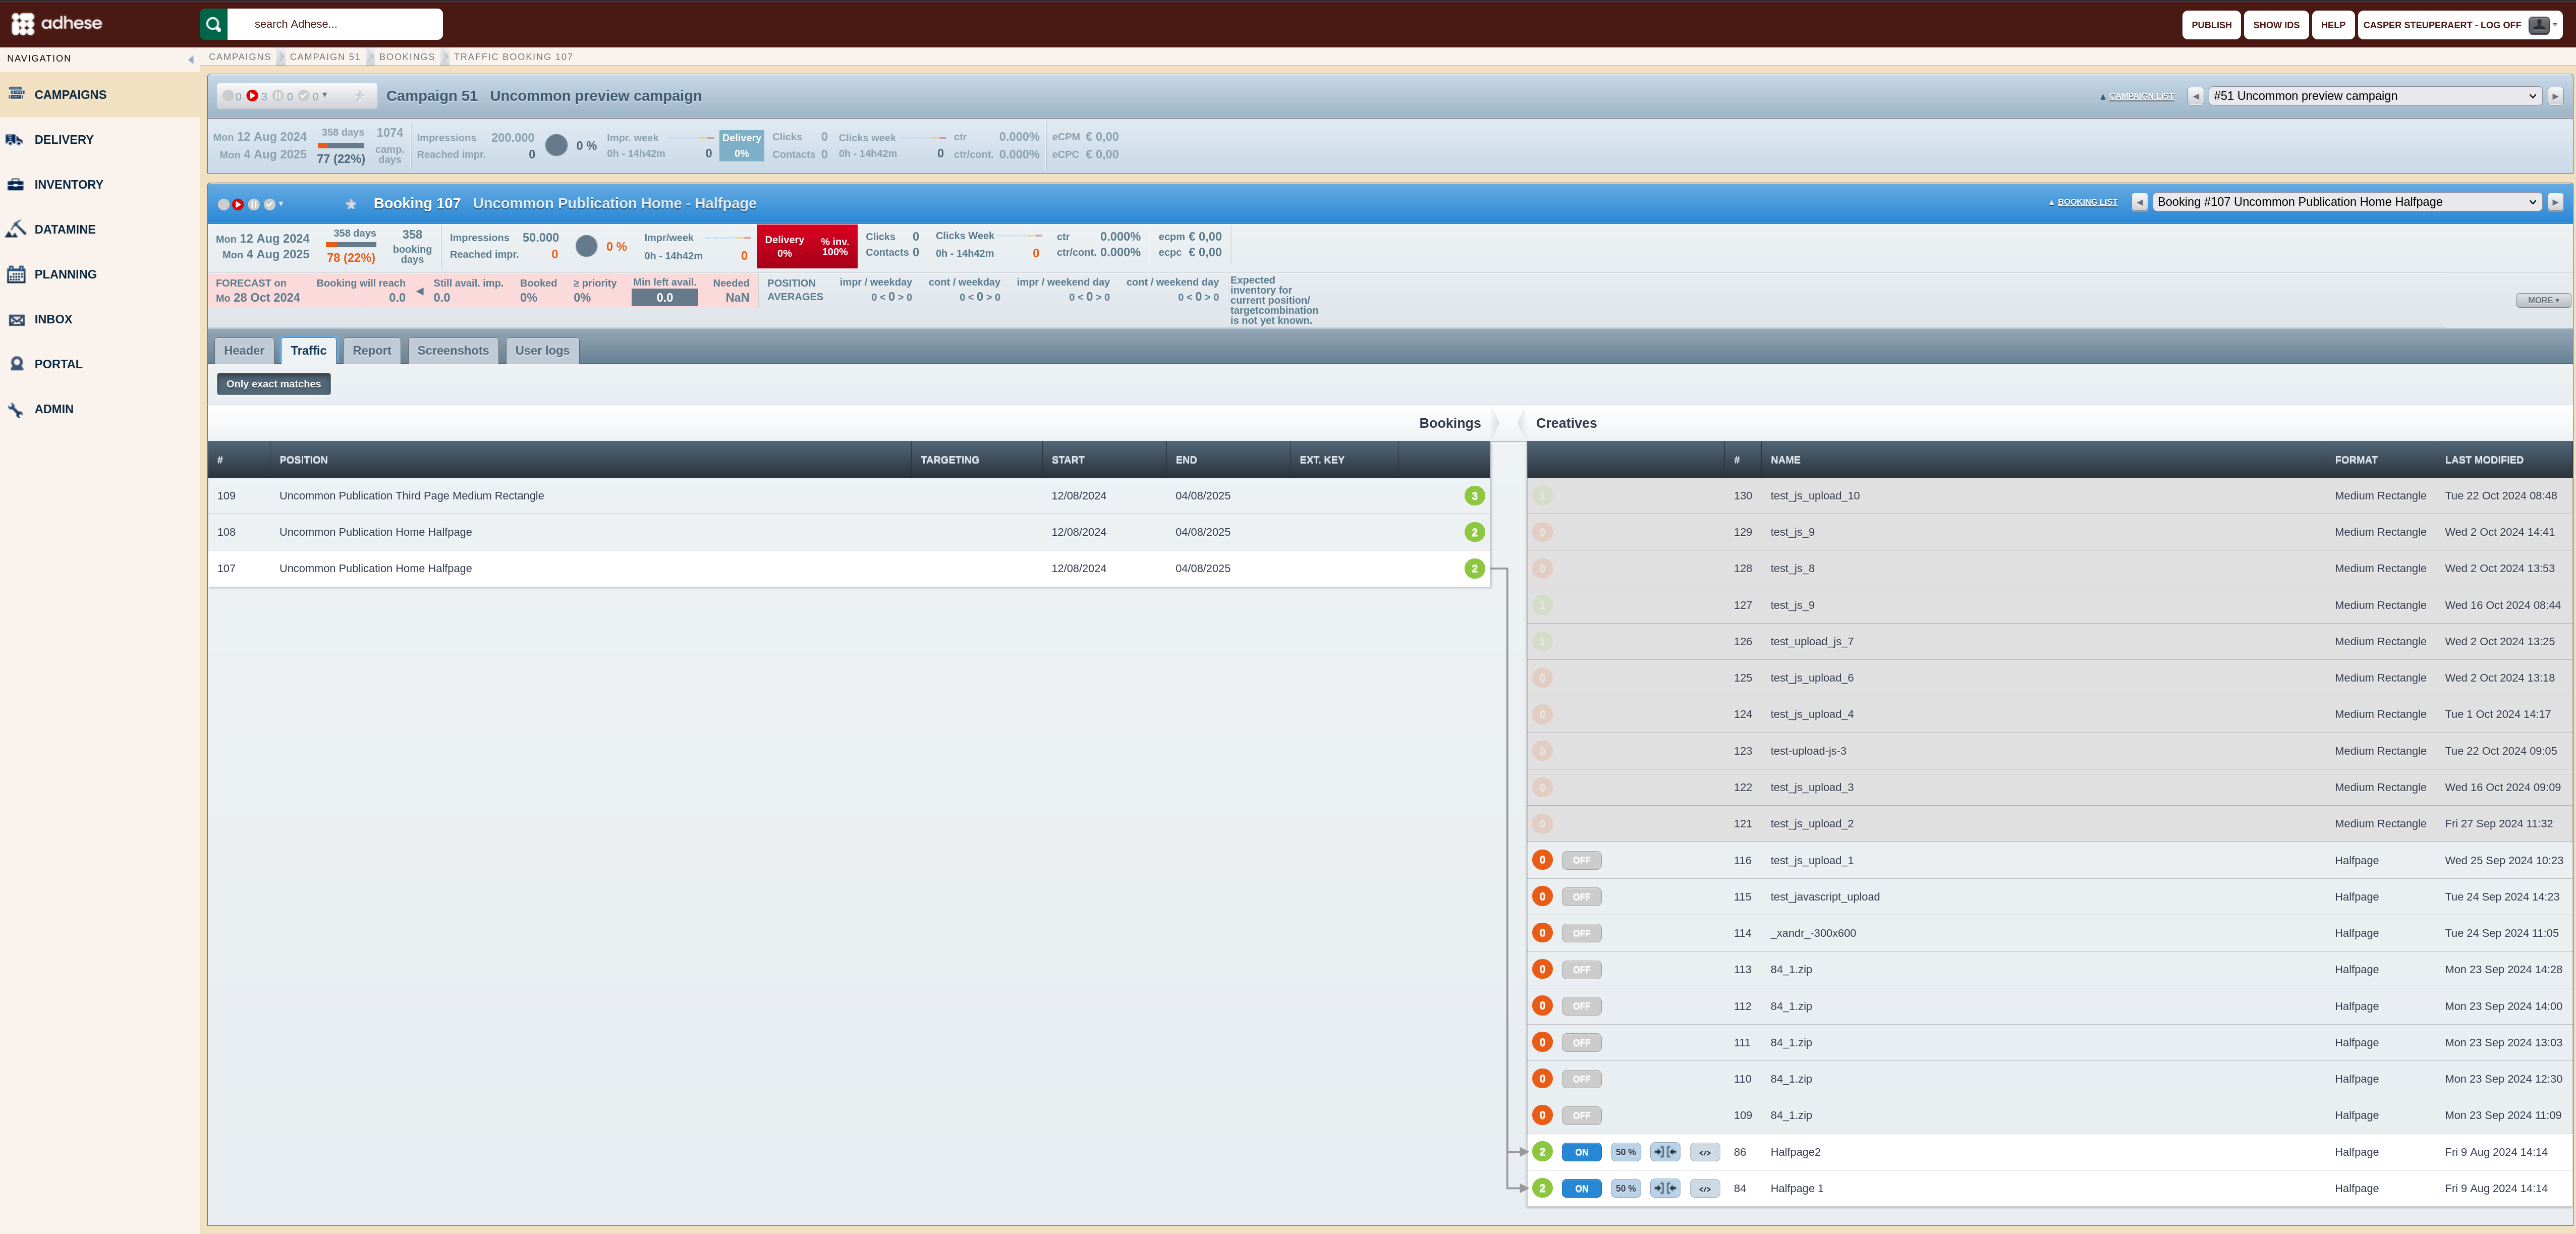
Video ad serving
Video content provides many advertising opportunities. There is a distinction between linear and non-linear video advertising.
- Linear video ads (or in-stream video ads) are shown before, after, or in the middle of the video clip.
- Non-linear video ads (or overlays) are shown parallel to the video fragment and are typically text or static images.
You can also choose to advertise outside the video player (for example, an autoplay video ad within a content article or a branded video player) and enhance the advertiser's visibility.
Please refer to Video advertising for a complete overview of video advertising formats.
VAST
If a publisher wishes to serve ads to video players, it must develop distinct video ad tags based on each video player's technology. The IAB has created a standard for video advertising, VAST, which allows for scalable delivery of ads to video players from different vendors.
VAST enables ad servers to utilise a single ad response format, independent of the video player's technology. The video player must be capable of requesting and parsing XML documents. Therefore, by utilising XML, VAST serves as a universal solution for video ad serving, comparable to HTML for browser-based ad serving.
Since the initial release of VAST, online video technology has advanced, enabling more sophisticated possibilities for online video advertising. To support this evolution, VAST has been enhanced with additional features and functionality. VAST 4.0 represents the current industry standard.
Adhese fully supports VAST: we are compliant with VAST 2.0, 3.0, and 4.0 and can help you adopt its guidelines.
How to add a video campaign?
To add a video campaign:
- Go to the Campaign overview. Click Campaigns in the left navigation menu of Adhese.
- Click the campaign for which you want to upload a video ad.
- Click the Creatives tab.
- Click the Add Advar button. A New creative screen opens for an Advar template where you specify the following details:
- Enter a name for the creative in the Name field.
- Click the Select a format link in the Format field. Choose a video format, such as a pre-roll, from the list in the List of formats modal window.
- In the Template field, click the Add advar template link and select the Advar template that accompanies the specified format.
- Enter the URL of the ad's landing page in the URL field.
- (Optional) Insert the third-party tracking URL in the Tracking URL field.
- Upload the video file. Adhese supports the .mp4 and .flv extensions and automatically recognises the duration of the video file.
- Click the Save button.
Should your video ad fail to display the video content and only play the sound, please verify that the video file has been encoded with the correct codec. The video file should be encoded with H.264. If this is not the case, it must be re-encoded using H.264.
Tracking video ads
In addition to monitoring the number of click-throughs, VAST also tracks a number of events related to the playback of the video ad and/or initiated by the viewer:
- Time progress tracking events, for example, mid-point, video ad completion, first and third quartile;
- Viewer initiated events:
- The viewer mutes or unmutes the sound of the video.
- The viewer pauses the playback of the video.
- The viewer switches the player to its full-screen mode.
- The viewer skips the playback of the ad creative.
- The viewer clicks a button to close a non-linear ad creative within the video player.
For a complete overview of the VAST implementation details and its tracking features, refer to http://www.iab.com/guidelines/digital-video-ad-serving-template-vast-4-0/.
Publish
Adhese processes changes to campaigns, bookings, creatives, etc... during its publish cycle. Any changed settings that have been saved will take effect when the running or next publish has finished.
This also applies to any automatic changes made to campaigns or bookings. A campaign or booking that has met its goal will stop delivering at the end of the next publish cycle. A booking or campaign that is scheduled to start on a specific date will be activated when that date arrives and the publish process has finished.
The publish cycle runs automatically every half hour on the hour and at hh:31. A publish can also be manually triggered via the publish button.


The publish takes some time to process all changes. This may take a while, especially for larger accounts.
New publishes don't overwrite, merge or queue after the current running publishes. If a publish is already running, the new manual publish will be ignored. If you wish to engage a manual publish, wait for the previous publish to finish.
Statuses
The status indicators show whether your inventory is performing smoothly and if campaign delivery may be inhibited.
The different statuses can be found as a distinct column in the table below the dashboards.
A summary of the Header, Booking, Creative, and Traffic status is displayed in the tab sheet after selecting a specific campaign, indicated by a red or green square.

Campaign status
The Campaign status is a summary of all underlying booking statuses. If a campaign contains more than one booking, the Campaign status will copy the status of the booking that is "most urgent". For example, if several bookings have different health statuses and at least one booking does not have an uploaded creative, this will result in a bright red Campaign status, indicating an urgent problem.
The Campaign overview displays the Campaign status in a distinct status column called Running status. You can also find the Campaign status next to the campaign ID and title. The ID and title appear at the top of an individual campaign’s overview page and underlying detail pages.

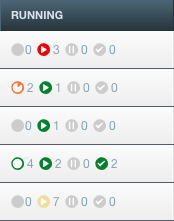
Next to these status icons, the numbers display how many bookings within the same campaign have the corresponding status. In the above screenshot, at least one of the statuses of the four running bookings is not ok.
Four circle-shaped icons present the Campaign status. Each icon denotes a different condition. The delivery of a campaign's booking is either:
- planned
- running
- paused
- finished
Colours indicate the health or status of a campaign. There are ten possible status colours – from red to orange and yellow to green.
- Green: everything is all right
- Orange/yellow: there is a non-urgent issue
- Red: there is an urgent issue
Hovering over the icons in the Running status table column of the Campaign overview will reveal more detailed information about the status.
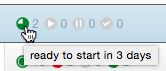
Status of planned bookings
Campaigns that have not started yet and that do not have any issues have one of the following status icons:

A planned campaign with an issue has one of the following icons:

A few examples of possible statuses for a planned campaign:
-
 The earliest starting booking has no issues and starts tomorrow;
 -
 The earliest starting booking starts in three days and has issues;
 -
 The earliest starting booking starts in more than ten days and has issues;
 -
 The campaign has already started or is finished.

The changing of colours from orange to red depends on the number of days before a booking starts and is defined during the setup of Adhese.
Status of running bookings
The second icon of the Campaign status indicates whether any bookings are currently running. If no booking is running, the status is:

If any booking of a campaign is running, possible statuses are:

The colour of the icon (green, orange or red) indicates whether or not there is a problem. The redder the icon, the more severe the problem will be.
Next to the green, orange or red colour, it is possible that the status icon turns blue:

The status icon will turn blue if the total number of impressions to be served is not determined. If the required number of impressions is determined on a campaign level (see To reach volume), Adhese will divide the necessary impressions over all running bookings. As a consequence, it cannot be determined whether an individual booking is performing properly.
Status of paused bookings
The third icon of the Campaign status indicates if there are any paused bookings. If no booking is set to pause, the status is:

If a booking is paused, possible statuses are:

The colour (green, orange or red) indicates whether there is a problem with the booking. The more red the icon, the more serious the problem. At least one booking delivery deviated from what was expected.
Status of finished bookings
The fourth and final icon of the Campaign status signifies whether there are any completed bookings within a campaign. The possible statuses are as follows:


The last icon (black) indicates a stopped booking. A stopped booking has been removed explicitly but has already received impressions.
The status is red if, for example, one of the bookings did not achieve its target.
Booking status
The Booking overview has a Running status table column that displays the Booking status. This status is specific to a single booking and indicates any issues that may be affecting it.
You can also view the status alongside the ID and title of the campaign on a detailed page of a selected booking:

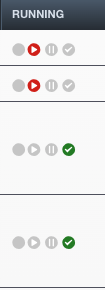
Four circle-shaped icons present the Booking status. Each icon denotes a different condition. The delivery of a campaign's booking is either:
- planned,
- running,
- paused, or
- finished.
Colours indicate the health or status of a Booking. There are ten possible status colours – from red to orange and yellow to green.
- Green: everything is all right;
- Orange/yellow: there is a non-urgent issue;
- Red: there is an urgent issue.
Hovering over the icons in the Running status table column of the Booking overview will reveal more detailed information about the status.
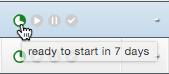
Status of a planned booking
A booking that has not started yet and that does not have any issues has one of the following status icons:

A planned booking with issues has one of the following icons:

A few examples of possible statuses for a planned booking:
-
The booking has no problems and starts tomorrow;
-
The booking starts in three days and has issues;
-
The booking starts in more than ten days and has issues;
-
The booking has already started or is finished.
The changing of the colours from orange to red depends on the number of days before a booking starts and is defined during the setup of Adhese.
Status of a running booking
The second icon of the Booking status denotes if the booking is currently running. If the booking is not running, the status is:

If the booking is running, possible statuses are:

The colour of the icon (green, orange or red) indicates whether or not there is a problem. The redder the icon, the more severe the problem will be.
Next to the green, orange or red colour, it is possible that the status icon turns blue:

The status icon will turn blue if the total number of impressions to be served is not determined. If the required number of impressions is determined on a campaign level (see To reach volume), Adhese will divide the necessary impressions over all running bookings. As a consequence, it cannot be determined whether an individual booking is performing properly.
Status of a paused booking
The third status icon of the Booking status indicates if the booking is set to pause. If a booking is not paused, the status is:

If the booking is paused, possible statuses are:

The colour (green, orange or red) indicates whether there is a problem with the booking. The more red the icon, the more serious the problem. The booking delivery deviated from what was expected.
Status of a finished booking
The fourth and last icon of the Booking status signifies whether the selected booking has been completed or finished. Possible statuses are:


The last icon (black) indicates a stopped booking. A stopped booking has been removed explicitly but has already received impressions.
The status is red if, for example, the booking did not achieve its target.
Creative status
The Creative status can be found as a distinct status column in the Campaign overview and in the Booking overview.
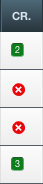
- In the Campaign overview, the Creative status indicates the number of uploaded creatives. The Creative status will appear as a green square with a number in it. This number indicates the number of creatives uploaded to the campaign. If no creatives are uploaded to a campaign, the Creative status icon is a red circle with a white cross.
- In the Booking overview, the Creative status indicates the number of creatives attached to the booking. The Creative status will appear as a green square with a number in it. This number indicates the number of creatives connected to the booking. If no creatives are attached to a booking, the Creative status icon is a red circle with a white cross.
Select the No material or not coupled option in the campaign filter of the campaign overview to identify campaigns with no uploaded or coupled creatives.
Header status
The Header status indicates any issues with the Campaign header (see Add a campaign). It is a distinct column in the Campaign overview.
The Header status has one of the following two states:
-
 : The Campaign header does not contain any faults.
 -
 : The Campaign header includes one or more faults, such as a missing value. This is configurable per client and individual user.
If the Header status is red, the Campaign status will also be red. However, a red Header status will not prevent the start of a campaign.
Traffic status
The Traffic status indicates whether each booking in a campaign is linked to a creative. A distinct table column in the Campaign overview provides an overview of all bookings' Traffic status.
The Traffic status can have one of the following two states:
-
: Everything is fine. Each booking is attached to at least one creative.
-
: There is an issue. At least one booking is not attached to a creative.
Each campaign has its own Traffic tab. It shows all existing or non-existing connections between a booking and a creative. If the Traffic status indicates a problem, the tab will clarify the missing links.
Select the No material or not coupled option in the campaign filter of the campaign overview to identify campaigns with no uploaded or coupled creatives.
Progress status
The Progress status is a percentage that indicates the number of impressions that have been served for a specific campaign. It is calculated as the ratio of served impressions to the total desired impressions.
The calculation of the Progress status is based solely on bookings with an impression volume.
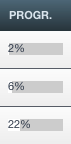
In the Campaign overview, the Progress status table column displays the percentage of progress. A status bar indicates the progress of the delivery. As more impressions are served or delivered, the status bar will become increasingly white.
You can also view the Progress status as a percentage in the campaign dashboard. A pie chart displays the progress with an orange colour.
Status stars
When you add a star to campaigns, bookings, or creatives in Adhese, you mark them as important.
The Campaign, Booking, and Creative overviews have an extra column for the status stars. For more information about how to display this column, refer to Personalize table columns.
The overview can be sorted to group all starred campaigns, bookings, or creatives. All starred campaigns, bookings, or creatives will either be displayed at the beginning or end of the overview.
The status star column is also available in the Delivery overview, allowing you to monitor starred bookings.
Add a star
There are two methods for adding a star to an individual campaign, booking, or creative:
- Go to the relevant overview and tick the star from the Star status column. The star is yellow now:

- Go to the relevant individual campaign, booking, or creative. Tick the star next to the main status and title at the top of its overview. The star is yellow now.

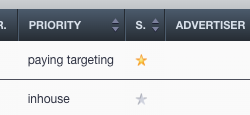

To unstar the campaign, booking or creative tick the yellow star. The star becomes grey.
If you wish to add a star to multiple bookings:
- In the Booking overview of a campaign, select the bookings you want to edit.
- Click the Edit multiple bookings button located above the Booking overview.
- In the Change multiple bookings simultaneously window, click Edit stars.
- To star the selected bookings, select Star these bookings.
- To unstar the selected bookings, select Unstar these bookings.
- Click Save.

Alerting
You can create alerts that are triggered upon a specific event you determine, which will result in an email being sent. This email is set up as specified by a template you create with a bit of coding.
Alerts
Alerts are email messages that are sent automatically when a specific event is triggered.
The Alerts screen displays a table with the following columns that detail the properties of a booking:
- A tick box to indicate an alert. This action makes the Duplicate, Run and Remove buttons available.
- The ID of the alert.
- The Recipients of the alert mail.
- The Name of the alert*.*
- The Hour when the alert runs.
- The Triggers set for the alert*.*
Add an alert
To add an alert:
-
Click Admin in the left navigation menu. The Administration screen opens.
-
Click Alerts under the General heading. The Alerting overview opens:

The Alerting overview contains the following columns:
- ID, the ID of the alert;
- Recipients, the persons who will receive the alert;
- Name, the name of the alert;
- When, when an alert is checked;
- Triggers: what event triggers the alert;
-
Click the Add button to add an alert. The Header tab of the Insert new alert screen opens.

-
Define the following details for the new alert:

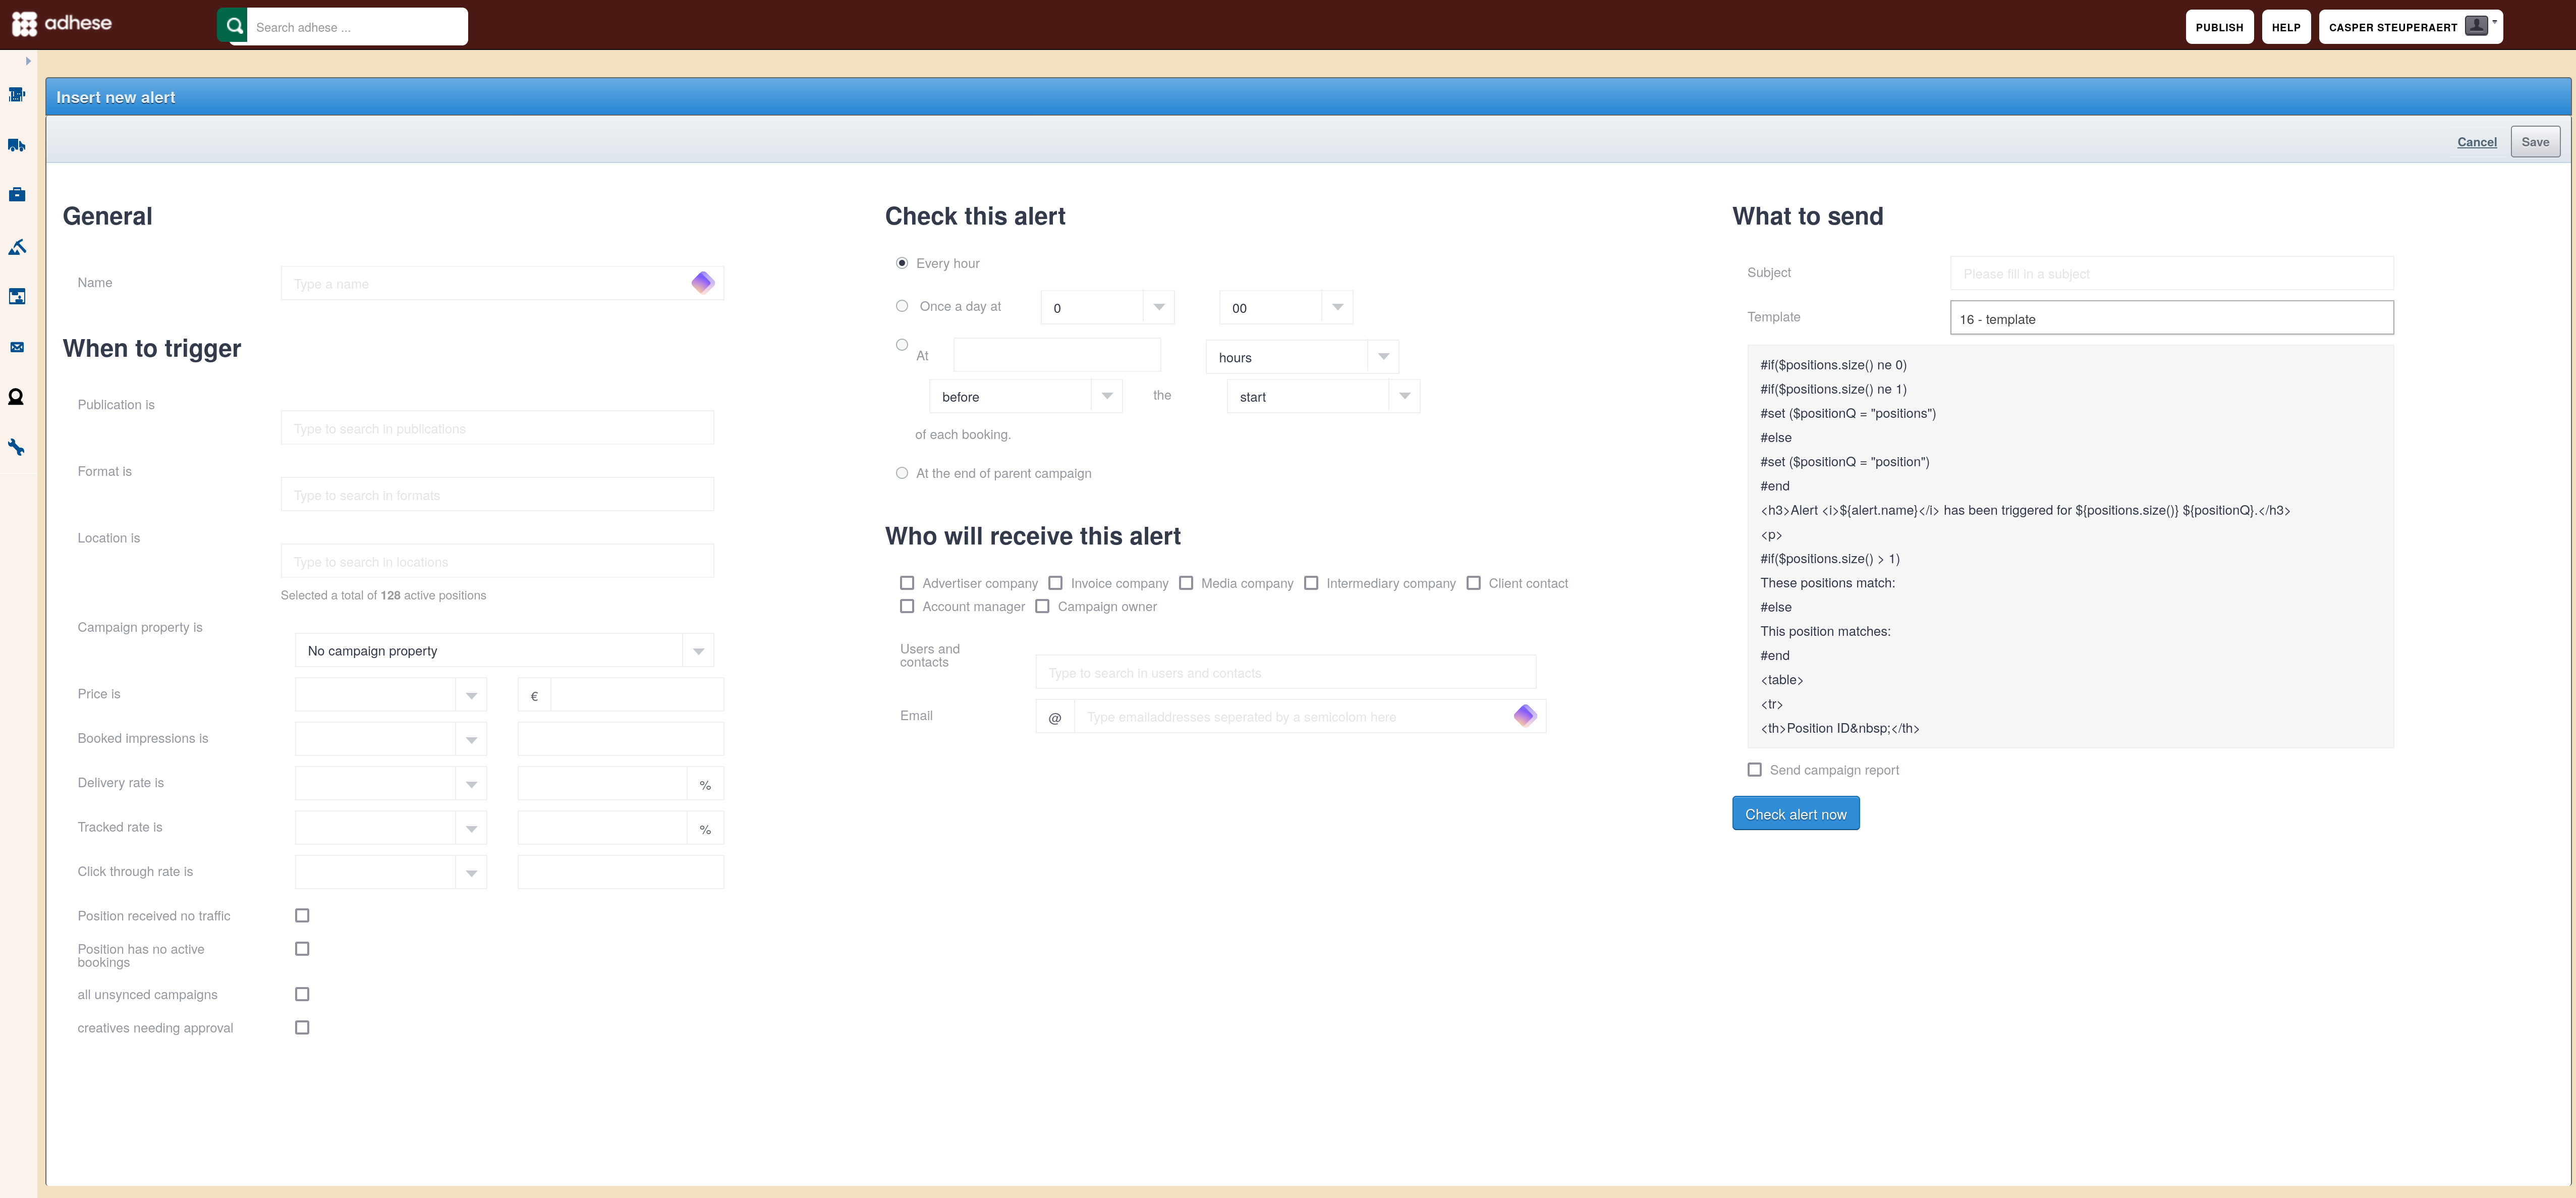
General
- Enter a name for the alert in the Name field.
When to trigger
This section determines what event triggers an alert for a specific publisher, format, location or a combination of those variables.
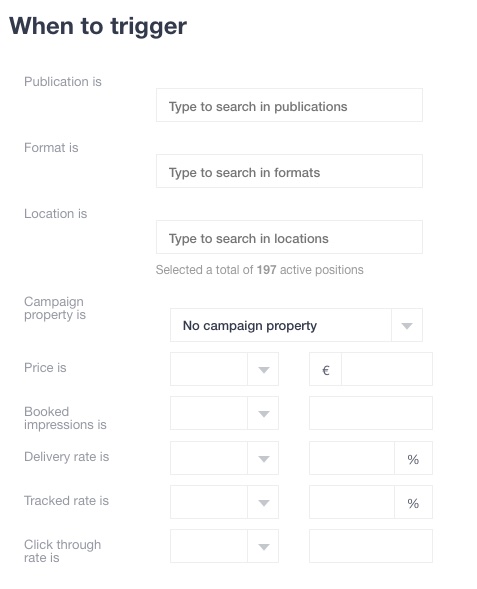
- Select one or more publications or search for a publication by entering its name in the Publication is field. Click the Save button.
- Select one or more formats or search for a format by entering its name in the Format is field. Click the Save button.
- Select one or more locations or search for a location by entering its name in the Location is field. Click the Save button.
The above three variables (i.e. publication, format, and location) determine the number of active positions taken into account.
- In the Price is field, determine whether an alert should be sent when the price of a booking at the selected active positions is less than, equal to, or more than the specific monetary value you specify.
- In the Booked impressions is field, determine whether an alert should be sent when the number of booked impressions at the selected active positions is less than, equal to, or more than a certain amount of impressions you specify.
- In the Delivery rate is field, determine whether an alert should be sent when the delivery rate of a booking at the selected active positions is less than, equal to, or more than a particular delivery rate you specify.
- In the Tracked rate is field, determine whether an alert should be sent when the tracked rate of a booking at the selected active positions is less than, equal to, or more than a certain tracked rate you specify.
- In the Click through rate is field, determine whether an alert should be sent when the CTR of a booking at the selected active positions is less than, equal to, or more than a specific CTR you specify.
Check this alert
The Check this alert section determines when the selected, active positions should be checked for an event (as specified in the When to trigger section) that could trigger an alert.
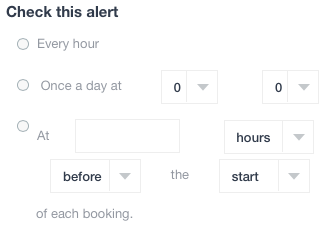
You can choose to check the alert:
- Every hour,
- Once a day at a time (in hours and minutes) you specify, or
- At a certain number of hours/days/working, before/after the start/end of each booking.
Who will receive this alert
The Who will receive this alert section determines who should receive an alert when the event is triggered:
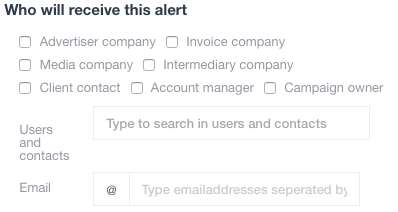
- You can select the following client users you have defined in the Client section of the Campaign Header tab: Advertiser company, Invoice company, Media company, Intermediary company, Client contact, Account manager, and/or Campaign owner.
- In the Users and contacts field, search for Adhese users or contacts by typing their name and clicking the Save button.
- In the Email field, enter one or more email addresses and separate them by a semicolon
;
What to send
In the What to send section, you specify the alert's content. This email is set up according to a template you create with a little bit of coding.
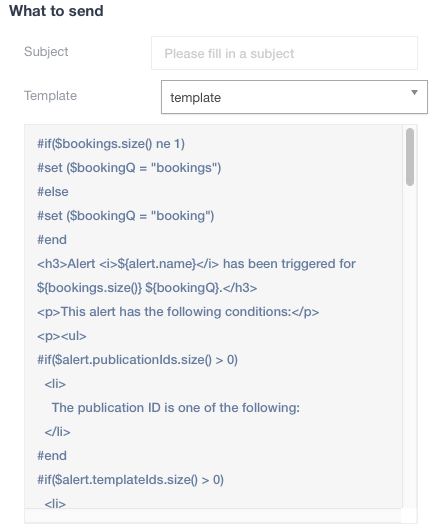
- Fill in a subject for the alert in the Subject field.
- Choose a predefined template from the Template drop-down. The template creates the message.
Check alert now
Click the Check alert now button beneath the What to send section and get a preview of the alert message and the bookings that match the alert.

This opens the Alert result modal window:
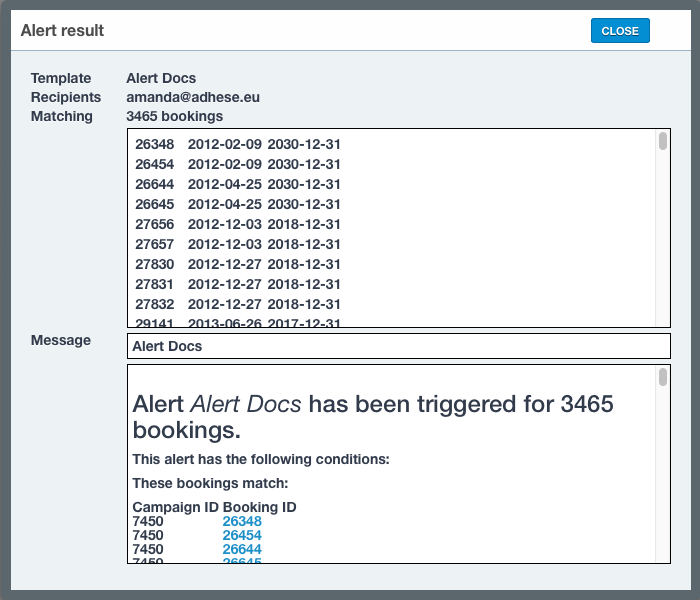
Do not forget to click the Save button in the Insert new alert screen to save the alert.
Edit an alert
To edit an alert:
- Click Alerts under the General heading of the Administration screen. The Alerting overview opens.
- In the Alerting overview, click the alert you want to edit. This opens the Header tab of the Edit alert screen.
- Edit the details you want to change.
- Click the Save button.
Duplicate alert
To duplicate one or more alerts:
- Click Alerts under the General heading of the Administration screen. The Alerting overview opens.
- In the Alerting overview, tick the checkboxes of the alerts you want to duplicate.
- Click the Duplicate button.
- Click OK to confirm and duplicate.
Remove alert
To remove one or more alerts:
- Click Alerts under the General heading of the Administration screen. The Alerting overview opens.
- In the Alerting overview, tick the checkboxes of the alerts you want to remove.
- Click the Remove button.
- Click OK to confirm and remove.
Run alerts
In the Check this alert section you have defined the circumstances under which an event should be checked to trigger an alert. However, you can also check one or more alerts at any time you wish.
- Click Alerts under the General heading of the Administration screen. The Alerting overview opens.
- In the Alerting overview, tick the checkboxes of the alerts you want to check.
- Click the Run button.
- Click OK to confirm and check the alerts. You will receive an email if the event of the alert is triggered.
Filter Alerting overview
In the Alerting overview, a search box lets you filter the overview. Enter a search term, and the overview will change accordingly, filtering the alerts that match the search term.
Sort Alerting overview
To sort the Alerting overview, click any column to sort the table in ascending or descending order.
Personalise Alerting overview
For more information about how to personalise the Alerting overview, refer to Personalise table columns.