Selecting a publisher at the campaign level (see [internal](https://documentation.adhese.org/books/campaign-management/page/campaigns#bkmrk-internal)) filters the relevant positions for bookings within that campaign.
If you have selected a position, the overview will show its forecasted volume based on [position averages](https://documentation.adhese.org/books/campaign-management/page/campaigns#bkmrk-campaign-forecasting). These averages represent the range of impressions or contacts that can be reached with 95% certainty. 3. Click the *Save* button to save your position. ### Forecasting figures and position averages Adhese displays the [forecasting figures](https://documentation.adhese.org/books/campaign-management/page/campaigns#bkmrk-campaign-forecasting) and [position averages](https://documentation.adhese.org/books/campaign-management/page/campaigns#bkmrk-campaign-forecasting) based on the position selected in the booking's *Header* tab. These figures offer an initial indication of whether the booking will meet its impression objective. [](https://documentation.adhese.org/uploads/images/gallery/2024-06/rJGWXrXUZqAXgTx5-where2.png) [](https://documentation.adhese.org/uploads/images/gallery/2024-06/PBdhZ7hLZ4kyRSiX-where3.png)The position averages change based on the profile targets you choose in the next step (see [Campaign targeting](https://documentation.adhese.org/books/adhese-setup-and-implementation/page/miscellaneous#bkmrk-campaign-targeting)).
If the position is overbooked, the variable **Booked** from the forecasting figures will exceed 100%. Whether your booking will deliver and meet its goals depends on the priority of competing bookings (i.e. bookings made for the same position as your booking). If the number of impressions from the booking is less than the number of **Needed** impressions, the booking is not expected to reach its goal and the background colour of the forecast will turn red.
[](https://documentation.adhese.org/uploads/images/gallery/2024-06/0ggMPMZFcw41nEaP-where4.png) For more information on these numbers, refer to [Forecasting figures](https://documentation.adhese.org/books/campaign-management/page/campaigns#bkmrk-campaign-forecasting) and [Position averages](https://documentation.adhese.org/books/campaign-management/page/campaigns#bkmrk-campaign-forecasting). #### Exclude publications and positions When you select a channel (or a group of positions), two additional links will appear. These links enable you to exclude specific publications and/or positions from the channel. [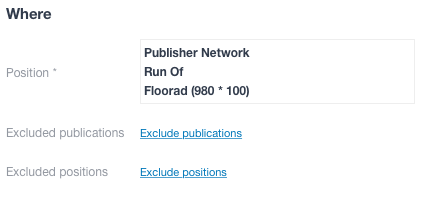](https://documentation.adhese.org/uploads/images/gallery/2024-06/jO2W0XIMoEdPfvs7-where5.png) To exclude one or more publications: 1. Click the *Exclude publications* link. The *Excluded publications* modal window opens. 2. Select the publications you wish to exclude. 3. Click the *Save* button. To exclude one or more positions: 1. Click the *Exclude positions* link. The *Excluded positions* modal window opens. 2. Select the positions you wish to exclude. 3. Click the *Save* button. ### WhenA bookings end date also determines priority. Bookings that will end earlier, but have the same priority setting as other bookings that will end later will receive a higher priority and a higher share. For more information see [this page](https://documentation.adhese.org/books/integration-setup/page/cpm-priority-sorting).
The *When* section of the *Booking* header lets you schedule the **delivery period** by adjusting the days and times of the booking. [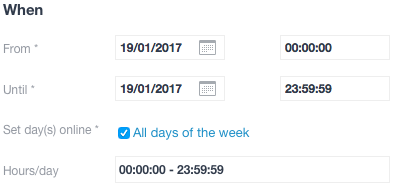](https://documentation.adhese.org/uploads/images/gallery/2024-06/clxIg6SNhpeuT3sr-when1.png) You can schedule the delivery period based on the following variables: - In the **From** field, select a start date from the calendar and pick a starting hour. The default setting is 00:00:00. - In the **Until** field, select an end date from the calendar and pick an ending hour. The default setting is 23:59:59. - In the **Set day(s) online** field, select the days of the week on which you would like the booking to be delivered. You can use this property to exclude certain days from delivery. The default setting is *All days of the week*. When this box is ticked, individual days can be selected or deselected. [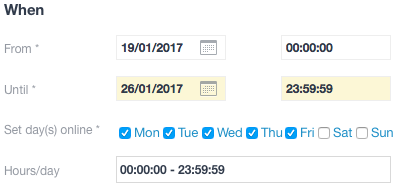](https://documentation.adhese.org/uploads/images/gallery/2024-06/bjGWdpqhPQRzrEaB-when2.png) - In the **Hours/day** field, enter the time of day at which you would like the booking to be delivered. You can exclude specific delivery hours, such as between 9:00 p.m. and 7:00 a.m. The default time setting is 00:00:00 - 23:59:59. To adjust the time setting: 1. Click *00:00:00 - 23:59:59*. A horizontal scrollbar appears. 2. To adjust the daily starting hour, click the left square and slide it to the right. 3. To adjust the daily ending hour, click the right square and slide it to the left. 4. Click the *OK button*. ### How [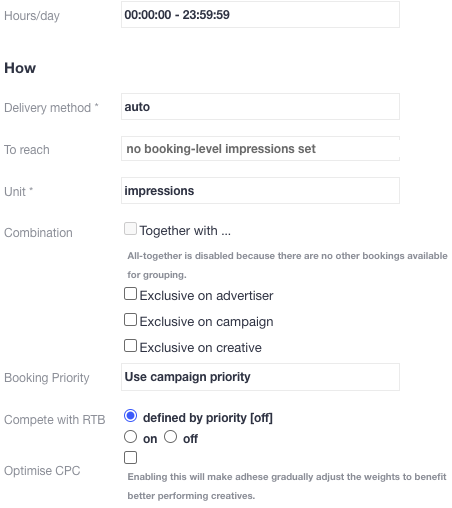](https://documentation.adhese.org/uploads/images/gallery/2024-06/6e9EF2Ww2utdr1f2-how1.png) The *How* section of the *Booking* header tab allows you to specify the booking's delivery method. For example, you can select 'all-together' in the *Combination* section or choose whether the booking should compete with RTB revenue in the *RTB* section. ### Delivery method The **delivery method** determines how impressions of a booking are distributed throughout the day. A frequency cap can restrict this delivery. Select one of the following three options from the **Delivery method** drop-down list: Share of Voice (SOV), Auto, or Rotation.**New targets & forecasting:** New targets lack forecast data and are therefore best used in combination with the SOV setting. When used with the auto setting, the system will try to calculate an estimated share. However, with many competing bookings on that same target, only some will likely receive a share. The other bookings will only start delivering once the forecast data is available, which can take up to a week.
#### Share of voice (SOV) The *Share of Voice* (SOV) delivery method gives a percentage or share (as defined by the delivery percentage) of the position's expected volume of impressions (voice). The *delivery percentage* indicates the frequency at which a booking will be delivered. A higher percentage means the booking will be delivered more frequently. For example, if the delivery percentage is 20%, the booking will be delivered once for every five impressions. To adjust the delivery percentage: 1. Click the delivery percentage in the **Delivery percentage** field and either 2. Slide the yellow slider to the desired percentage, or enter it manually. 3. Click the blue *OK* button.Delivery times may also be affected by other factors, such as traffic volume and competing bookings with higher priority, which can cause deviations from the desired schedule.
ASAP - If you want to set a goal (see [How: To reach](https://documentation.adhese.org/books/campaign-management/page/bookings#bkmrk-to-reach)) and achieve it as quickly as possible, set the delivery percentage to 100%.
Use SOV when booking [DOOH bookings](https://documentation.adhese.org/books/campaign-management/page/the-delivery-scheme-of-adhese-explained#bkmrk-dooh-campaigns).
#### Auto Suppose the delivery method is set to Auto. In this case, Adhese will determine the percentage of impressions delivered by the selected booking, taking into account its properties and those of competing bookings. Adhese will always aim to deliver impressions evenly. However, variations in daily delivery may occur due to competing bookings with a higher priority or a shorter time span.When using *Auto* as the delivery method, you must provide a volume in the **To reach** field of the booking (or on campaign level). Refer to the next paragraph for more information on the **To reach** field.
#### Rotation The *Rotation* delivery method aims to start and stop bookings without changing the properties of competing bookings. Rotation ensures that competitive bookings with the same priority and delivery method have an equal chance of being delivered. For instance, if three bookings with the same priority are booked on the same position, whether in one campaign or separate campaigns, each booking will be displayed randomly for 33% of the time. Similarly, when ten bookings are booked, each one will be displayed for 10% of the time. The *Rotation* delivery method is often used to fill unsold inventory, but it only works when all bookings are 100% identical. It is typically used for in-house (or stopper) campaigns and is displayed when no higher-priority campaigns have been booked.You cannot combine rotation with other settings, such as *all-together* and *exclusive*.
We highly recommend using one creative per rotation booking. Using multiple creatives per booking with a rotation delivery schedule can result in the booking not being delivered in accordance with the share of each creative. For example, even if both creatives have a 50% share, it is possible that one creative will deliver significantly more impressions than the other.
#### To reach In the **To reach** field, enter the desired number of impressions, clicks, etc. that you want the booking to receive. Once this volume has been reached, the booking's delivery will stop. The [forecasting figures](https://documentation.adhese.org/books/campaign-management/page/campaigns#bkmrk-campaign-forecasting) for a booking will change according to the *To reach* volume and will predict whether or not a booking will achieve its goals.If a booking delivery stops before reaching the desired volume, multiple goals may have been combined. Check [the volume at the campaign level](https://documentation.adhese.org/books/campaign-management/page/creating-campaigns#bkmrk-to-reach-volume) to ensure that the goals do not overlap. If multiple goals have been combined, ensure a logical connection exists between the target volume of the campaign and the individual bookings.
#### Unit Select one of the following objectives from the **Unit** drop-down: - Impressions - Clicks - Unique visitors - *Tracking of specific events*, such as leads and purchases.Impressions and clicks are implemented by default. Unique visitors and events can be applied on request.
#### Combination or delivery multiplesThe use of this functionality depends on the type of implementation. For more information on this topic, please contact [support.](https://documentation.adhese.org/books/introduction/page/adhese-support)
The **Combination** feature allows you to combine or exclude multiple bookings within a campaign. If none of the options for the **Combination** feature are selected, the campaign's bookings will be displayed independently of one another. Consider a campaign that contains bookings for three different positions on the same page. The page can show zero, one, two or all three bookings. #### Exclude delivery To **exclude** a booking, determine whether the exclusive setting should be applied to the advertiser, the campaign, or the creative. If you tick the *advertiser* box, the current booking must **not** be delivered with any other booking from the same advertiser. If you tick the *campaign* box, the current booking must **not** be delivered with any other booking from the current campaign. If you tick the *creative box*, a creative linked to that booking can only be delivered **once** to the web page. This is useful when multiple formats with the same dimensions are requested on a web page, and a creative should be displayed only once on that page. Other creatives in the same campaign or coupled with the same booking can still be delivered on the same webpage. #### Combine delivery If you want to **combine** the delivery, it is essential to consider that the combined bookings must have identical delivery periods.- [ ](https://documentation.adhese.org/books/introduction/page/adhese-support)To use the **Combination** feature, navigate to the Header tab of the booking and select the leading format based on the [**Trigger Order**](https://documentation.adhese.org/books/inventory-setup/page/formats) setting. The trigger order determines the placement of formats on a web page by setting a number that indicates the position of the format in a sequence of formats. Therefore, the leading format has a lower trigger order (number 1) than the formats of the bookings (numbers 2 and 3) with which it is combined. - Only the leading format needs an assigned volume.Assign a volume only to the leading booking. Failure to do so will result in issues with the delivery of the linked bookings.
When combining two bookings with subformats, ensure their main formats have a set trigger order.
The follow-up bookings can only be trafficked with a single creative.
To **combine** the delivery of one, several, or all bookings with the current leading booking: 1. Tick the *Together with* box. The *Select the bookings running together* modal window opens: [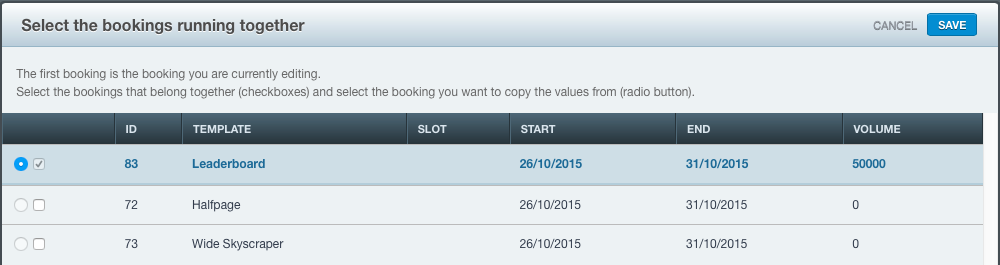](https://documentation.adhese.org/uploads/images/gallery/2024-06/bAdksRmINASubScn-how2.png) The leading booking is highlighted in a darker colour. In the example above, the Leaderboard format runs from 26/10/2015 to 31/10/2015 and has an assigned volume. Bookings that can be delivered together with the leading format are also shown. 2. Tick the checkboxes of the bookings you wish to deliver together with the current booking. - You cannot tick the boxes of bookings that are already booked in the same position as the current booking. - The radio button copies the delivery period, targeting properties and volumes of the checked booking. - Once it has been determined which bookings are delivered together, they will behave as a single booking. Therefore, if you modify the delivery period, targeting properties and/or volumes of the leading booking, the properties of the accompanying bookings will adjust accordingly. 3. In the following screenshot, the Leaderboard and Halfpage formats will be delivered simultaneously. The delivery of the combination will start on 26/10/2015 and end on 31/10/2015, with a volume of 50.000. [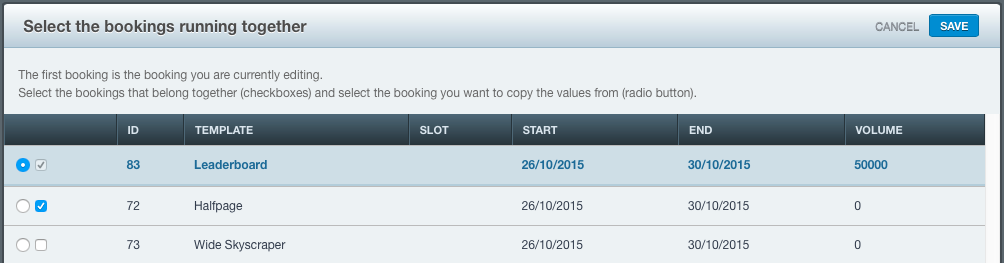](https://documentation.adhese.org/uploads/images/gallery/2024-06/Vij4samjGPH28Dq1-how3.png) 4. Click the *Save* button in the upper right corner of the modal window. The bookings will now be treated as a single booking. The How section of the Booking header for booking 83 (Leaderboard) is as follows: [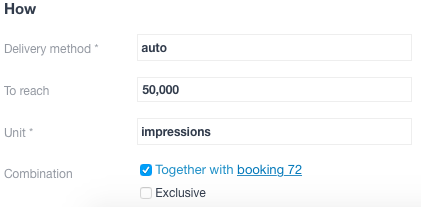](https://documentation.adhese.org/uploads/images/gallery/2024-06/nDfSONfruEkzDDM0-how4.png) In contrast, the How section of the Booking header for booking 72 (Halfpage) is as follows: [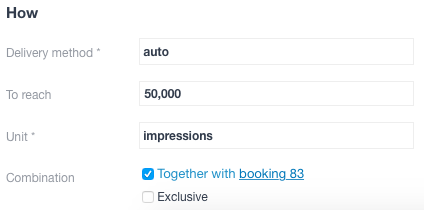](https://documentation.adhese.org/uploads/images/gallery/2024-06/kfR9AbeQjwr5poa2-how5.png) #### Booking priority The priority of a campaign is set at header level. The default setting for this box is 'Use campaign priority'. Select an option from the dropdown to assign a different priority to the booking. #### RTB Determine whether the booking can compete with Real-Time Bidding or [RTB](https://documentation.adhese.org/books/adhese-gateway/page/adhese-gateway) by enabling the **Compete with RTB** checkbox. [](https://documentation.adhese.org/uploads/images/gallery/2024-06/VudIdu0cuMPkegMe-how6.png) In the above image, the default RTB value for the selected [campaign priority](https://documentation.adhese.org/books/campaign-management/page/creating-campaigns#bkmrk-priority) indicates that the booking cannot compete with RTB. The **on** radio button is ticked to allow for competition. #### Optimise CPC Bookings with multiple creatives can be optimised for CPC. When more than one creative is coupled to a booking, you can let Adhese optimise it so that the best-performing creatives are prioritised over the less-performing ones. Enabling CPC optimisation will cause Adhese to gradually adjust the weights to benefit better-performing creatives.| impressions A | clicks A | impressions B | clicks B | share A | share B |
|---|---|---|---|---|---|
| 0 | 0 | 0 | 0 | 0.5 | 0.5 |
| 1000 | 12 | 1000 | 8 | 0.59 | 0.41 |
| 1000 | 15 | 1000 | 5 | 0.73 | 0.27 |
| 1000 | 20 | 1000 | 0 | 0,95 | 0.05 |
Please note that the unique identification of visitors and the storage of personal and other data are subject to national, European, and international laws and regulations. It is the exclusive responsibility of the publisher to comply with the law and adequately notify the user of their rights. Adhese can help and advise publishers here. More on user privacy is available in [the GDPR section](https://documentation.adhese.org/books/adhese-setup-and-implementation/page/user-privacy-and-gdpr) of the documentation.
Adhese won't deliver a campaign with a frequency cap to implementations without any consent integration or to visitors who do not accept cookies (see [The user privacy settings of a browser](https://documentation.adhese.org/books/adhese-setup-and-implementation/page/user-privacy-and-gdpr#bkmrk-privacy-settings-of-)).
To add a user frequency cap: 1. Click *Add user frequency cap*. The *Add user frequency cap box* opens. [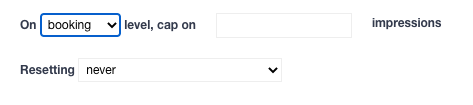](https://documentation.adhese.org/uploads/images/gallery/2024-06/1KscdttbgcDzIajy-user-frequency-cap2.png) 2. To set a user frequency cap, specify the following details: - Enter the number of times a booking may be delivered in a given time period in the **Cap on impressions** field. - Select a constraint level from the **Constraint level** drop-down menu (in the above screenshot, it is set as booking). The constraint level determines the level at which an individual visitor's cap (or the number of impressions) should be taken into account before delivery of the current booking is stopped. Select one of the following options: - *Booking level*. The visitor's capping volume increases each time an impression for the selected booking is delivered. If the maximum number of impressions for a booking is reached (as determined by CAP), the booking will no longer be served to this specific visitor, regardless of the number of creatives attached to the booking. For instance, if the cap is set at 1 and 2 creatives are attached to one booking, only one creative will be displayed. - *Campaign level*. The visitor's capping volume increases with each impression of any booking within the campaign. Once the maximum number of impressions is reached for the entire campaign, delivery of the selected booking will cease. For example, if a campaign includes two bookings, booking A without a capping limit and booking B with a frequency cap of 3 at the campaign level, after three impressions for the campaign, regardless of the booking, booking B will no longer be served to the visitor. - *Traffic level*. At the traffic level, the visitor capping volume applies to each combination of a booking and its attached creatives. For example, if three creatives are attached to the booking and the frequency cap is set at 3, the booking will be delivered a maximum of 9 times before the frequency cap is reset. It is important to note that each combination of a booking and a creative will be delivered three times. - The number of impressions per unique visitor can be reset after a defined period in the **Resetting** section. To set the duration period of a frequency cap, choose one of the following options: - *Never*. If this option is selected, the frequency cap will never reset. Once the frequency cap is reached, the booking or creative will no longer be displayed. - *Every … hours*. The frequency cap resets at fixed intervals, counting from midnight. If you want the cap to reset every 5 hours, it will be reset at midnight, 5:00 a.m., 10:00 a.m., 3:00 p.m., and 8:00 p.m.We recommend setting a minimum frequency cap that resets every three hours
- *… hours/minutes after first impression*. The frequency cap resets after a set period of time based on the visitor's first impression. For instance, if the cap is set at 2 and you want to reset it 3 hours after the first impression, the booking will be offered a maximum of twice between 10 am and 1 pm. The frequency cap will reset at 1 pm. The duration of the frequency cap will be taken into account when the surfer makes a subsequent visit after 1 pm.A frequency cap resets after a visitor deletes [cookies](https://documentation.adhese.org/books/privacy-consent/page/cookies) from their browser. Therefore, a capped campaign will only be shown on the second page view, as Adhese must first verify that the visitor accepts cookies.
A frequency cap does not affect the [forecasting figures](https://documentation.adhese.org/books/campaign-management/page/campaigns#bkmrk-campaign-forecasting) for a booking. The inventory figures will remain the same regardless of the frequency cap.
### Delivery limit**Important:** Delivery Limits are **applied** from the moment they are configured **and** **published**. Any impressions already served before the limit was set, will not be counted toward the total. If you add a delivery limit later in the day to an already-running booking, the impressions delivered earlier that day are excluded from the count. Additionally, delivery limits are based on **tracked** impressions rather than requested ads. If there is a significant delay between an ad request and the moment the impression is registered, the booking will continue delivering during that window, which may result in overdelivery.
The *Delivery limit* section lets you specify a maximum delivery limit of impressions or clicks per day or hour for a booking. To add a **Delivery limit**: 1. Click *Add limit*. The *Delivery limit* box appears: [](https://documentation.adhese.org/uploads/images/gallery/2024-06/3TDQDDagEIabiidj-delivery-limit1.png) 2. Choose between a *Daily* or an *Hourly* limit and between *Impressions* or *Clicks* 3. Fill in the maximum number of *Impressions* (or *Clicks*) 4. You can combine several delivery limits: [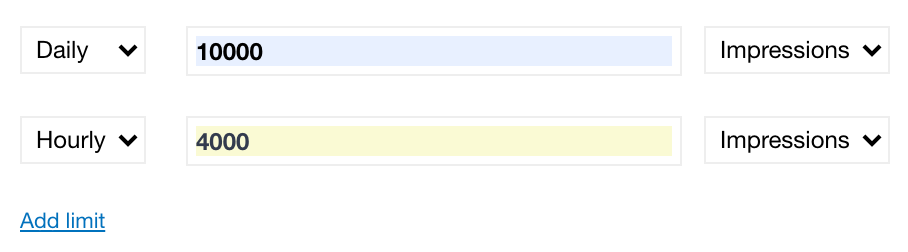](https://documentation.adhese.org/uploads/images/gallery/2024-06/F9gW1iNE5SG1QCnT-delivery-limit2.png) In the example above, the booking has a maximum of 10 000 daily impressions with a maximum of 4 000 per hour. ### Targeting The targeting section allows you to deliver bookings when specific targets are present or absent (negative targeting). For more detailed targeting information, check [this page](https://documentation.adhese.org/books/inventory-management/page/targeting). To add a target to a booking, click *Add ...* next to the targeting types: [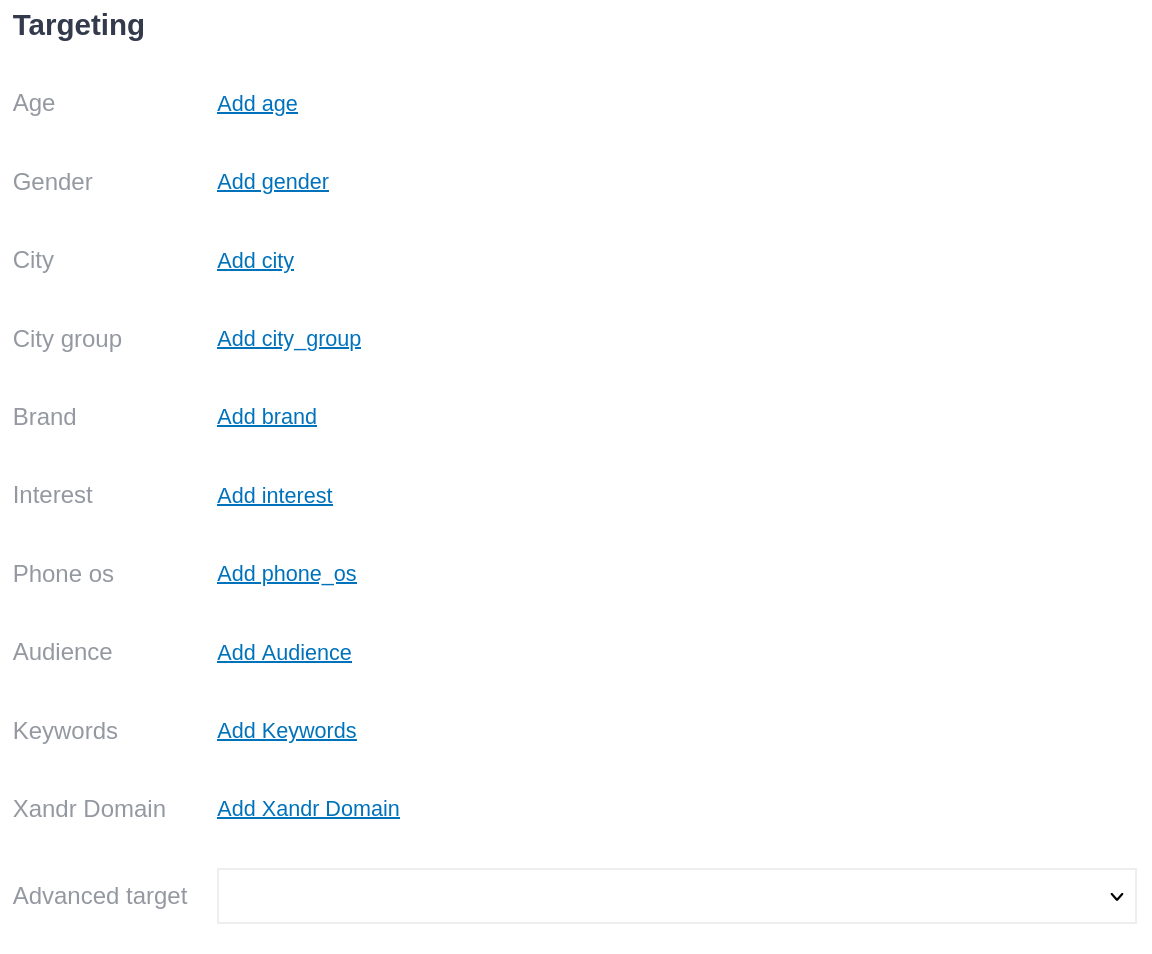](https://documentation.adhese.org/uploads/images/gallery/2024-10/lA5zbXVeXWQwiTfv-schermafdruk-van-2024-10-01-15-23-32.png) When you click a target type, a pop-up window appears with the available target values for that category. Here you can select the targets you want active on the booking: [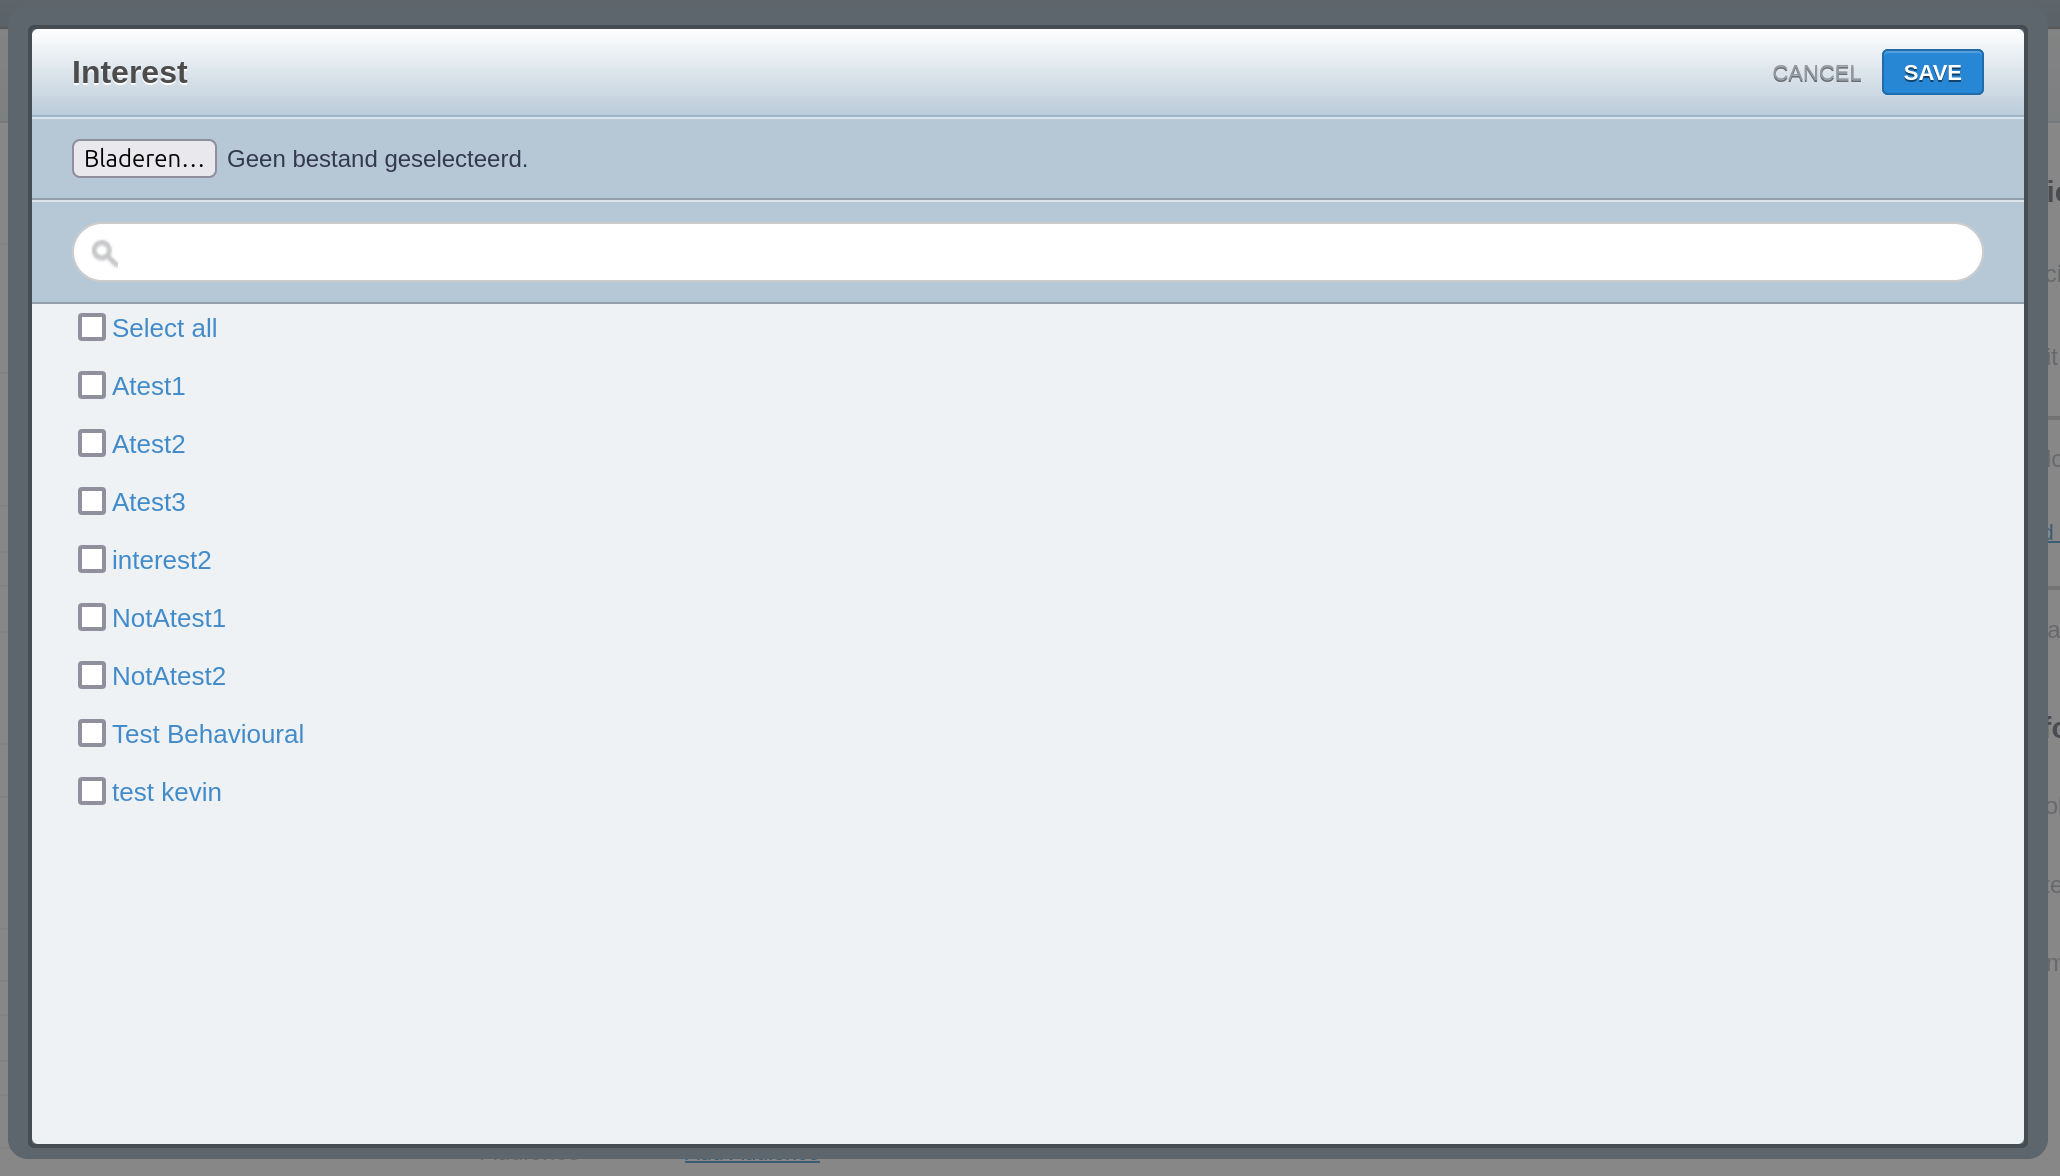](https://documentation.adhese.org/uploads/images/gallery/2024-10/JYA0gEmif65XFyy4-schermafdruk-van-2024-10-01-15-42-32.png) When you select multiple target values, it's important to take several things into account: 1. Two or more active target values within the same target type exist in an OR relation. This means that at least one of the options must be present for the booking to be delivered. 2. Target types themselves exist in an AND relation. That is, if there are two target values, each in a different target type, both target values must be present for the booking to be delivered. 3. When you have multiple target values and multiple target types, both OR and AND relations exist. If you have two target values each in two target types, the two target values in the same target type will be in an OR relation and the two target types will be in an AND relationship, which means that one target value of each target type must be present for the booking to be delivered. [](https://documentation.adhese.org/uploads/images/gallery/2024-10/1BhXZGAJKpPNJWPr-schermafdruk-van-2024-10-01-15-53-53.png)Be cautious when combining positive and negative target values within the same target type. A positive target value in the same target type as a negative target value can cancel out the negative target. If the positive target is present, the booking will be delivered (since it's in an OR relation, only one target needs to be present), even if the target that needs to be excluded is present. You can solve this by making a combined target value. For more information, see the [Targeting page](https://documentation.adhese.org/books/inventory-management/page/targeting).
Targets make a booking more specific and, therefore, count towards its priority, IF the inventory is not sufficient for all running bookings (overdelivery). A booking with targets active will take priority over a booking without in this cse, provided the actual priority level is equal.
#### Bulk activating targets To activate multiple target values at once, follow these steps: 1. Click *Add* on the target type you wish to add targets to, and the targeting screen will open:[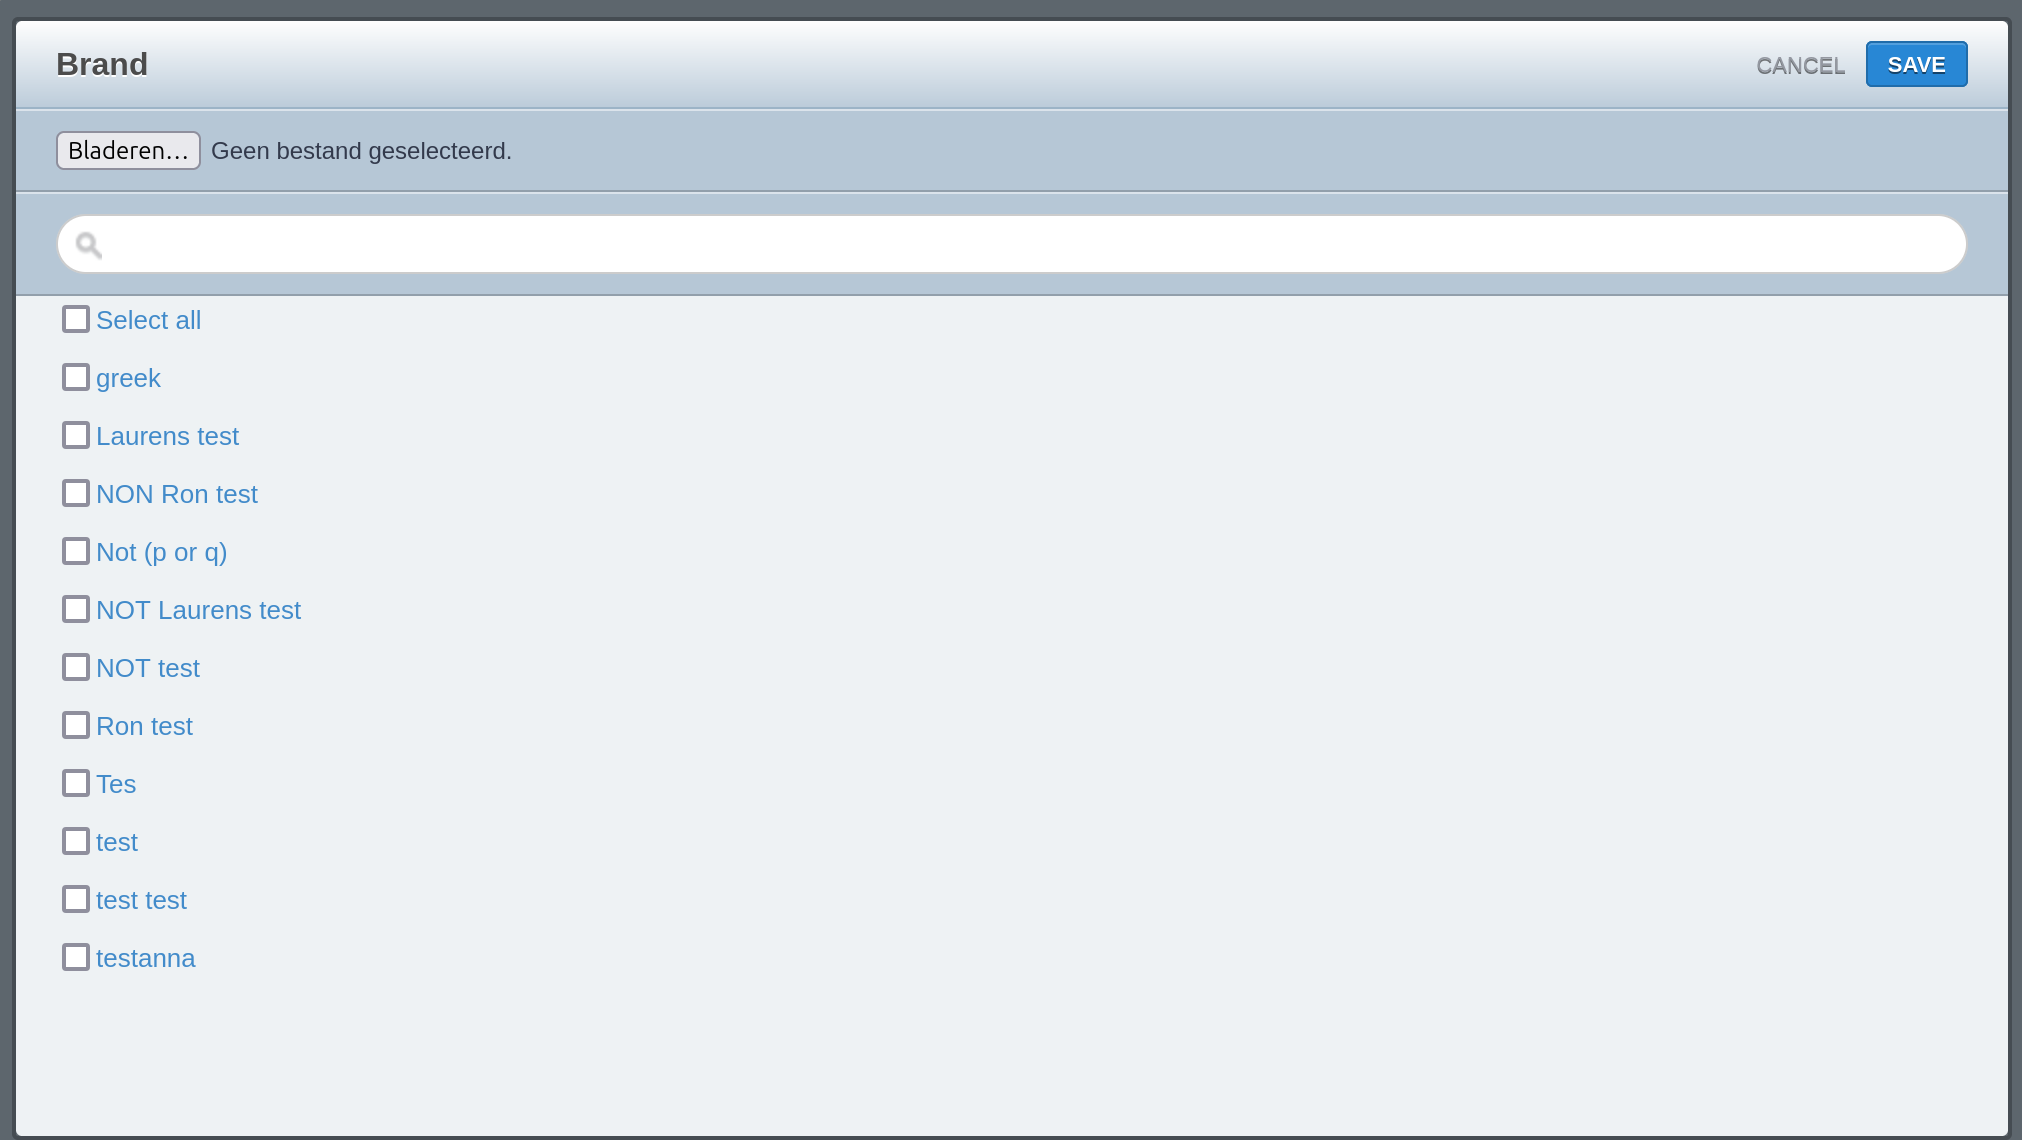](https://documentation.adhese.org/uploads/images/gallery/2024-11/eZ5mGG17zDeoM60B-schermafdruk-van-2024-11-14-13-00-36.png) 2. Select *Bladeren (Browse)*, and your file manager will open. 3. Select a CSV file that contains the IDs or target codes for the target values you want to activate. The IDs/codes should be listed underneath each other under the first column of the CSV file: [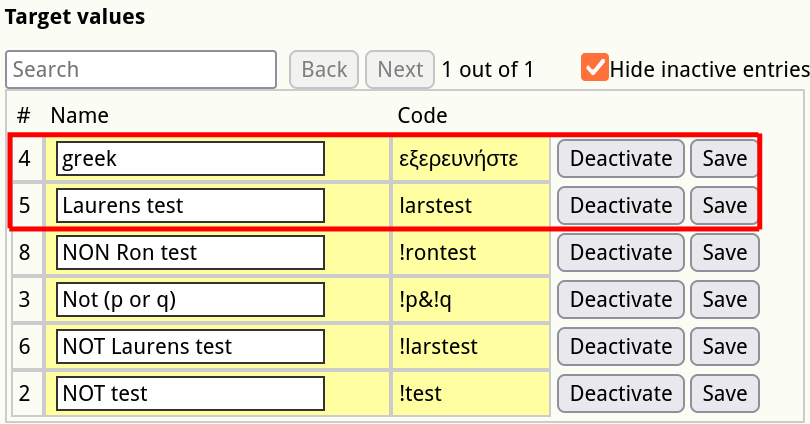](https://documentation.adhese.org/uploads/images/gallery/2024-11/PdlqAgXBqAb7gYpq-schermafdruk-van-2024-11-14-13-00-58.png)[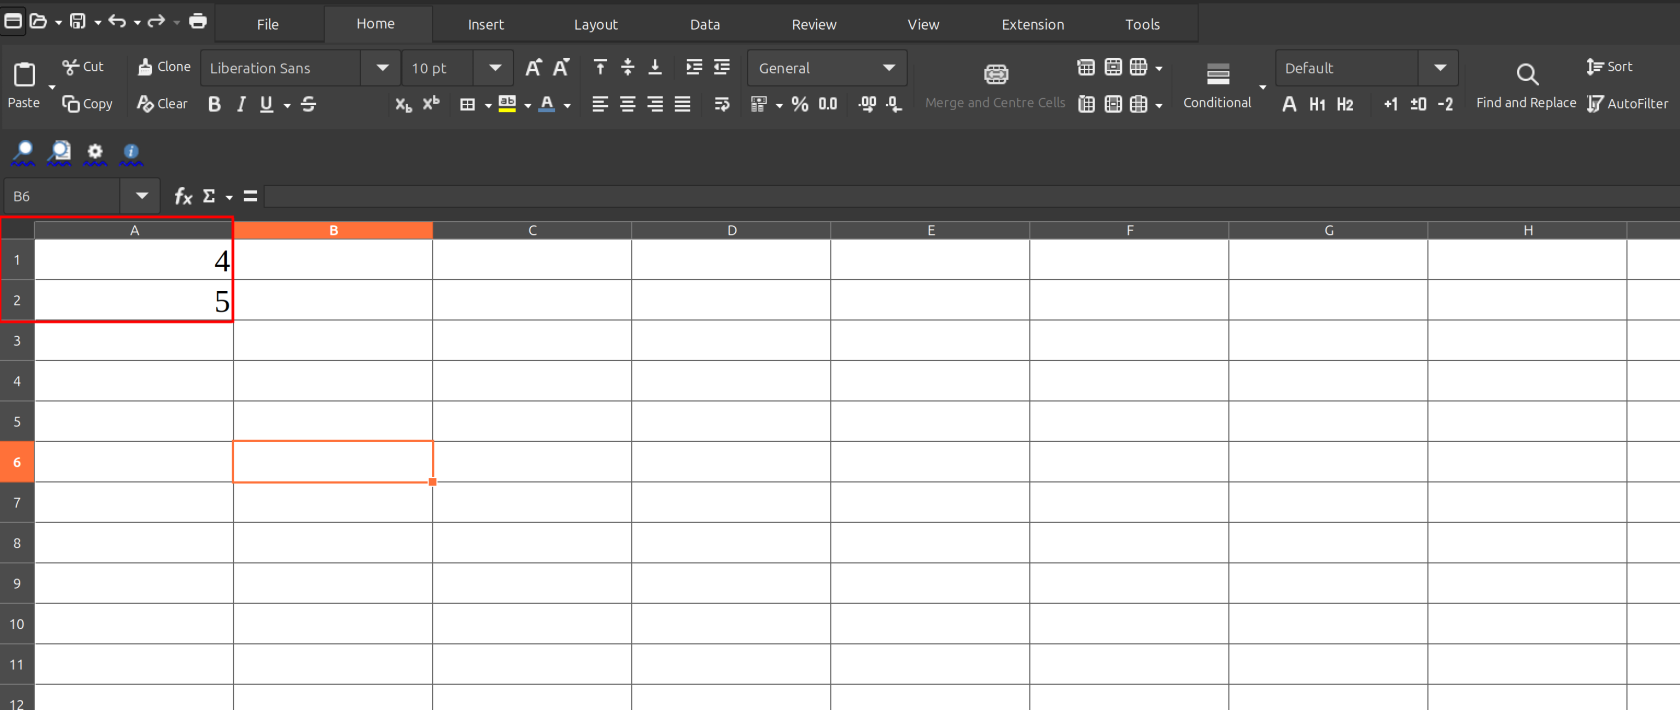](https://documentation.adhese.org/uploads/images/gallery/2024-11/9UkCBMCXNRc2ywKU-schermafdruk-van-2024-11-14-13-02-05.png)Whether your target uses the ID (#) or target code (Code) depends on the target in question and how it was configured.
For the best results when bulk uploading targets, create a .csv file in a spreadsheet program like LibreOffice Calc or Microsoft Excel.
1. As soon as the CSV file is selected, the requested target values will be selected:[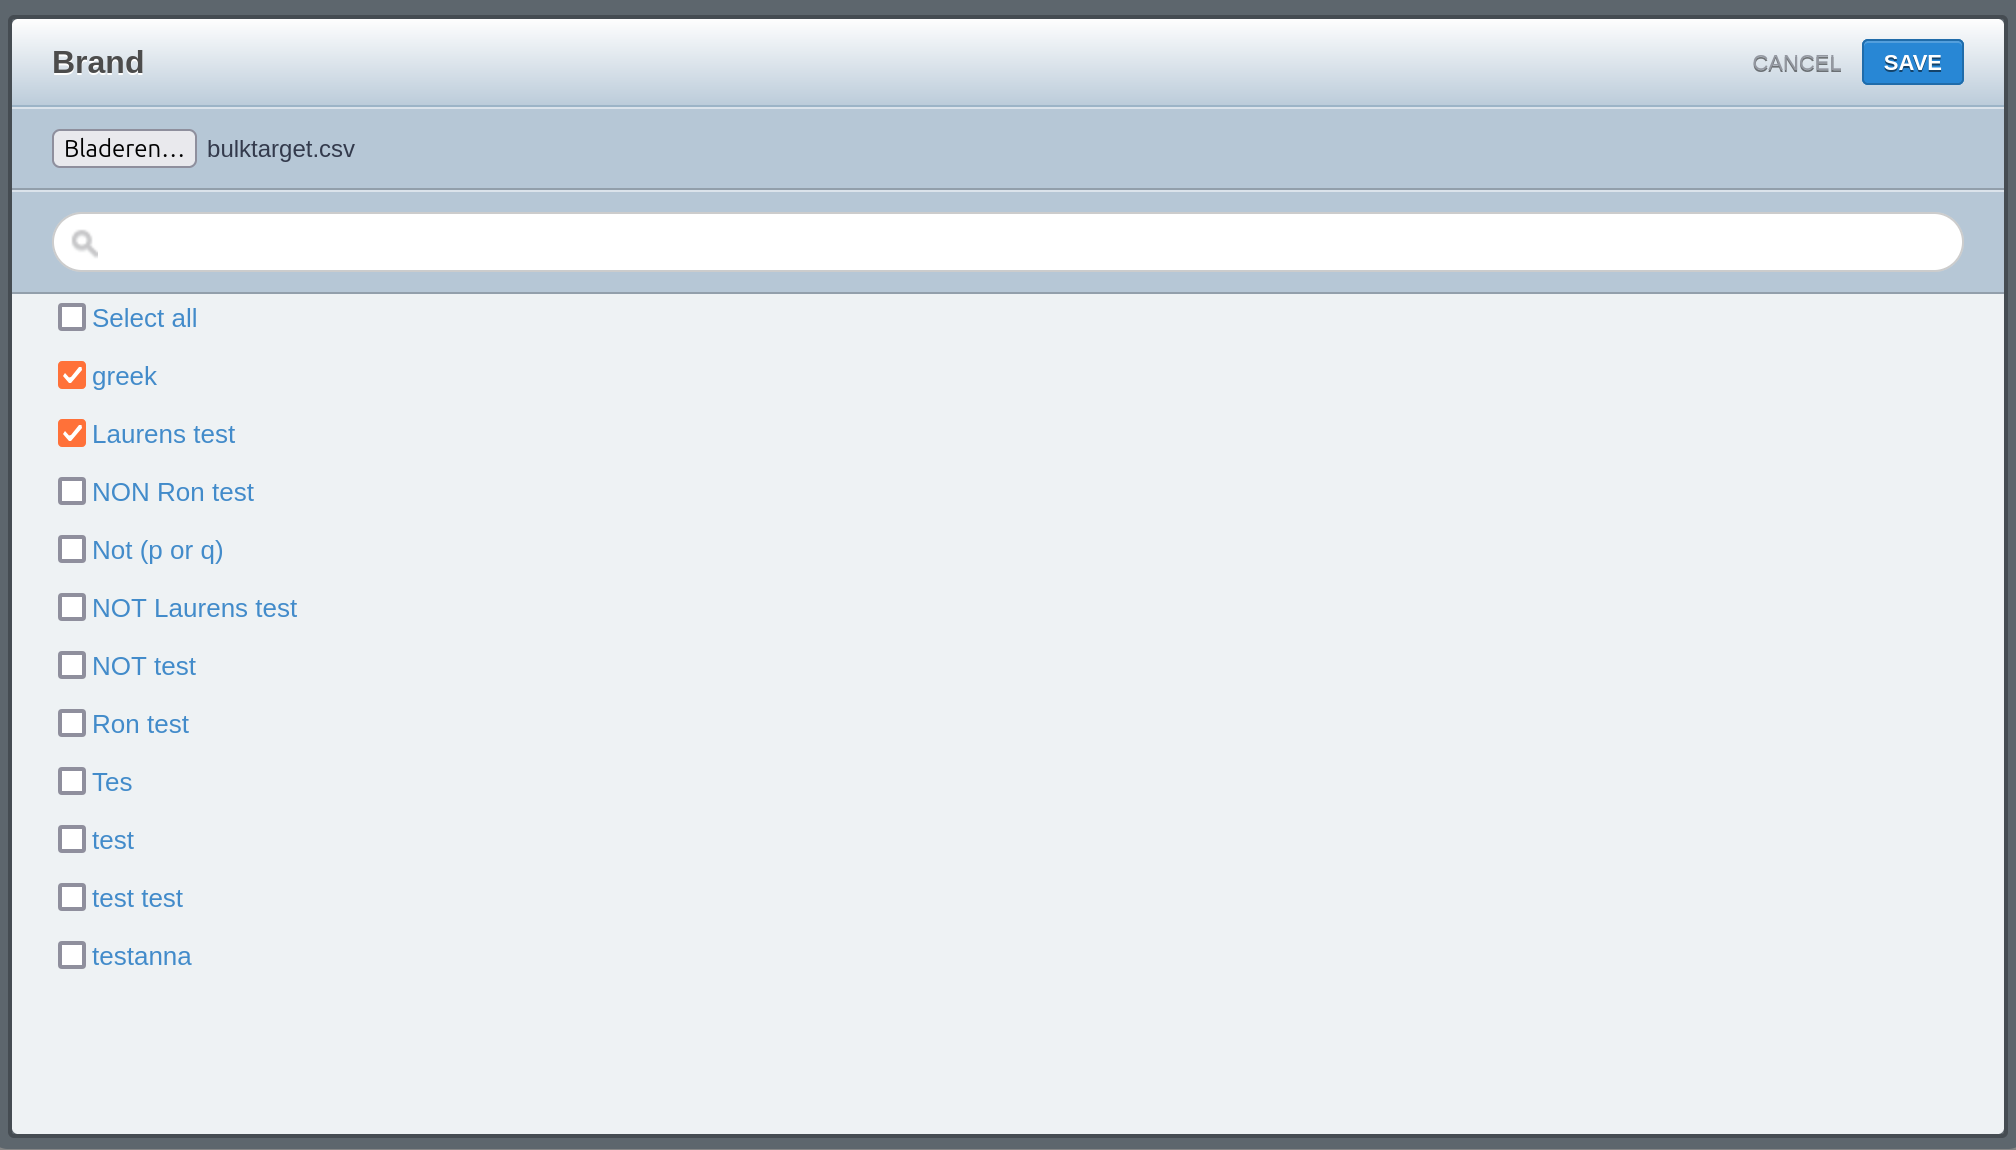](https://documentation.adhese.org/uploads/images/gallery/2024-11/Nx5yGbR34oUEXYsl-schermafdruk-van-2024-11-14-13-05-12.png) 2. Click *Save*, and the bookings will be selected in the bookings interface:[](https://documentation.adhese.org/uploads/images/gallery/2024-11/Mr83jL9qxBV1dJ3f-schermafdruk-van-2024-11-14-13-05-32.png) ### Booking priceBy default, CPM has no effect on priority. If you want higher CPM to increase priority and thus booking share instead of the booking end date, see [this page](https://documentation.adhese.org/books/integration-setup/page/cpm-priority-sorting).
The *Price* section in the *Booking* header lets you specify the pricing details of a booking, including the pricing model and the corresponding unit price. [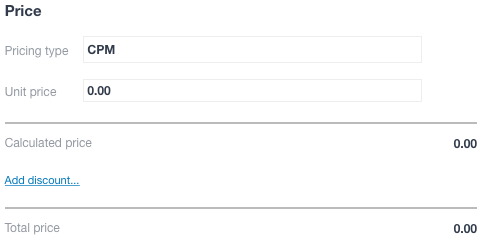](https://documentation.adhese.org/uploads/images/gallery/2024-06/c2O6RAd482TgcK4j-booking-price1.png) The input fields below are optional and do not impact the start or delivery of a campaign. - Select the pricing model you want to use to charge a client from the **Pricing type** drop-down list. The available options are: - *CPM* or cost per mille, the cost per thousand impressions for an ad. - *CPC* or cost per click, the cost for a single click on an ad. - *CPL* or cost per lead, the cost per action, such as a download, subscription to a newsletter, request of a brochure, … - *CPP* or cost per period is the cost for a fixed delivery period, independent of the number of impressions or clicks. - *ADM* or administrative cost, a cost that is unrelated to a volume or time. - In the **Unit price** field, set the price a client will pay per thousand impressions, per day, per click, per lead or per purchase. - The **Calculated price** field multiplies the unit price by the reached volume of the pricing type. - *Click the Add discount* link to add a discount or surplus (as a percentage or fixed number). This will open the *Add discount* modal window, where you can select the *Discount type* and add a comment. Discounts are typically applied for high volumes of impressions purchased or specific packages. - The **Total price** is calculated by subtracting the discount or adding the surplus to the base price. - The **Campaign budget** field displays the [budget](https://documentation.adhese.org/books/campaign-management/page/creating-campaigns#bkmrk-budget) of the campaign. #### Bid Optimisation [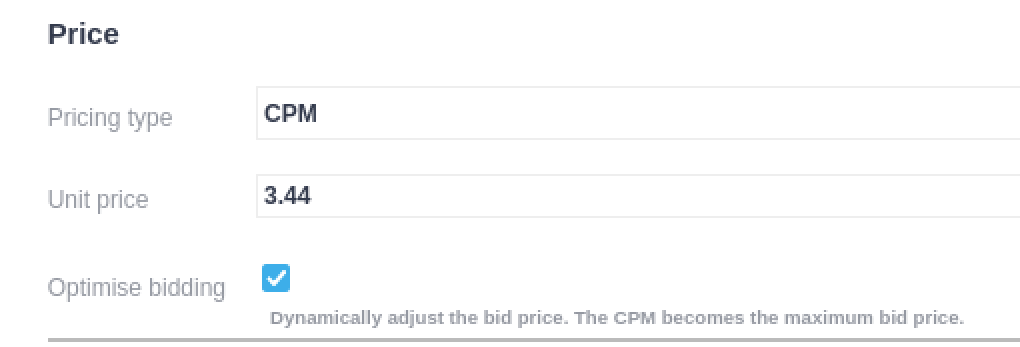](https://documentation.adhese.org/uploads/images/gallery/2024-10/tm0yEgtQvAQyQ7Zt-image.png)Bid optimisation is a custom feature that requires setup. Please contact [support](https://documentation.adhese.org/books/support/page/adhese-support) if you're interested in this feature.
Bid Optimisation does not work with "Clicks" as a to reach value or any pricing types that aren't "CPM"
Bid optimisation is a buy-side feature that allows the ad server to dynamically change the CPM of an ad to bid as low as possible. The ad server lowers the CPM until bids are lost, at which point the CPM will rise again. The bid optimisation feature aims to keep the CPM as low as possible while losing a minimal amount of bids. Bid optimisation can be enabled by clicking the *Optimise bidding* checkbox in the *Price* section of the booking screen. ### Booking info & metadata #### Info - (Optional) In the Booking Name field, you can enter a name for the booking. - (Optional) In the **External key** field, enter an external ID or key if there is a link to an external party or system, such as a third-party ad server or accounting system.To upload creatives via the [Hotfolder](https://documentation.adhese.org/books/campaign-management/page/creatives#bkmrk-hotfolder), you must provide a unique external key that connects a creative with a booking.
- (Optional) Provide a comment in the **Comment** field. #### Metadata You can create custom metadata fields to add to a booking. Metadata provides additional information about the booking, facilitating comparison and benchmarking of similar bookings. Additionally, metadata can prevent the display of competitive advertisers, such as two car brands, on the same web page. To add metadata to a booking, you must first create a booking property in your Adhese account. This feature is restricted to users with Admin rights. 1. Go to the *Administration* screen. Click *Admin* in the left navigation menu. 2. Under General, click *Booking properties*. 3. Enter the name of the booking property in the first (or left) **Group** field. 4. Enter a code or ID for the booking property in the second (or right) **Group** field. The code should be equivalent to the property's name. 5. Click the *Save* button. 6. In the **Elements** field, enter the different options of the booking property. Enter a name in the left field and a code or ID in the right field. 7. Click the *Save* button. You can now add an additional option to the booking property. After creating a booking property, a new section appears in the *Header* tab of a booking: *User Metadata*. You can now add a booking property by choosing an option from the drop-down menu. ## Saving a booking To save the booking, *click on the Save* button. If you *click on the arrow* next to this button, a drop-down menu of saving options will appear: [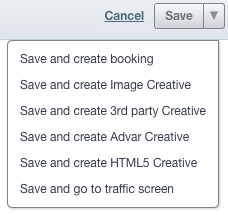](https://documentation.adhese.org/uploads/images/gallery/2024-06/nidR5RZdBubwPOXw-saving-a-booking1.jpg)| **Save and create booking** | Saves the current booking and opens a new create booking screen |
| **Save and create Image Creative** | Saves the current booking and opens a create Image Creative screen |
| **Save and create 3rd party Creative** | Saves the current booking and opens a create 3rd party Creative screen |
| **Save and create Advar Creative** | Saves the current booking and opens a create Advar Creative screen |
| **Save and create HTML5 Creative** | Saves the current booking and opens a create HTML5 Creative screen |
| **Save and go to traffic screen** | Saves the current booking and goes to the traffic screen for that booking |
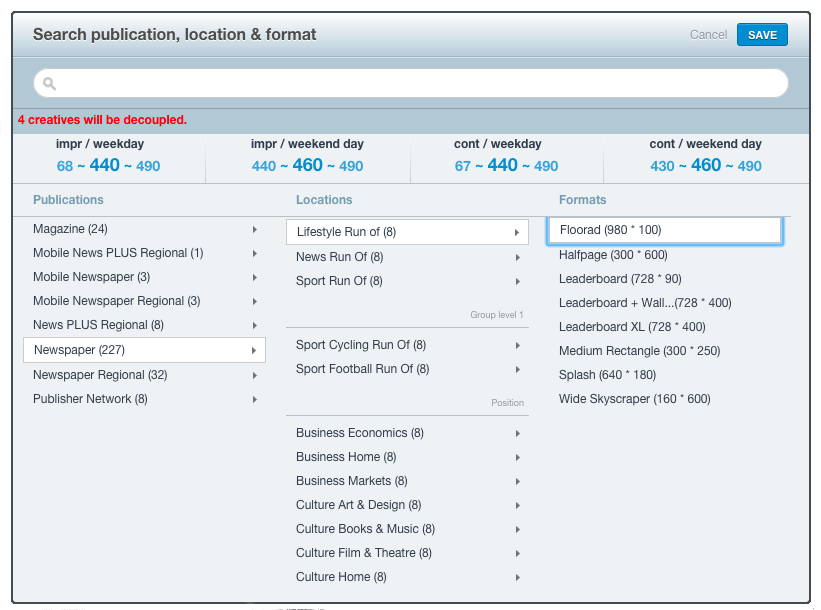
When editing the position of a booking, the creative format may no longer match the new position. The *Search publication, location & format* modal window will warn you if a creative is decoupled from the booking:
[](https://documentation.adhese.org/uploads/images/gallery/2024-06/Br2rsJCVpyM724OZ-edit-a-booking1.png) ### Edit multiple bookings Multiple bookings can be edited in bulk for start and end dates, running hours, days of the week, targeting, and capping in a single operation. To modify multiple bookings at once: 1. Go to the *Campaign* overview. Click *Campaigns* in the left navigation menu of Adhese. 2. Click the campaign for which you want to edit multiple bookings. The *Header* tab of the campaign opens. 3. Click the *Bookings* tab. This displays the *Booking* overview. The *Booking* overview lists all bookings created for the selected campaign. 4. In the *Booking* overview, select the bookings you want to edit. 5. Click the *Edit multiple bookings* button located above the *Booking* overview. [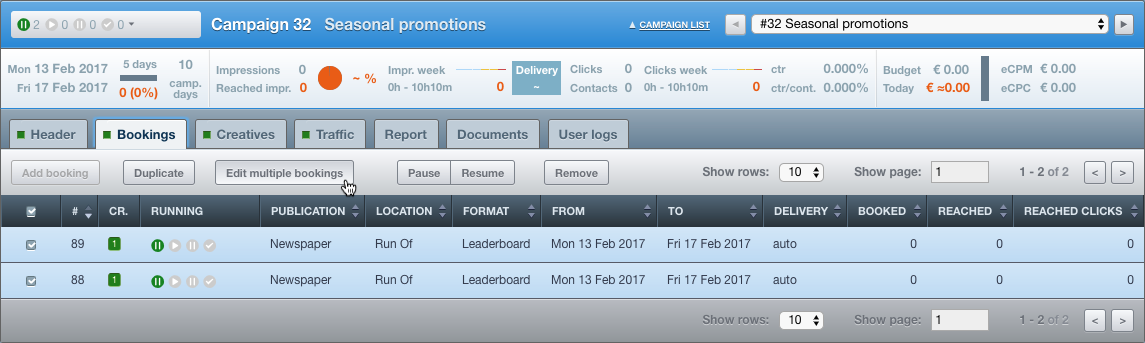](https://documentation.adhese.org/uploads/images/gallery/2024-06/WKH9bJZN04NBSJNO-edit-multiple-bookings1.png) The *Change multiple bookings simultaneously* window opens. Adhese displays the common values of all selected bookings. In the example below, these bookings share the same start and end dates, running hours, days of the week, and targeting: [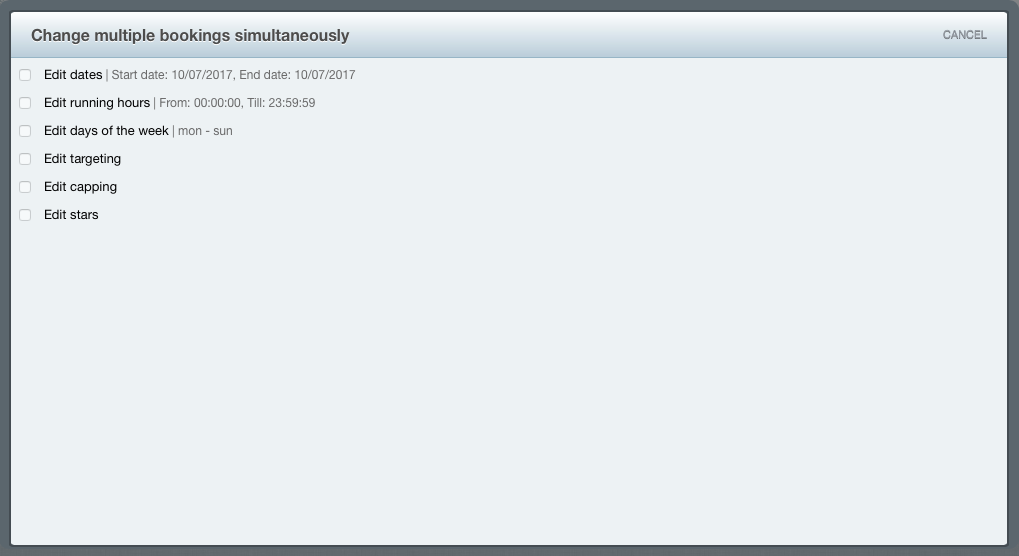](https://documentation.adhese.org/uploads/images/gallery/2024-06/r0fL1S204DMQsSda-edit-multiple-bookings2.png) ### Edit dates To change the start and/or end dates of the selected bookings: 1. In the *Change multiple bookings simultaneously* window, click *Edit dates*.If any of the selected bookings have already started, you can only modify the end dates of those bookings. It is impossible to change the start or end dates to a date before the day you are editing the bookings. If you attempt to move bookings to a date prior to today, Adhese will notify you that the relevant dates will be adjusted to the current date. For example, 'One or more end dates were set to before today; they will be set to today.' It is not possible to end bookings before they begin. If you attempt to move the end date of bookings to a time before they started, Adhese will notify you that the end date will be set to the day after the starting day (or to today if the starting day is in the past): 'One or more end dates were set to before the starting date, they will be set to the day after the starting day or to today.' Bookings cannot start after they end. If you attempt to move the start date of bookings to after the end date, Adhese will notify you that the start date will be set to the day before the end date: 'One or more start dates were set to after the ending date; they will be set to the day before the ending date.'
2. To adjust the start and/or end dates of all selected bookings forward or back by a number of days, weeks, months or years: [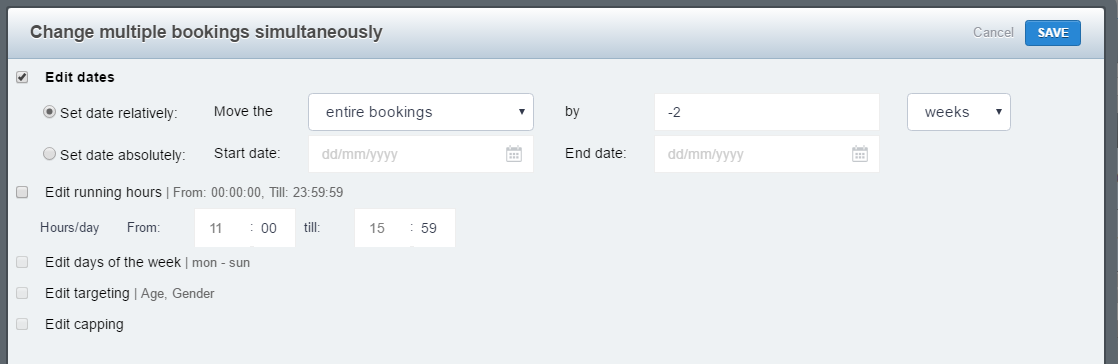](https://documentation.adhese.org/uploads/images/gallery/2024-06/edEnwP3vUlqNFSrS-edit-multiple-bookings3.png) 1. select *Set date relatively;* 2. choose *start of the bookings* to only adjust the start of all selected bookings, or choose *end of the bookings* to only adjust the end of all selected bookings, or choose *entire bookings* to adjust both start and end of all selected bookings; 3. choose *days* to adjust a number of days, or choose *weeks* to adjust a number of weeks, or choose *months* to adjust a number of months, or choose *years* to adjust a number of years; 4. to adjust all selected bookings, enter the number of days, weeks, months, or years. Enter a positive number for forward adjustment and a negative number for backward adjustment. 3. To set an absolute start and/or end date for all selected bookings: [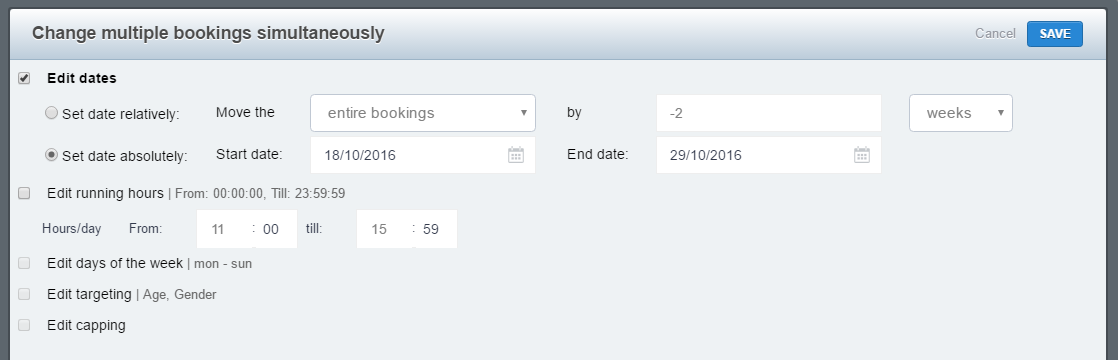](https://documentation.adhese.org/uploads/images/gallery/2024-06/dlVMBg9q8kI3GWT5-edit-multiple-bookings4.png) 1. select *Set date absolutely*; 2. enter a date in *Start date* to change the start date of all selected bookings; 3. enter a date in *End date* to change the end date of all selected bookings; 4. Click *Save*. ### Edit running hours To edit the running hours of all selected bookings: 1. In the *Change multiple bookings simultaneously* window, click *Edit running hours*. - To change the start time, enter a start time in the *From* field. - To change the end time, enter an end time in the *till* field. [](https://documentation.adhese.org/uploads/images/gallery/2024-06/3WWG1FHqWhO86CnT-edit-multiple-bookings5.png) 2. Click *Save*. ### Edit days of the week To edit the days of the week that all selected bookings run on: 1. In the *Change multiple bookings simultaneously* window, click *Edit days of the week*. 2. Select the days of the week on which you want all bookings to run. [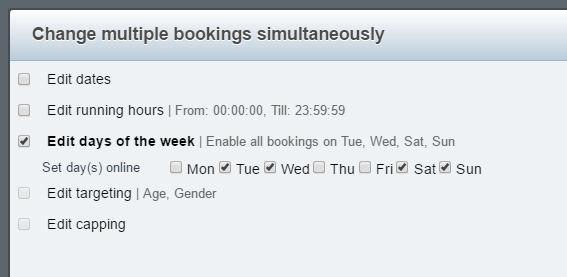](https://documentation.adhese.org/uploads/images/gallery/2024-06/wrzXvdtq0XXpllEo-edit-multiple-bookings6.png) 3. Click *Save*. ### Edit targeting To edit the targeting of all selected bookings: 1. In the *Change multiple bookings simultaneously* window, click *Edit Targeting*. - To remove all targeting, select *Remove all targeting*. [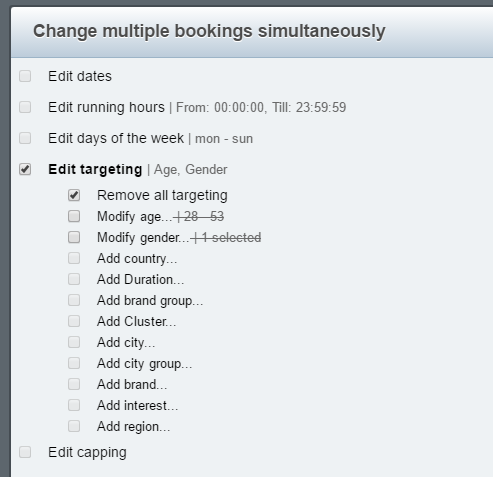](https://documentation.adhese.org/uploads/images/gallery/2024-06/otIkGlQkbDpIIQps-edit-multiple-bookings7.png) - Select *Modify (specific targeting option)* to modify the targeting for all selected bookings - S*elect Add (targeting option)* to add new targeting for all selected bookings. [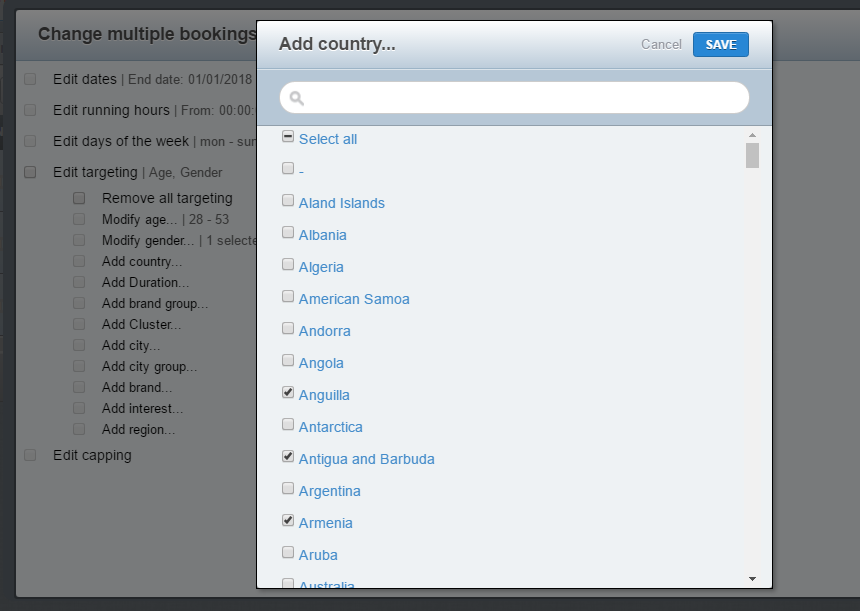](https://documentation.adhese.org/uploads/images/gallery/2024-06/yR8bajW8SfHNwPIa-edit-multiple-bookings8.png) 2. Click *Save*. ### Edit capping To edit the capping of all selected bookings: 1. In the *Change multiple bookings simultaneously* window, click *Edit capping*. - To remove capping from all selected bookings, select *Remove all capping*. - To add capping to all selected bookings, select *Add capping...* and enter the capping information. [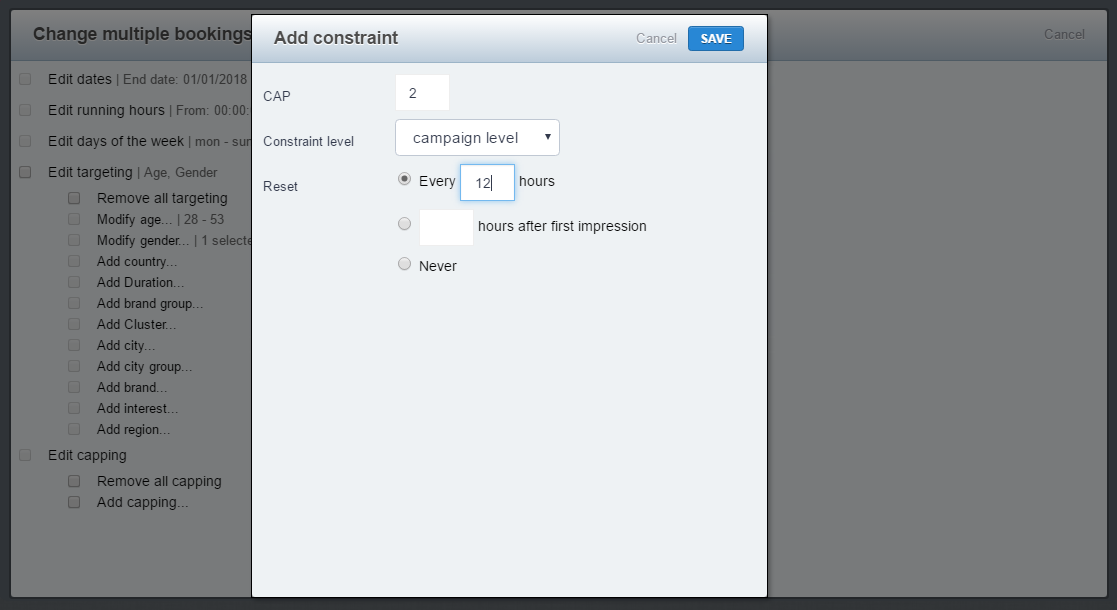](https://documentation.adhese.org/uploads/images/gallery/2024-06/twKvZlF1joA2XTL1-edit-multiple-bookings9.png) 2. Click *Save*. ### Edit stars To change the [star status](https://documentation.adhese.org/books/campaign-management/page/statuses#bkmrk-status-stars) of more than one booking: 1. In the *Change multiple bookings simultaneously* window, click *Edit stars*. - To start the selected bookings, select *Star these bookings*. - To unstar the selected bookings, select *Unstar these bookings*. [](https://documentation.adhese.org/uploads/images/gallery/2024-06/blZJ163BLO4kGElA-edit-multiple-bookings10.png) 2. Click *Save.* ## Duplicate a booking If you duplicate a booking, you will get an exact copy of the original booking. The status of the duplicated booking is automatically set to pause. To duplicate or copy a booking: 1. Go to the *Campaign* overview. Click *Campaigns* in the left navigation menu of Adhese. 2. Click the campaign for which you want to duplicate a booking. 3. Click the *Bookings* tab. 4. Select the booking you want to duplicate by ticking its box in the overview. 5. Click the *Duplicate* button above the overview. [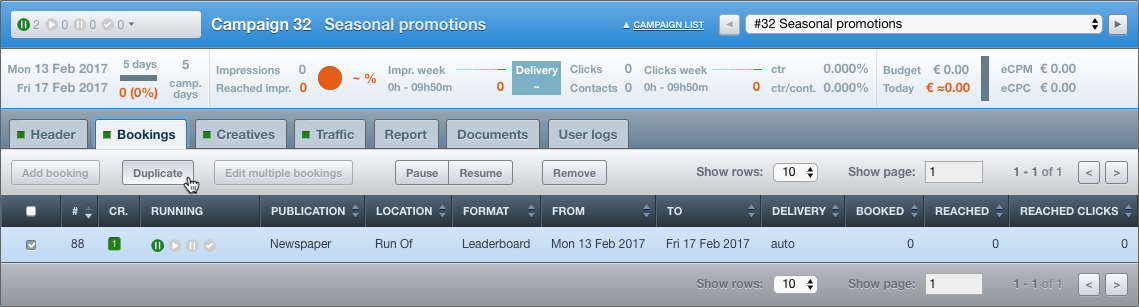](https://documentation.adhese.org/uploads/images/gallery/2024-06/6lND6Ki0ld7QeR0r-duplicate-a-booking1.png) 6. Click *OK* on the confirmation screen. This duplicates the booking [](https://documentation.adhese.org/uploads/images/gallery/2024-06/iCrXCCLobiv74yQe-duplicate-a-booking2.png) 7. The overview briefly highlights the duplicated booking. Or, 1. Go to the *Campaign* overview. Click *Campaigns* in the left navigation menu of Adhese. 2. Click the campaign for which you want to duplicate a booking. 3. Click the *Bookings* tab. 4. Click the booking you want to duplicate. 5. Click on the small triangle next to the *Running* status, left to the title of the booking. A list appears. [](https://documentation.adhese.org/uploads/images/gallery/2024-06/pnP7sEAwEEiPh1vX-duplicate-a-booking3.png) 6. Click *Duplicate booking*. 7. Click *OK* on the confirmation screen. This duplicates the booking. [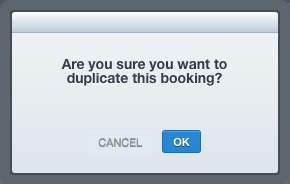](https://documentation.adhese.org/uploads/images/gallery/2024-06/N4FqdT7CdEwVsDUN-duplicate-a-booking4.png) 8. The overview briefly highlights the duplicated booking. ## Pause a booking There are two ways to pause a booking. To pause a booking: 1. Go to the *Campaign* overview. Click *Campaigns* in the left navigation menu of Adhese. 2. Click the campaign for which you want to pause a booking. 3. Click the *Bookings* tab. 4. Select the booking you wish to pause by ticking its box in the overview. 5. Click the *Pause* button above the overview. The booking is paused. [](https://documentation.adhese.org/uploads/images/gallery/2024-06/fsODQNIUwEYjHIxI-pause-or-resume-a-booking1.png) 6. The *Booking* overview briefly highlights the paused booking. - Pausing a running booking changes its status to *paused*. The paused tooltip within the paused icon of the *Running* *status* table column (see [Booking status](https://documentation.adhese.org/books/campaign-management/page/statuses#bkmrk-booking-status)) indicates this. - If you pause a booking that has already ended, its status will change to *planned.* The paused tooltip within the planned icon of the *Running* *status* table column () indicates this. Or, To pause a booking: 1. Go to the *Campaign* overview. Click *Campaigns* in the left navigation menu of Adhese. 2. Click the campaign for which you want to pause a booking. 3. Click the *Bookings* tab. 4. Select the booking you wish to pause by ticking its box in the overview. 5. Click on the small triangle next to the *Running* status, left to the title of the booking. A list appears. 6. Click *Pause booking*. This pauses the booking. [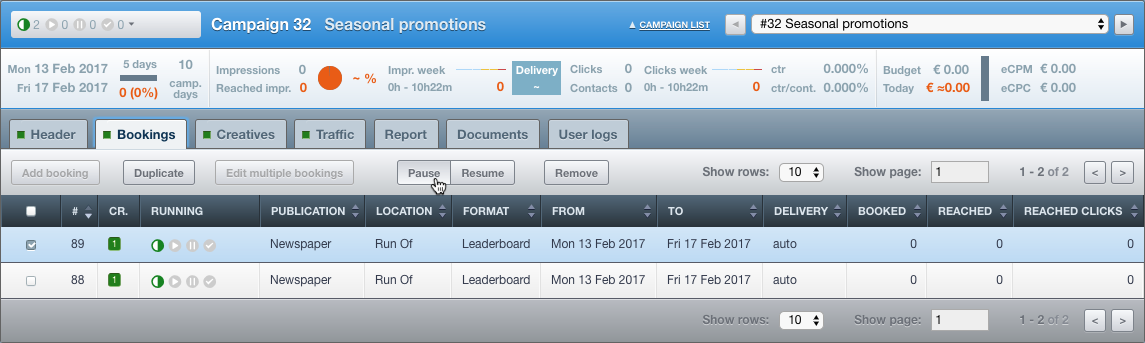](https://documentation.adhese.org/uploads/images/gallery/2024-06/dHxMSJOVbxEJcnxI-pause-or-resume-a-booking2.png) 7. The *Booking* overview briefly highlights the paused booking. - Pausing a running booking changes its status to *paused*. The paused tooltip within the paused icon of the *Running* *status* table column (see [Booking status](https://documentation.adhese.org/books/campaign-management/page/statuses#bkmrk-booking-status)) indicates this. - If you pause a booking that has already ended, its status will change to *planned.* The paused tooltip within the planned icon of the *Running* *status* table column () indicates this. ## Resume a booking A booking can be resumed in two different ways. To resume a paused booking: 1. Go to the *Campaign* overview. Click *Campaigns* in the left navigation menu of Adhese. 2. Click the campaign for which you want to resume a paused booking. 3. Click the *Bookings* tab. 4. Select the paused booking you want to resume by ticking its box in the overview. 5. Click the *Resume* button above the overview. This resumes the booking and changes the status to its normal status. [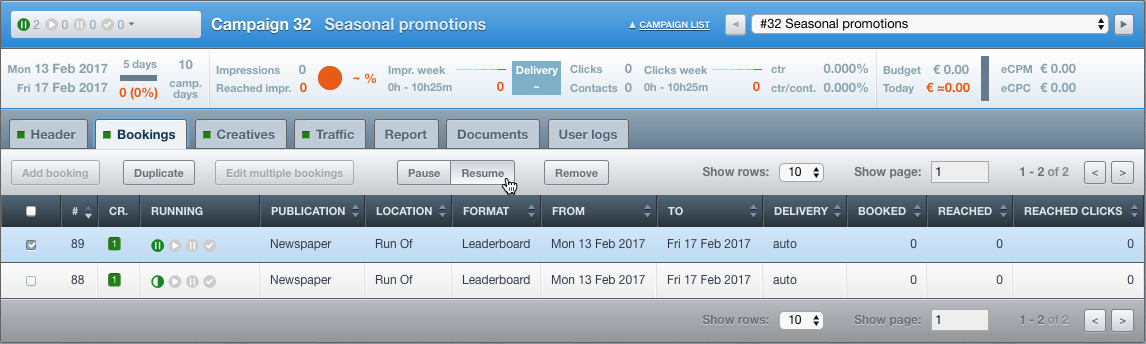](https://documentation.adhese.org/uploads/images/gallery/2024-06/WukPxdDzyHn03Jq2-pause-or-resume-a-booking3.png) 6. The *Booking* overview briefly highlights the resumed booking. Or, 1. Go to the *Campaign* overview. Click *Campaigns* in the left navigation menu of Adhese. 2. Click the campaign for which you want to resume a paused booking. 3. Click the *Bookings* tab. 4. Click the booking you want to resume. 5. Click on the small triangle next to the *Running s*tatus, located to the left of the booking title. A list appears. 6. Click *Resume booking*. This resumes the booking and changes its status to normal. [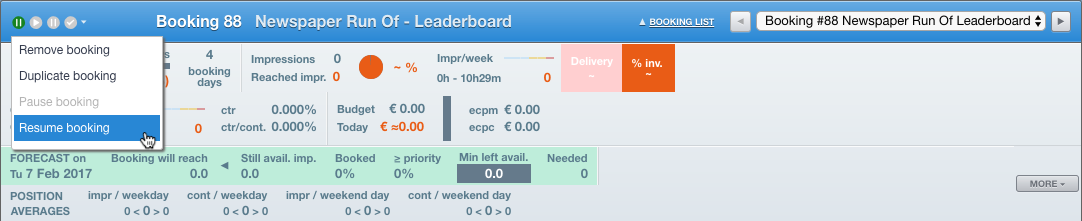](https://documentation.adhese.org/uploads/images/gallery/2024-06/r5dBbRmKPuEesKYS-pause-or-resume-a-booking4.png) 7. The *Booking* overview briefly highlights the resumed booking. ## Stop a booking There are two ways to stop a booking. To stop a booking: 1. Go to the *Campaign* overview. Click *Campaigns* in the left navigation menu of Adhese. 2. Click the campaign for which you want to stop a booking. 3. Click the *Bookings* tab. 4. Select the booking you want to stop by ticking its box in the overview. 5. Click the *Stop* button above the overview: [](https://documentation.adhese.org/uploads/images/gallery/2024-06/fHMob8aP3oxpjCOb-stop-a-booking1.png) 6. Click *OK* on the confirmation screen. This stops the booking. [](https://documentation.adhese.org/uploads/images/gallery/2024-06/6X43We4itEchCA3D-stop-a-booking2.png) Or, 1. Go to the *Campaign* overview. Click *Campaigns* in the left navigation menu of Adhese. 2. Click the campaign for which you want to stop a booking. 3. Click the *Bookings* tab. 4. Click the booking you want to stop. 5. Click on the small triangle next to the *Running* status, located to the left of the booking title. A list appears. 6. Click *Stop booking*. [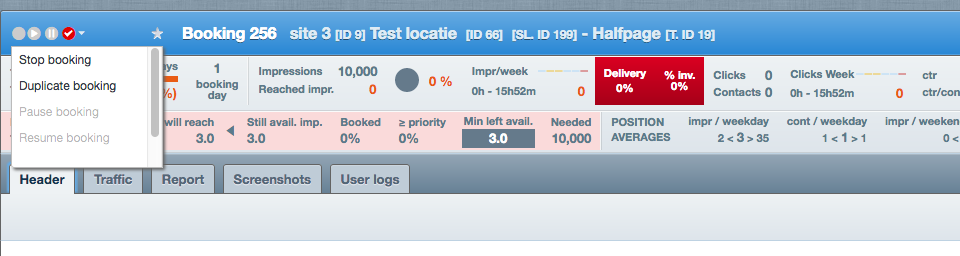](https://documentation.adhese.org/uploads/images/gallery/2024-06/q95u9VXsCqz4gPqx-stop-a-booking3.png) 7. Click *OK* on the confirmation screen. This stops the booking. [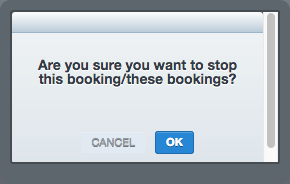](https://documentation.adhese.org/uploads/images/gallery/2024-06/2UMSjocmRfRHxWN4-stop-a-booking4.png) The booking gets the status Stopped. By default, only stopped bookings that have measured impressions will remain visible in the interface. If Adhese has measured impressions, the booking receives the status *Stopped* (the status indicator is displayed as a black circle in the *Running* status). Bookings that have not measured impressions are hidden by default. See the screenshot below for an example. No stopped bookings (with no impressions measured) are visible. [](https://documentation.adhese.org/uploads/images/gallery/2024-06/JI9JUMTEHW0jgAsM-stop-a-booking5.png) When you hit the *Show hidden bookings* button, stopped bookings (with no impressions measured) become visible: [](https://documentation.adhese.org/uploads/images/gallery/2024-06/kVzgJiYPi6ZId8XH-stop-a-booking6.png)Once a booking has the status *Stopped*, you cannot resume the booking.