A Stack format sends a list of ads that are available for display for that position. A stack is always a client-specific implementation.
6. (Optional) Select a JavaScript template file in the **Template file** drop-down. Refer to [Templates](https://documentation.adhese.org/books/adhese-ui/page/the-administration-screen#bkmrk-formats-and-template) for more information about template files. 7. If you choose to deliver multiple campaign bookings simultaneously (see [Delivery multiples](https://documentation.adhese.org/books/campaign-management/page/bookings#bkmrk-combination-or-deliv)), you will need to specify the order of the formats on the web page. In the **Trigger Order** field, enter a number that indicates the position of the format within the sequence of formats. 8. Enter the dimensions of the format in pixels in the **Width** and **Height** fields.You can configure a format to contain up to six images.
9. Enter the maximum file size of the format in kiloBytes in the **Max size (kB)** fields. 10. Skip the next property (Add URL?) as it is of no significance anymore. 11. In the **Tag** drop-down: - Select *yes* if the format is the main format.Do not forget to enter a code tag in the **Code tag** field (step 19), as a new tag is necessary for the main format.
- Select *no* if the format is a subformat.Do not forget to refer to the main format in the **Code book** field (step 17).
12. **Open creative previews in a new tab?** The default setting is *no*. When set to yes, the preview of a creative is shown in a new tab. 13. Select *yes* or *no* from the **Has completion rate events** drop-down to activate video reporting for the new format. 14.The transcodable option is currently not supported. Leave it on *no*.
15. If the format will be used in [Digital Out of Home (DOOH)](https://documentation.adhese.org/books/integration-setup/page/dooh-endpoints) positions, assets can be pre-loaded and cached by selecting *yes* in **Use in headsup file** (if the headsup endpoint is configured). 16. (Optional) Specify the foreign key of the format in the **Code Import** field to link Adhese to an existing external CMS. 17. Enter the name of the tag variable in the **Code book** field. If the format is a subformat, enter the tag code of the main banner. (Optional) 18. The Code MDB field is deprecated 19. Enter the name of the tag variable in the **Code tag** field. The code tags themselves are usually defined in the setup stage.A code tag is only required if the format is the main format (step 11). For example, if your main format runs on the BANNER tag, the tag code is BANNER.
20. (Optional) Provide a key in the **Code export** field to establish a link with an external database. The following table gives a few examples of completing the *Code tag* and *Code book* input fields for main and sub formats.| **Format name** | **Format type** | **Code tag** | **Code book** |
| Leaderboard | Main format | leaderboard | leaderboard |
| Homepage takeover (leaderboard + wallpaper) | Sub format | leaderboard | |
| Medium rectangle | Main format | rectangle | rectangle |
| Large rectangle | Sub format | rectangle |
You must save the main format again after creating a new subformat. For all existing main format positions, subformat positions will also be available on the booking screen.
# Edit a format To edit a format: 1. Go to the *Administration* screen. Click *Admin* in the left navigation menu. 2. Click *Formats*. 3. In the list of formats, click the format's name or click the edit icon [](https://documentation.adhese.org/uploads/images/gallery/2024-06/bVIyxmJCeT34tq7o-afbeelding.png) for the format you want to edit. The *Edit template* screen opens: [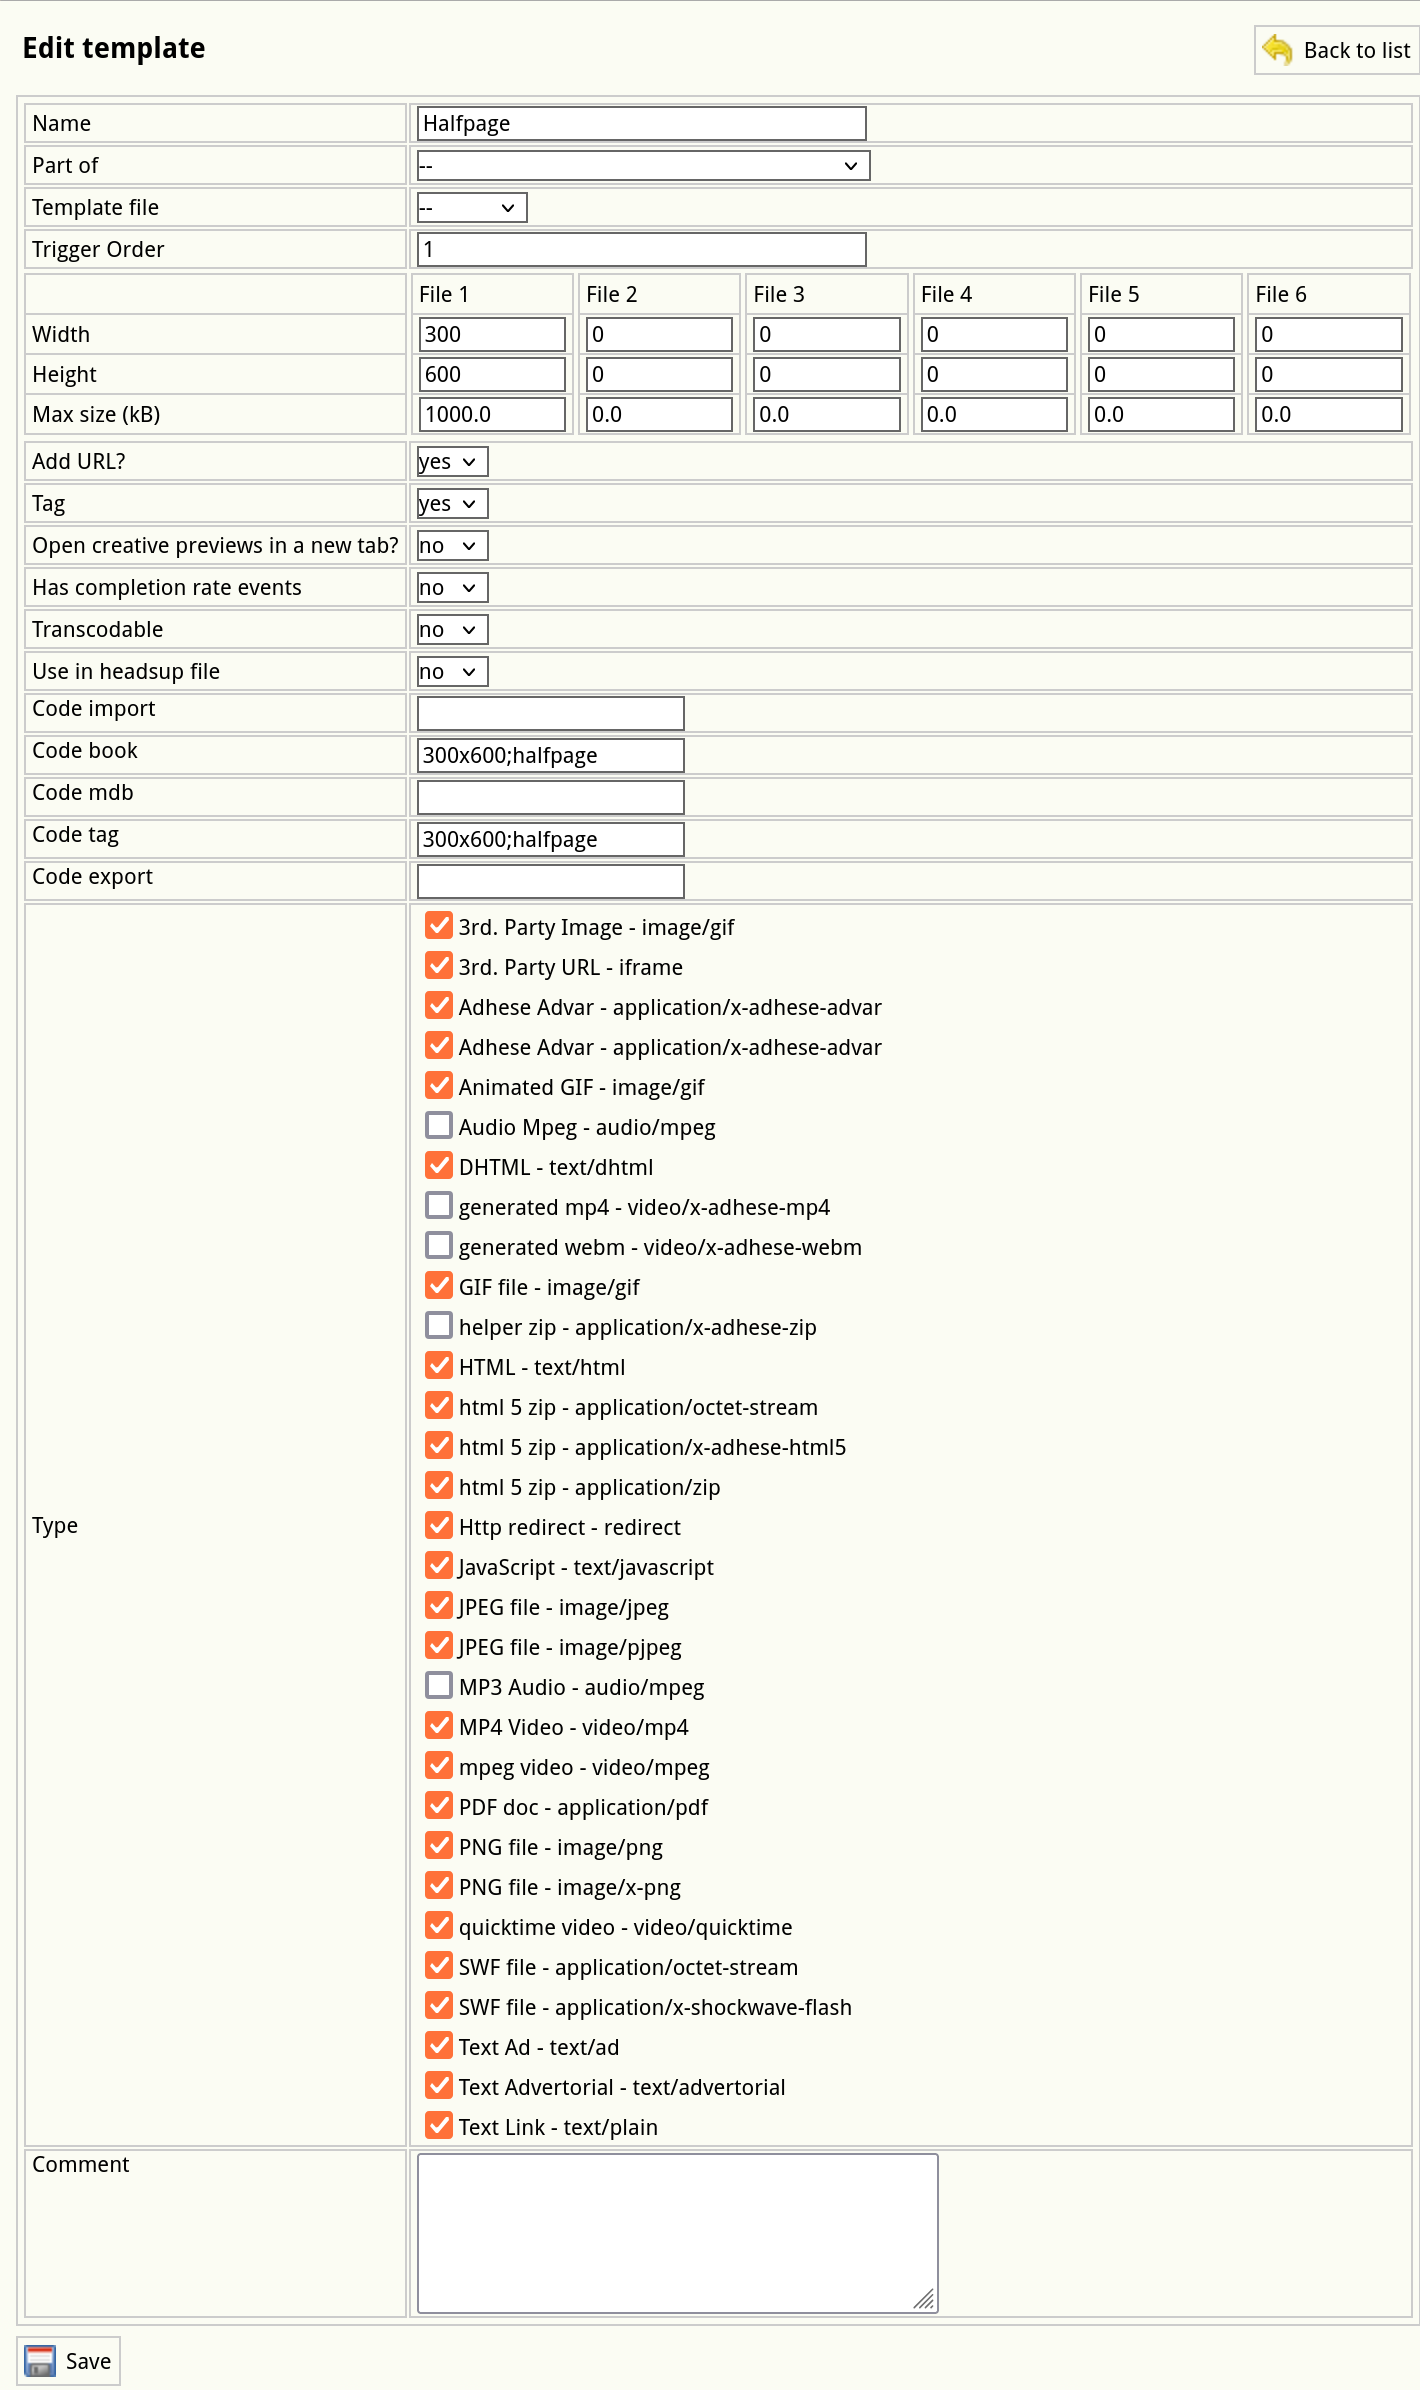](https://documentation.adhese.org/uploads/images/gallery/2024-10/qedNbVz4tAkUWHQm-schermafdruk-van-2024-10-22-10-26-12.png) 4. Change any of the format’s details. 5. Click *Save*. # Stacked format A *Stack* format sends a list of ads available to display for that position. The client (browser) decides which ad(s) to display. An example of a stacked format is a text link ad. To create a stacked format, add a new format: 1. Click *Admin* in the left navigation menu. This opens the *Administration* screen. 2. Click *Formats*. The *Formats* screen opens: [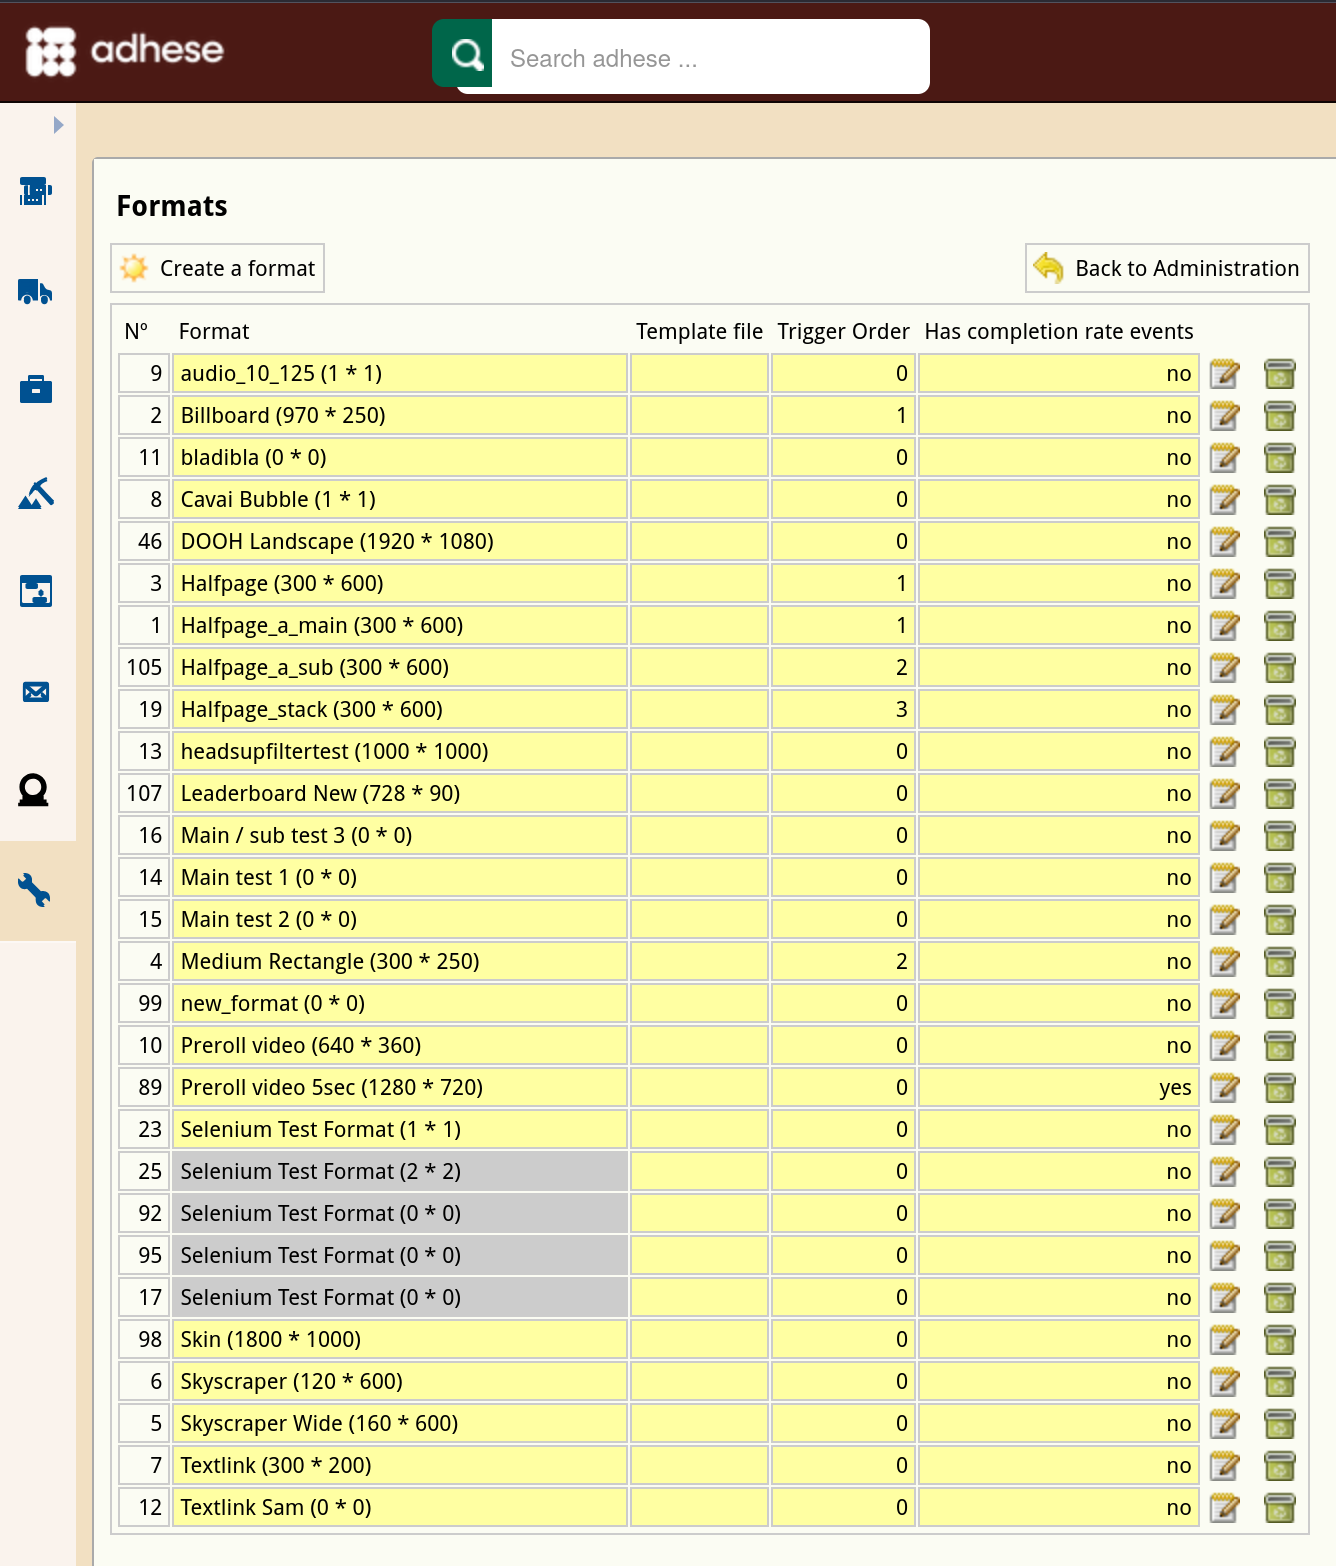](https://documentation.adhese.org/uploads/images/gallery/2024-10/nei7BiRgT8yMuXop-schermafdruk-van-2024-10-21-13-51-38.png) 3. Click the *Create a format* button. The *Create a new format* screen opens: [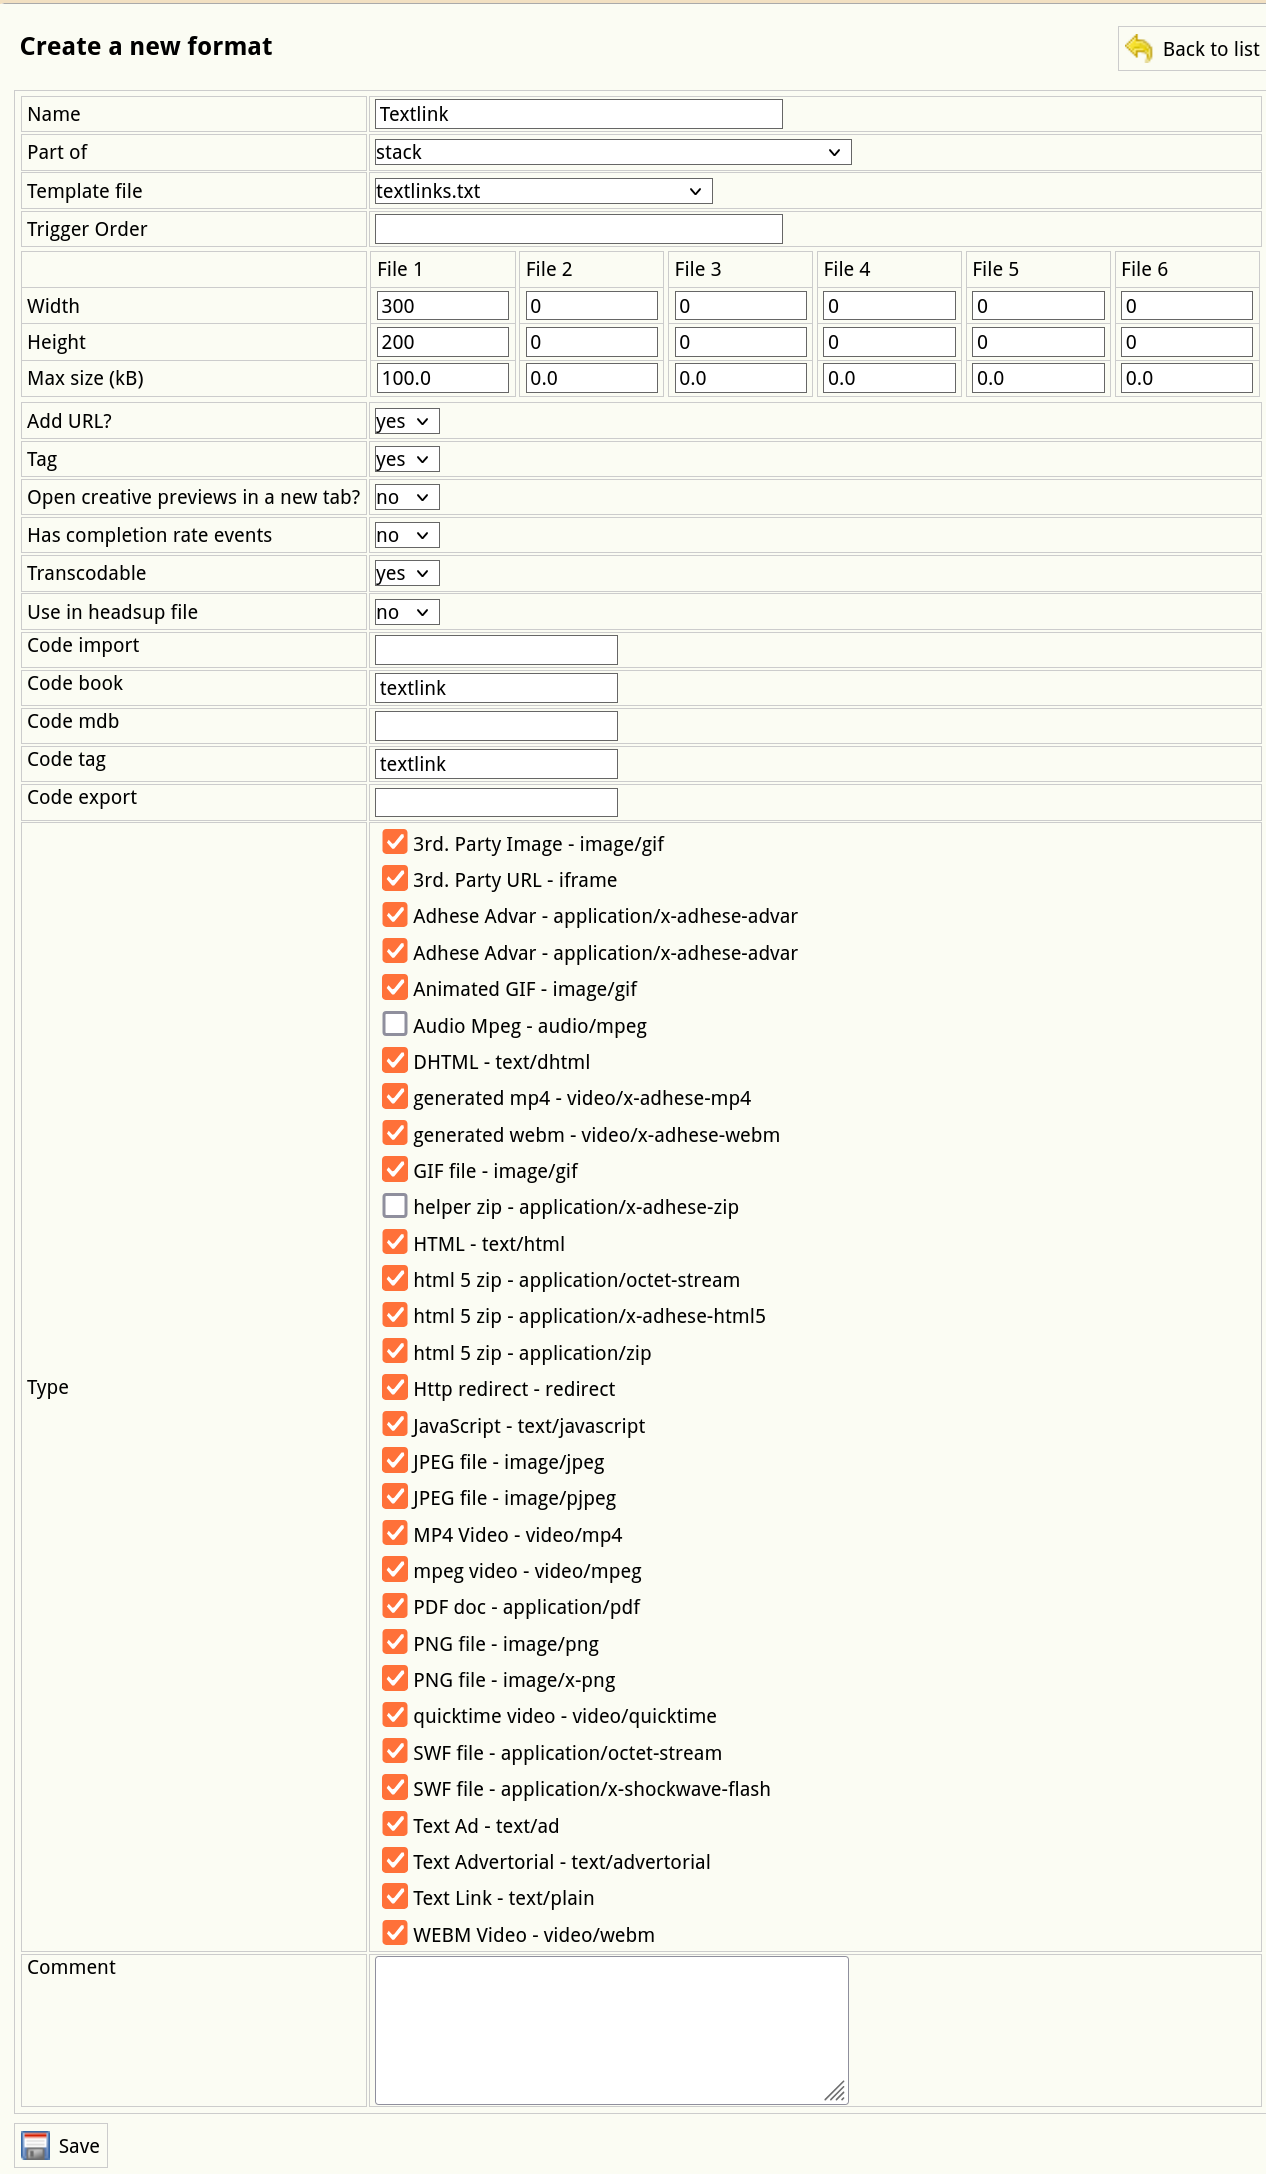](https://documentation.adhese.org/uploads/images/gallery/2024-10/Gc6ShFAxvKgNSXnw-schermafdruk-van-2024-10-21-14-45-42.png) 4. Define the following properties that are necessary for the correct implementation of a stacked format: 1. From the **Part-of** drop-down, select *Stack* to define the format as a stack format. 2. Select the correct JSON template from the **Template file** drop-down. Do not select a template if you plan to use an [Advar template](https://documentation.adhese.org/books/inventory-setup/page/templates#bkmrk-advar-templates) to return a JSON object. 3. Indicate the **Type** of the format, such as a third-party URL or image, video, animated GIF, or text ad. 5. Click the *Save* button beneath the form to save your new format.