Introduction to Adhese for adops
This document is for Adops team members who use Adhese for the first time.
It is a short introduction to the Adhese application with links to the in-depth articles of the primary Adhese documentation.
- Getting familiar with the interface:
You learn how to Navigate and Search, are introduced to the different Components of the Adhese UI and see how you can customise the Adhese interface. - Inventory:
What is the available inventory and check what is already booked - Setting up a campaign:
A step by step How-to book a campaign with bookings and creatives and how to couple bookings with creatives - The Start and Following up of a campaign:
Check if everything is correct for the campaign to start and following up while the campaign runs. - Reporting during a campaign:
An introduction to the Report tab - Report documents after the campaign is finished:
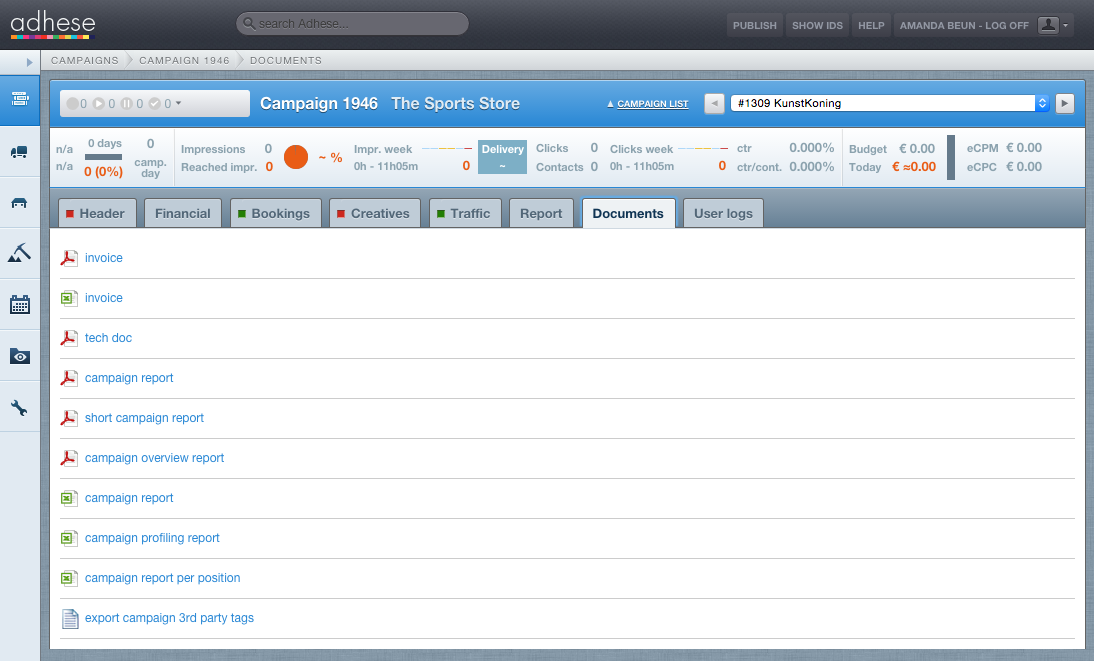
An introduction to the Documents tab
Getting familiar with the interface
How to log in and log out and reset your password
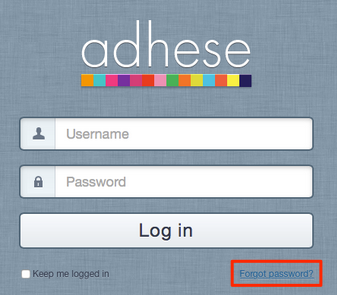
The above screenshot is the login screen. Add your username and password and click the Login button.
Reset your password by clicking the Forgot password link and follow the instructions.
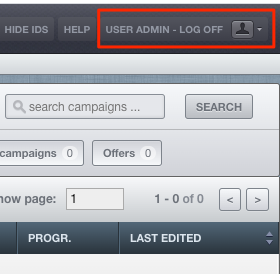
The above screenshot shows the log off button situated at the far right top of the Adhese interface.
How to navigate between the different screens
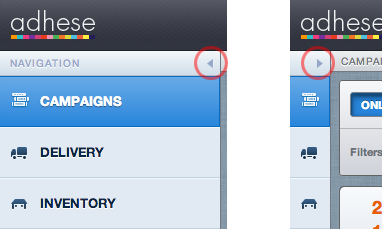
The above screenshot shows the main Navigation menu. You can switch from extended to collapsed view.
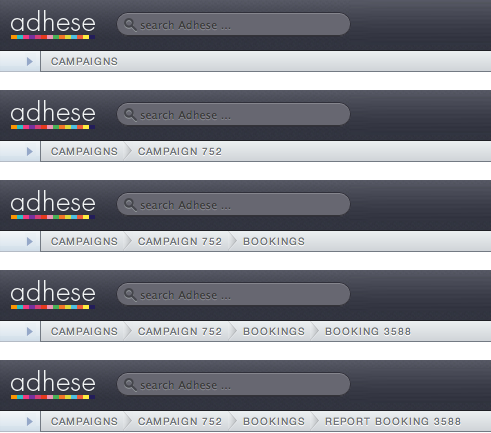
The above screenshot shows a breadcrumb trail to see where you are in the navigation structure of the Adhese interface.
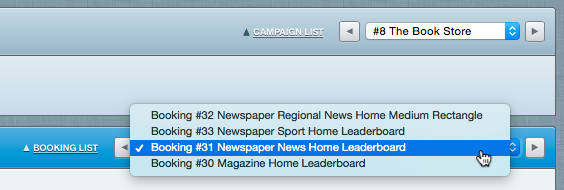
The above screenshot shows the dropdown menu. You can find this drop-down menu in the upper right corner of each overview for an individual campaign, booking, and creative.
Search possibilities

The quick search is at the top of every Adhese screen next to the Adhese logo. Use a quick search to go fast to a particular campaign, booking, or creative by entering a search term and then press Enter.

Within the Campaign and Delivery overview, you can use the search bar located at the upper right corner of the campaign filter. Use this field to search for more specific keywords.
Components of the Adhese UI
A detailed explanation of all of the components of the Adhese UI is written in this chapter of the documentation.
Customise the Adhese interface

The general Campaign overview and the Delivery overview both have a campaign filter. You can only select one of the five buttons: online now, ending soon, starting soon, ended recently, and all campaigns.
Below these five buttons, there are filters to narrow your result, including Options, Underdelivery, No or not coupled material, Recently used campaigns, etc.
You can find a complete overview of the filters in the main documentation.

Some of the table columns can be sorted. They have two triangles on the right side of the column. See the screenshot above and some examples in the main documentation. The table columns can be personalised. You can decide which columns must be visible, set the display sequence, or change the name of a column's heading. Just right-click the column heading row and make your changes in the Personalize table columns modal window. It is a simple drag and drop system.
Inventory
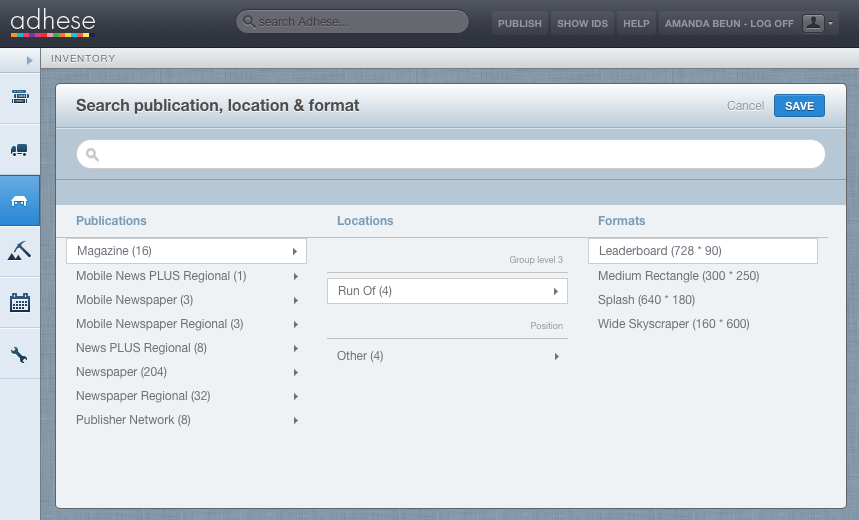
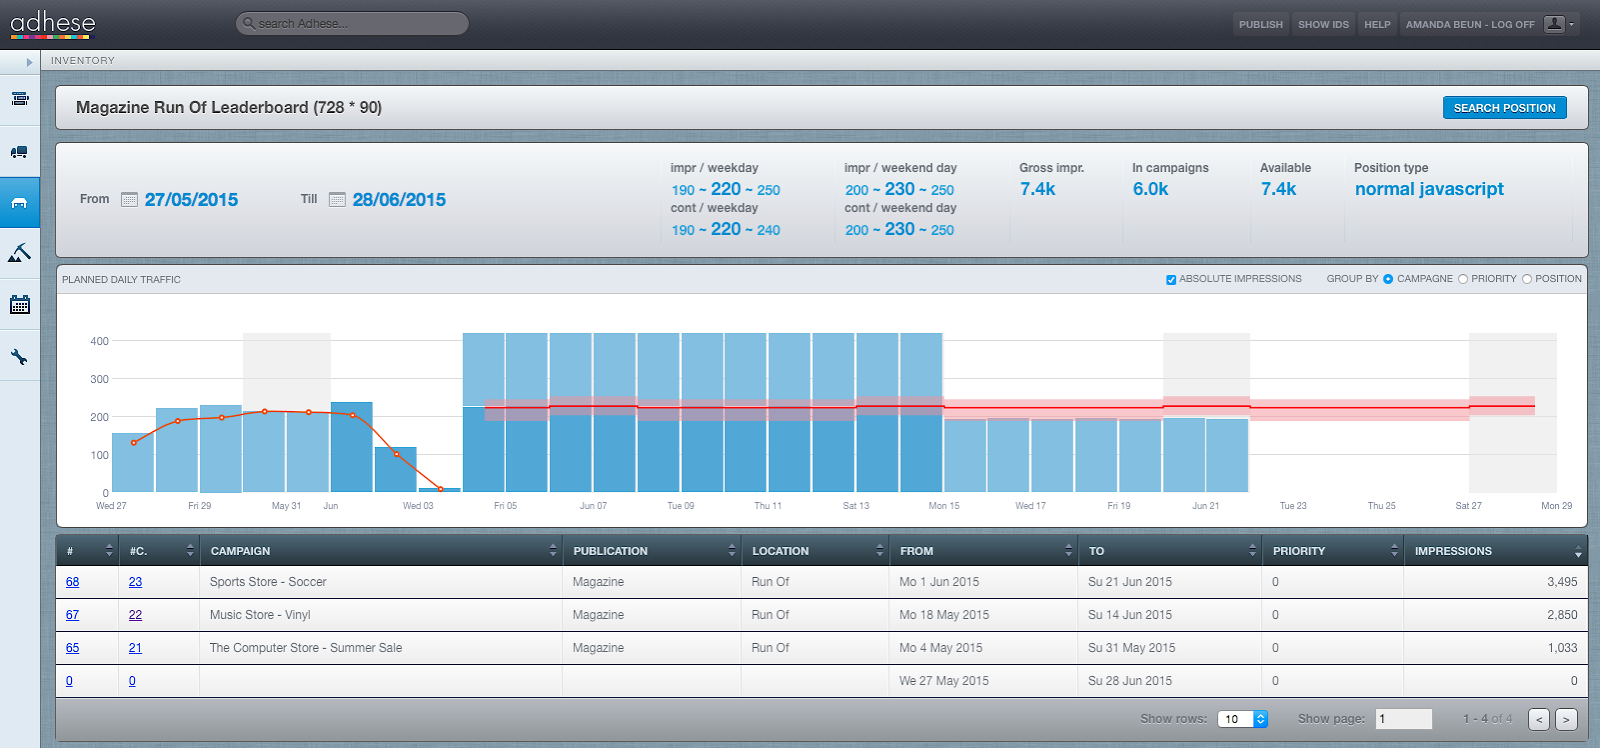
The interface of Adhese has a clear forecasting overview: Inventory. Click the third button in the main navigation menu. Search for a position or select a position by choosing a publication, location, and format:
Click the Save button. By default, the forecast report shows the data for the past 30 days (the already delivered impressions) and the following 30 days (the expected volume) and all booked campaigns for that position.
Setting up a campaign
How to book a campaign
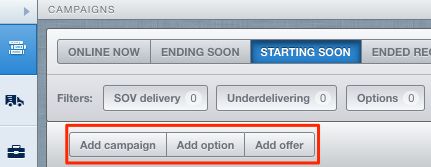
There are three buttons. You can add a campaign, add an option or add an offer. Both a campaign and an option take booked volumes into account. An offer does not.
When you push an add button, you get the following screen:
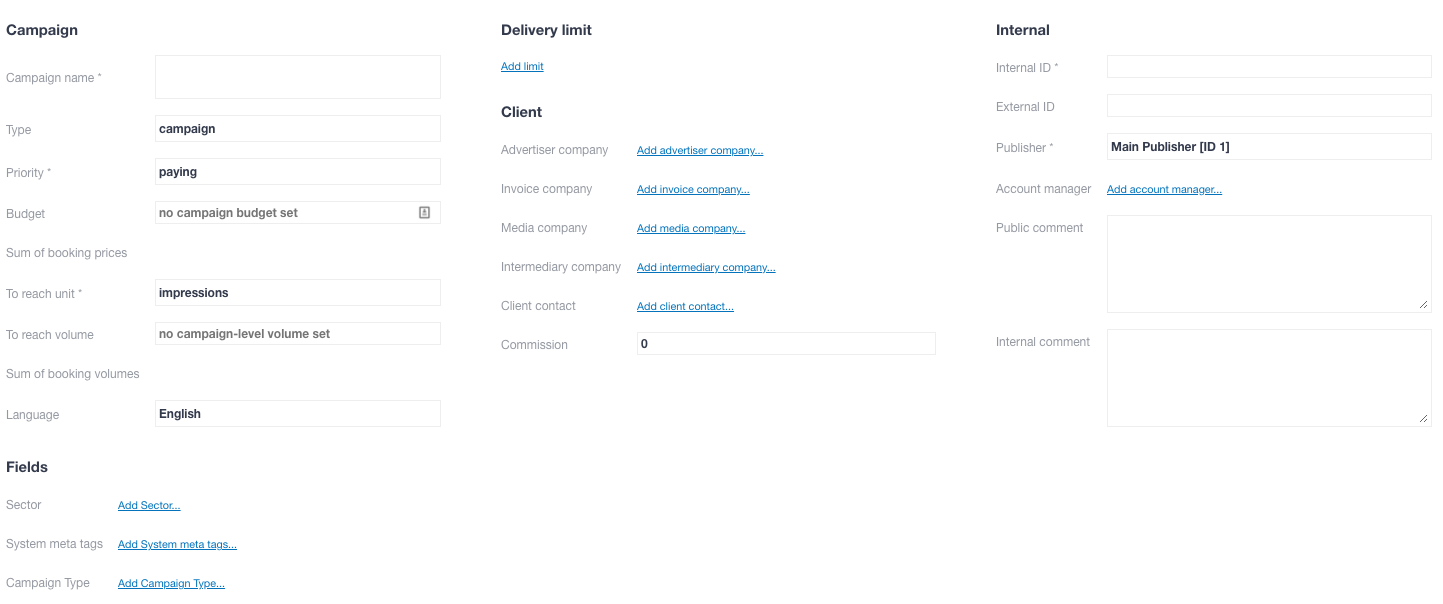
Two boxes are mandatory on this screen: Campaign Name and Priority. You can choose to set a volume of impressions (or clicks) on the campaign level or select a quantity later in the booking screens of the campaign. You can find a full explanation of all fields here: Add a campaign.
You can edit a campaign anytime you want.

There is also an option to copy a complete campaign. You can pause and resume a campaign with a few clicks or stop a campaign.
How to add bookings to a campaign

Hit the Add booking button in the bookings tab to create a booking in a campaign. The following screen appears:
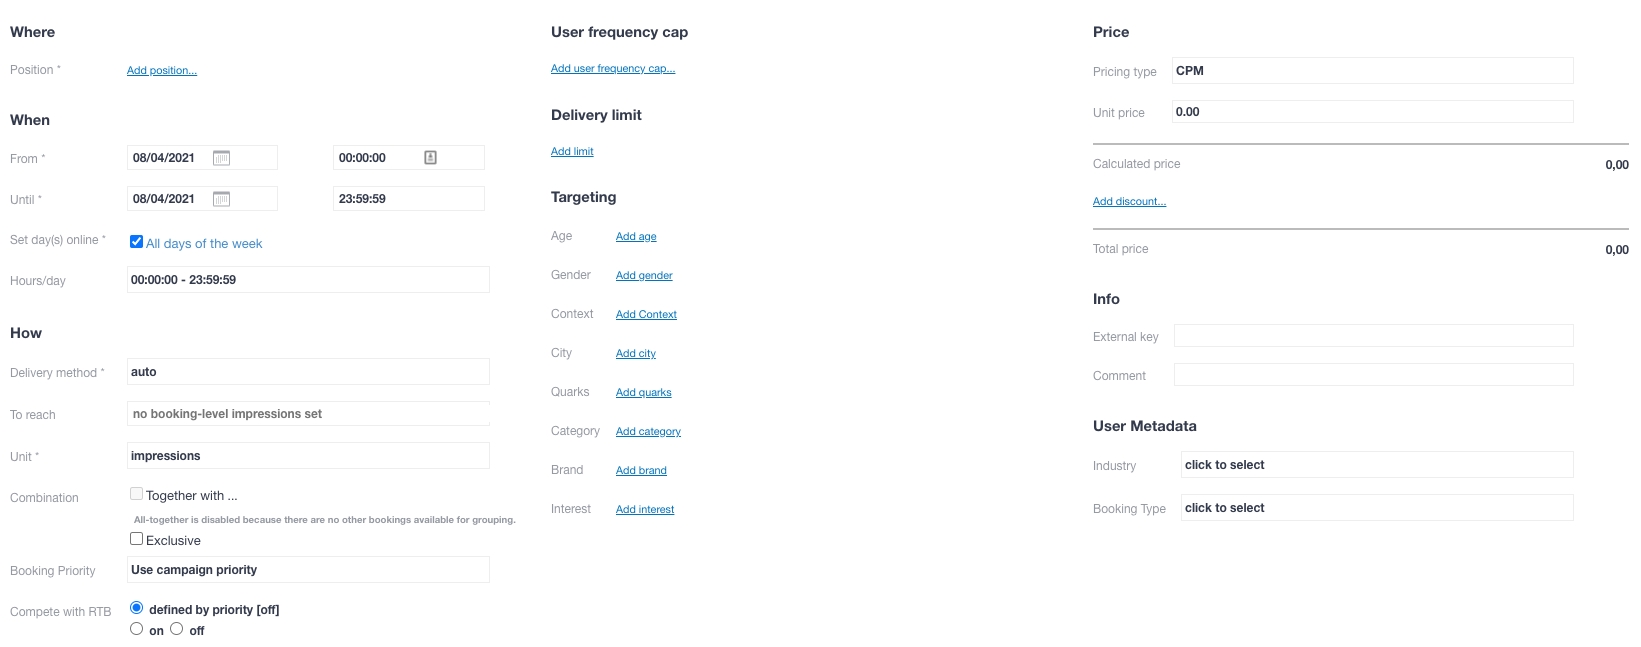
The following fields are mandatory:
- Where:
Click Add position. This opens the Search publication, location & format modal window.
Choose a position by selecting a publication, location, and format and click on the Save button.
Based on the selected position, Adhese displays the forecasting figures and position averages in the booking header tab.
- When:
Fill in the start and end Date and start and end Time. The default times are 00:00:00 and 23:59:59. You can also set a booking for specific days in the booked period (for example, every Monday, Wednesday and Friday), and you can set a time slot (for example, every day between 7:00 and 20:59:59) a booking needs to run.
- How
Delivery method: choose one of the three options
AUTO - you have to fill in a volume (or you have filled in an amount at campaign header level).
SOV - you have to fill in a percentage
ROTATION - no volume or percentage needed, one or more rotation bookings on the same position get interchanged.
To Reach: Fill in the volume the booking must reach
Unit: Choose impressions or Clicks
The following three settings are optional and depend on your set-up
Combination (optional): Choose Together With or Exclusive. Use this setting if different bookings must be combined with or excluded from one another.
Booking Priority (optional): the default campaign priority setting can be adjusted for this particular booking.
Compete with RTB (optional): a switch to decide if this booking can compete with Real-time bidding (RTB) via the Adhese Gateway.
Complete overview:
- User frequency cap
- Delivery limits
In this sections, you can set frequency capping and delivery limits for the booking. Frequency capping makes it possible to limit the number of times Adhese delivers an advertisement towards a unique visitor during a defined period. Delivery limits can be set for a day or an hour.
The following two sections are (for the most part) only valid for your audience who have permitted to use their data. Adhese strictly follows the rules set by the General Data Protection Regulation (GDPR).
- Targeting:
In this section, you can set your targeting.
A complete rundown of possibilities:
- Price, Info, User Metadata:
These sections are optional (but you need to set a price if you want the booking to compete with RTB) The Price section lets you set the pricing details of a booking, such as a pricing model and corresponding unit price. Info and User Metadata
You can edit a booking anytime you want. There is also the option to edit multiple bookings with a few clicks:

Furthermore, you can copy a booking, pause and resume a booking with a few clicks, or stop a booking.
How to upload creatives to a campaign
This chapter is about uploading a creative, automated check of the uploaded files, preview and live preview of the ad, and checking the URL and landings page.
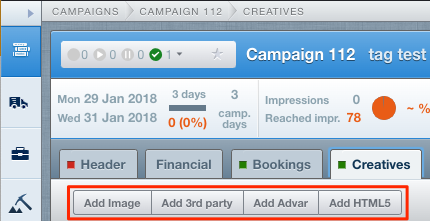
Hit one of the Add creative buttons in the creative tab to upload a creative in a campaign. As an example, we use the Add Image button. The following screen appears:
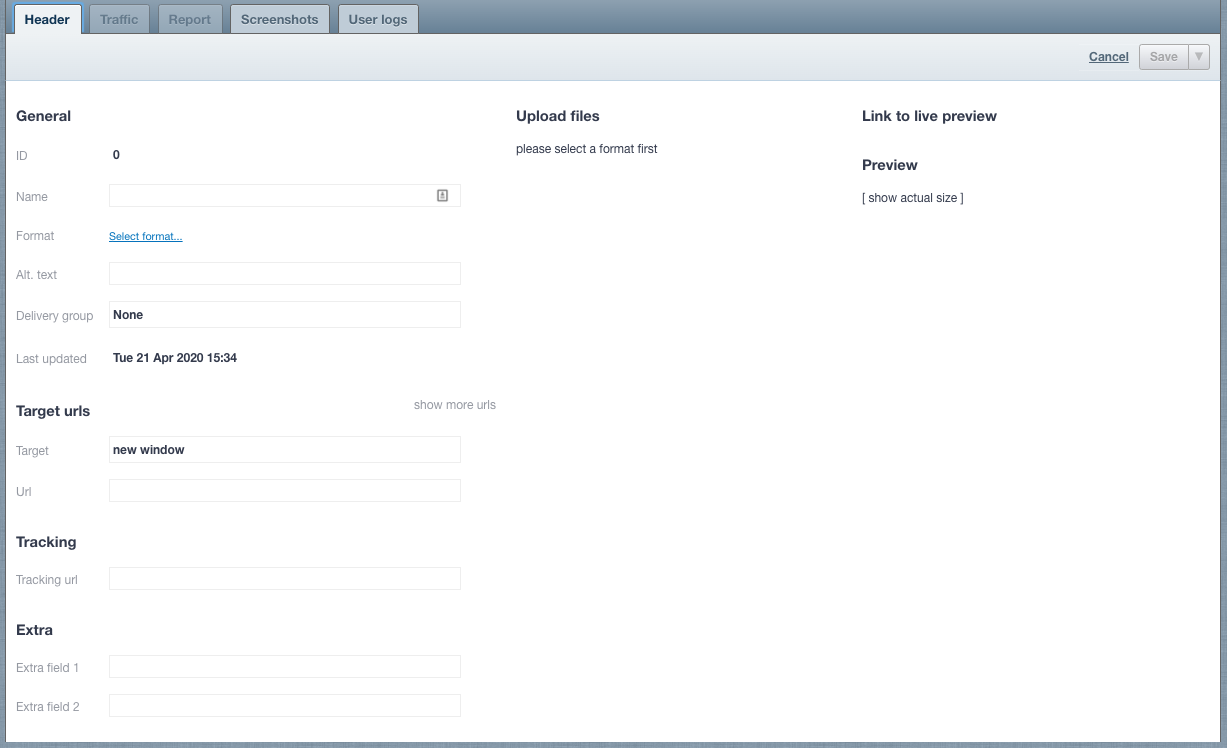
The following fields are mandatory:
Name: Give the creative a name. If no name is provided, the filename of the uploaded image file is used.
Format: Select a format
URL: fill in the target URL
Finally, upload an image file and save the creative.
The other three upload possibilities are:
- HTML5 zip file
Give the creative a name, select a format and fill in a target URL. Upload the HTML5 zip file and save the creative.
- Third-party tag
Give the creative a name, select a format. Paste the third party tag in the Third-party code field and save the creative.
- Advar template
An Advar template is a custom template created by Adhese. The template consists of multiple components (images, videos, texts and URLs) that form a complex creative. The user provides these elements when uploading a new Advar creative.
You can edit a creative anytime you want. You can copy a creative and can remove a creativewith a couple of clicks.

You can edit a creative anytime you want. You can copy a creative and can remove a creative with a couple of clicks.
When a creative is uploaded, you will see a preview of the creative. There is also a link to a live preview. The URL of the live preview can be copied and forwarded to the client. The client can check if the creative is shown how the client wants the ad to be displayed.
How to couple a booking to a creative
After a creative has been saved, you can traffick it with a booked position. It is possible to attach multiple creatives to one booking or assign a creative to various booked positions. By clicking on the traffic tab, you get the following screen.
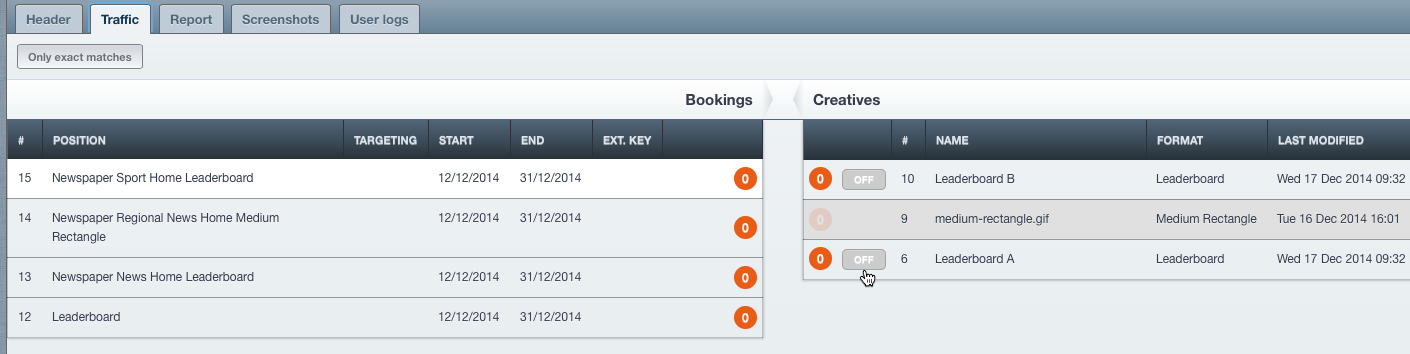
The left panel shows the bookings of the campaign, the right panel the creatives. When you click on a booking, an on/off button becomes available for the creatives with the same format. Click the button to couple a booking to one (or several) creatives:
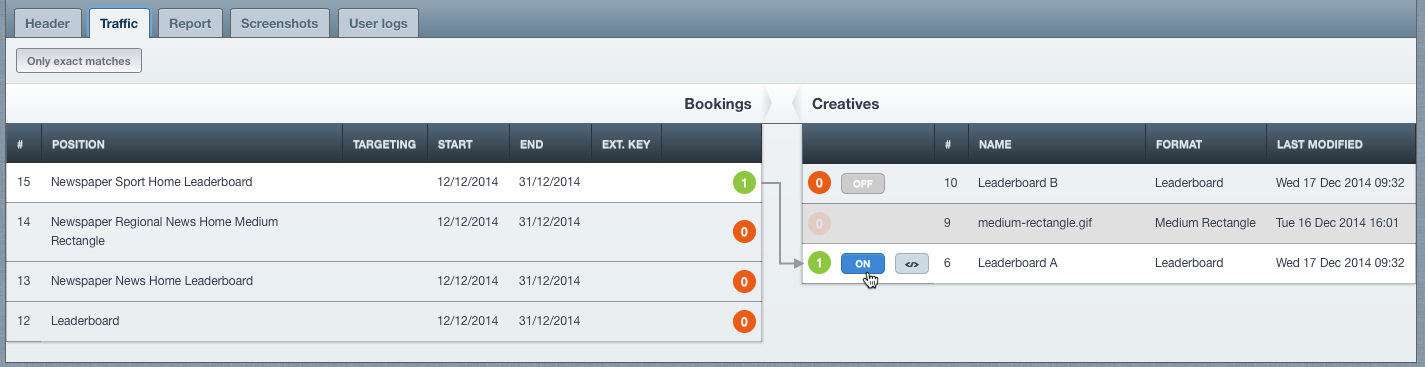
It works the other way around as well. You can couple creatives to one (or several) bookings.

When more than one creatives are coupled to a booking, all creatives are rotated equally. However, you can give more weight to an individual creative.
The Start and Following up of a campaign
Before a campaign starts, you can check if everything is ready to go. In the campaign overview screen, select the starting soon button.

A list of campaigns that will start within two weeks becomes visible. Check for missing creatives and or un-trafficked material. The green colours mean everything is fine. Investigate when yellow and red colours appear.
You can find a list of all statuses in the documentation.
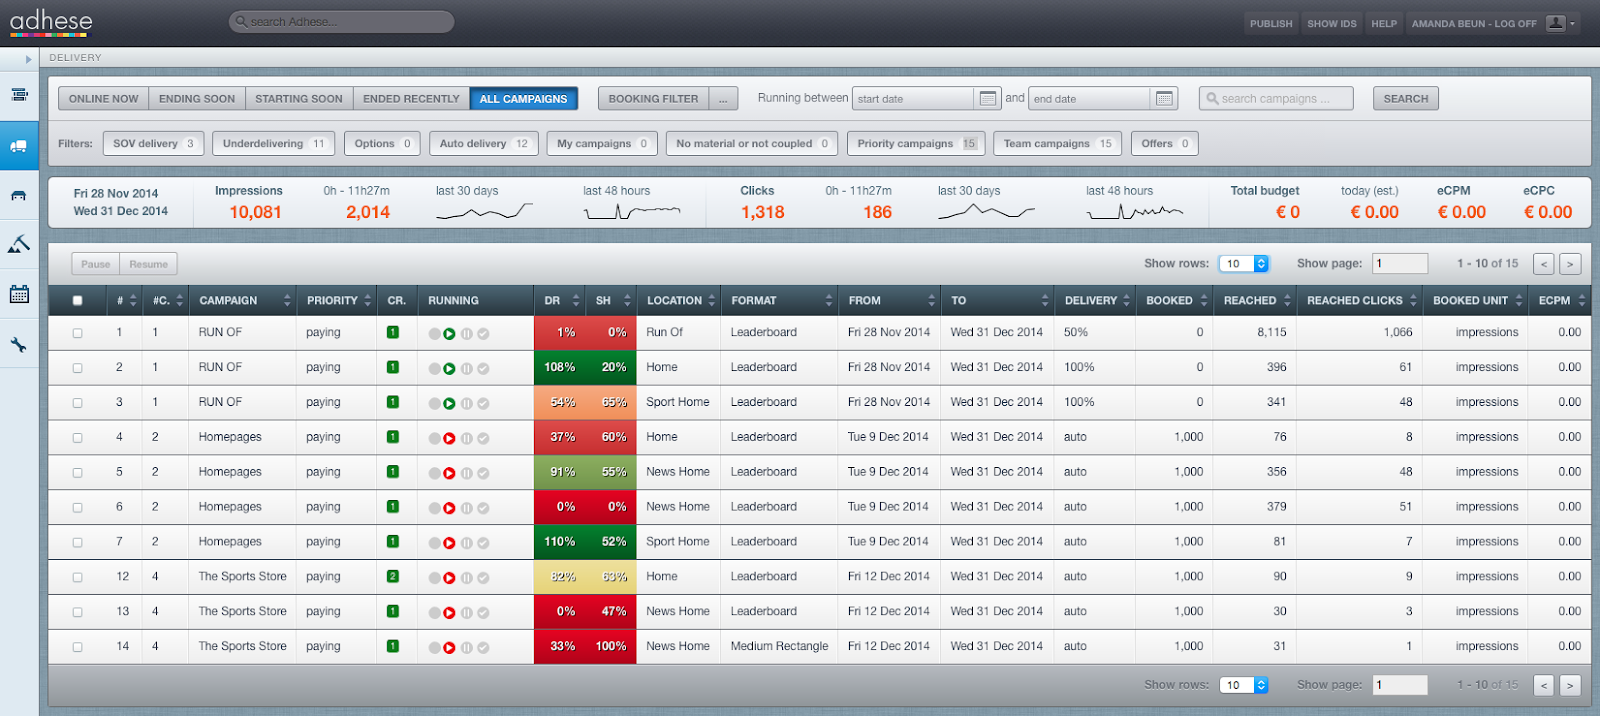
When a campaign has started, you can monitor its progress via the delivery tab (the second item in the main navigation menu). A colour scale is used to give a quick view of the delivery rates. A green colour indicates that the booking is running okay: the delivery is on schedule, and there are no anticipated problems. As the colour moves from green to yellow to red, Adhese considers the booking delivery as more problematic or less "healthy".
Reporting during a campaign
A day after a campaign has started, a report becomes available in the Report tab of a campaign. This report is available as a graph or as a table. You can switch between the two at the top right of the table. This report can also be downloaded as a spreadsheet.
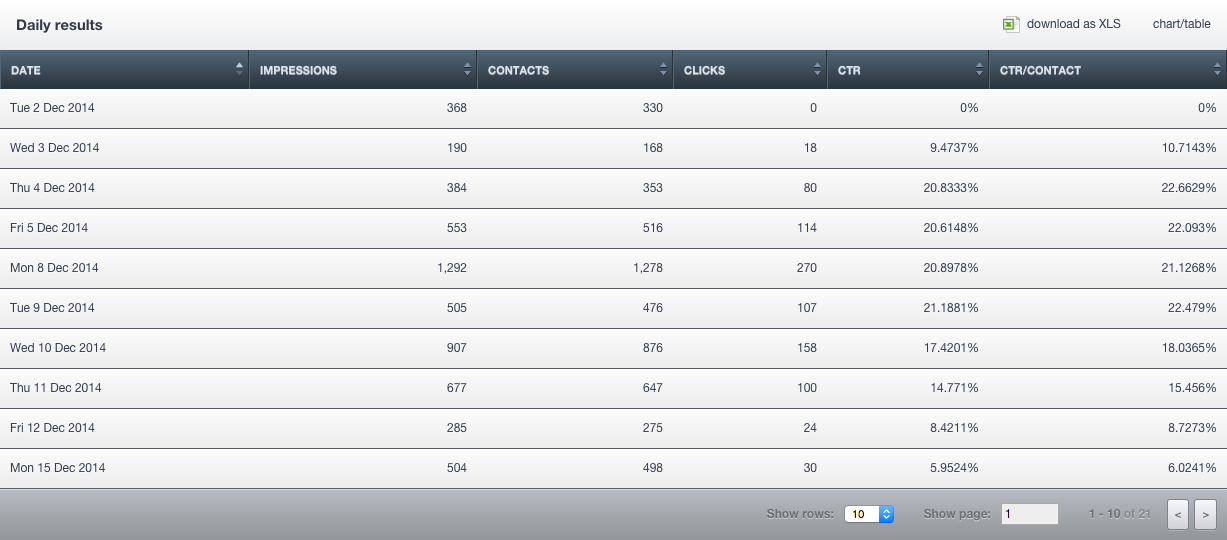
Apart from the campaign overview report, there are reports per booking and creative. Every night the figures for the previous day become available.
Report documents after a campaign has finished
Via the Document tab of a campaign, you can create reports for your client. These reports enable you to decide what information you want to share -- ranging from a complete daily performance report to a summary report.