
User management for admins
Passwords must meet the following criteria:
- Minimum length: 16 characters
- Maximum Length: 64 characters
- Uppercase characters: >= 2
- Lowercase characters: >= 2
- Numbers: >= 2
- Special characters: >= 2
This page describes the workflow for creating and editing users in Adhese.
It is important to log in via Keycloak to create and edit users and send password reset links. Do not use legacy login methods.
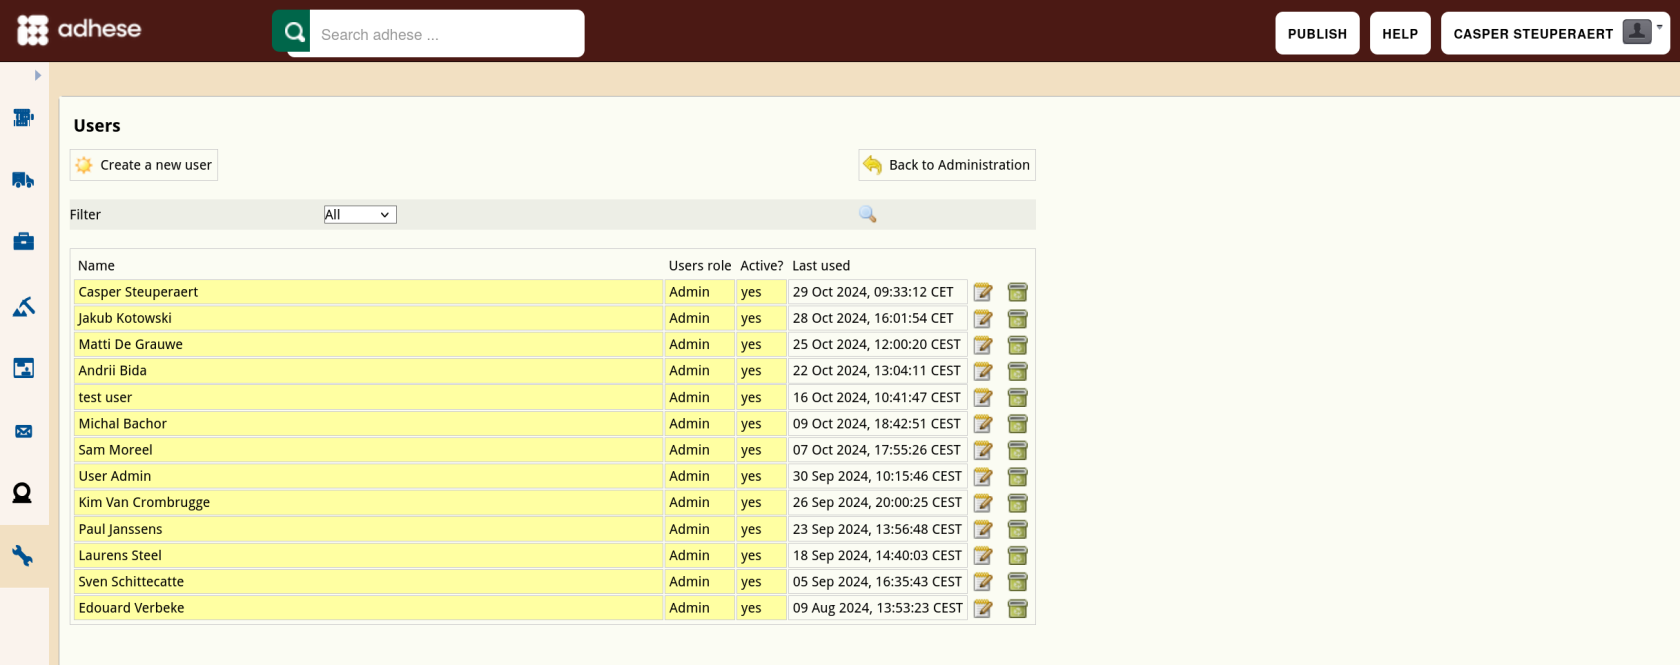
Users
Users are the people who perform tasks in Adhese.
The Users screen shows the users who have access to your Adhese account.

The Users screen presents a table with four columns:
- The Name column presents the name of the user.
- The Users role column displays the role of the user within Adhese.
- The Active? column specifies whether the status of the user is active or not.
- The Last used column indicates when changes were made to the user account or when the user last logged in.
To create a new user, click the Create a new user button.
To edit a user, click the name of the user to modify or use the edit icon  .
.
User levels
Administrators can define user groups or user levels, such as administrators, salespersons, or traffickers. Each group has its own set of access and usage rights for Adhese.
Contact Support if you wish to create a new user level or edit an existing one.
Creating a new user
Please use a valid email adress as a username. Custom usernames are not supported.
To create a new user:
- Click Admin in the left navigation menu: the Administration screen opens.

- Click Users. The Users screen opens.
- Click the Create a new user button. The Create a new user screen opens.

- Define the following details for the new user:
- Select a publisher in the Company drop-down. This property determines for which publishers and/or sub-publishers a user can create a campaign. Accordingly, the Campaign overview will only show the campaigns from the relevant (sub)publishers.
- Choose a username in the Login field.
- (Pick a password in the Password field. By default, for new users you keep this field empty so they can pick their own passwords)
- (Determine whether the user's status is active in the Active drop-down.)
- Select a user level in the User type drop-down.
- (Select the user's default campaign priority in the Default order priority drop-down. The default order priority is the default value of a priority when you are creating a campaign. The default value is the highest available priority.)
- (Select the user's maximum campaign priority in the Maximum order priority drop-down. For example, a user can book a campaign at any priority if you set the maximum priority value at paying. However, if you set this value in-house, the user can only book campaigns at the in-house priority level or a lower priority like stopper. The default value is the highest available priority.)
- Enter the first name of the user in the First name field.
- Enter the last name of the user in the Last name field.
- (Optional) Select the gender of the user in the Gender drop-down.
- Select the language of the Adhese interface in the Language drop-down. The following languages are available: English, Dutch, and French.
- Enter the user's email address in the Email field.
- (Optional) Enter the user's phone number in the Phone field.
- Click Save.


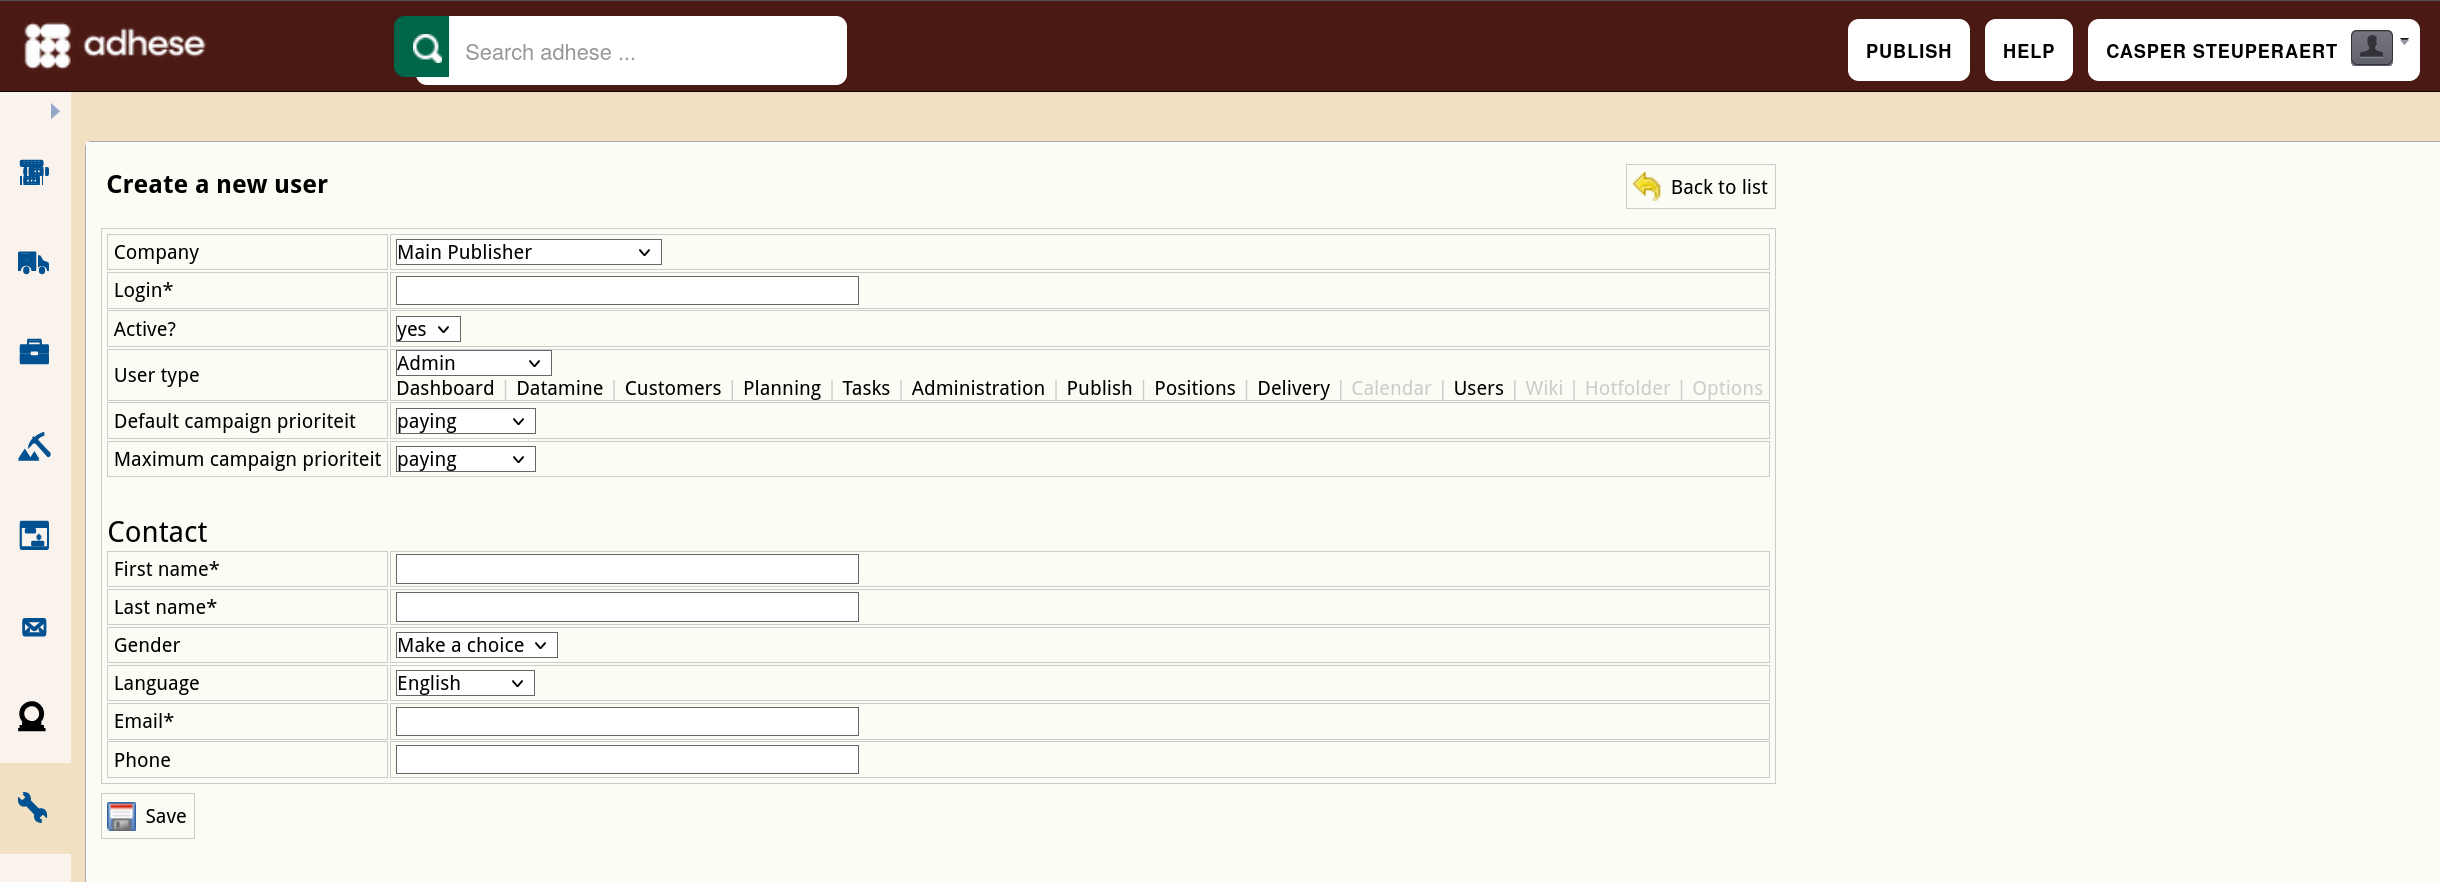
Options between () should be left at the default value unless there is a good reason to change it at account creation.
After having created a new user, we'll send a password reset link to that user so they can set their own password for their account:
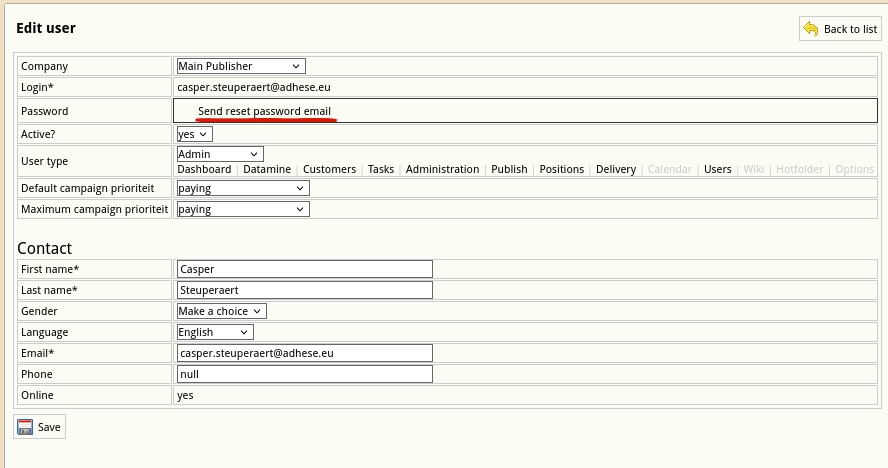
Edit a User
To edit a user:
- Go to the Administration screen. Click Admin in the left navigation menu.
- Click Users.
- Click the edit icon
or the user's name for the user you want to edit. The Edit user screen opens:
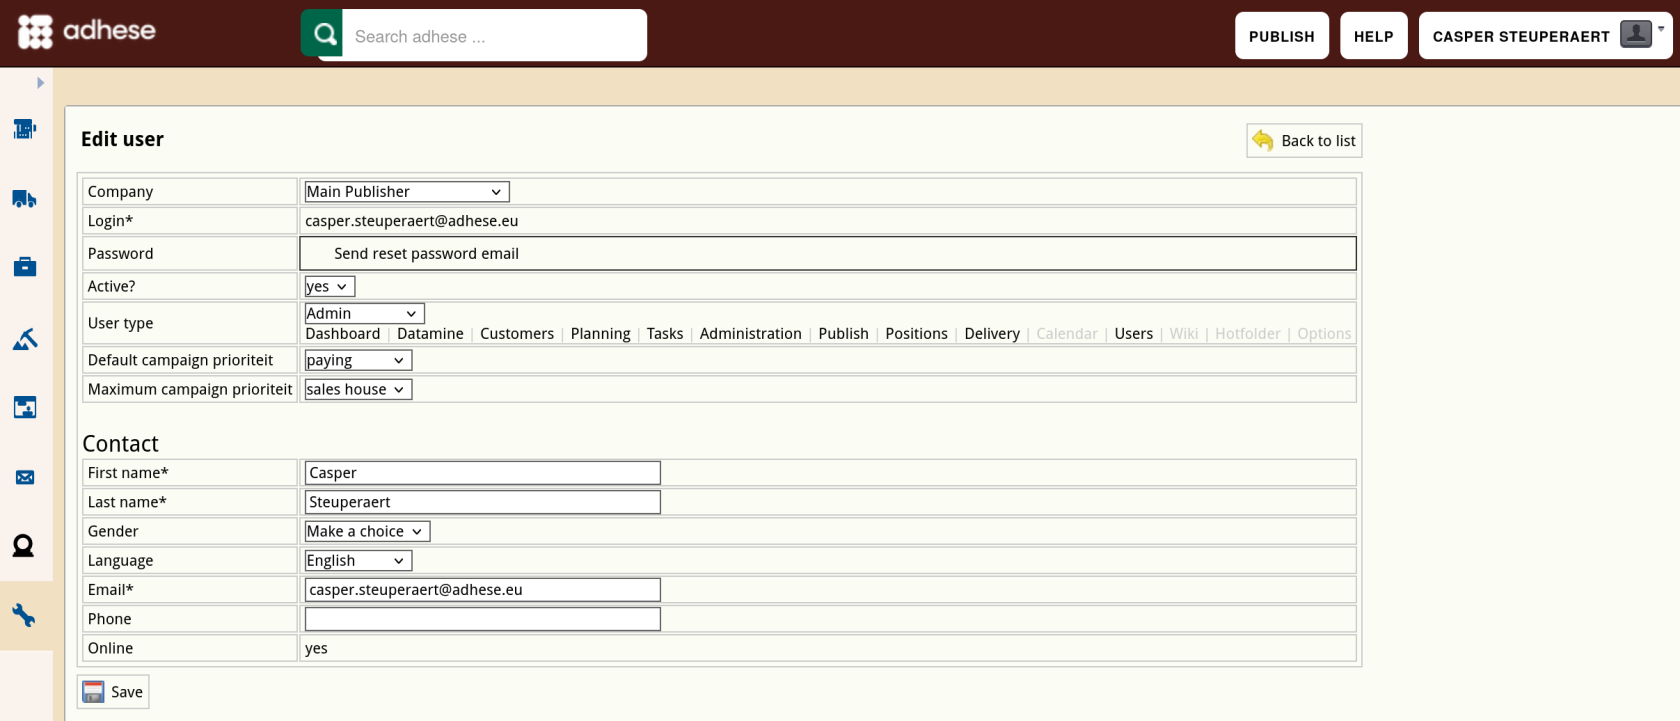
- Change any of the user's details.
- Click Save. The changes are visible after the user logs out and logs back in.

Users with a prefix in their Login* field under Edit User are managed externally and not by Adhese directly.
Deactivate or delete a user
Before you delete a user, you should first consider changing its status from active to inactive. To deactivate the status of a user, refer to Edit a User and change the Active field from yes to no in the Edit User screen.
To thoroughly delete a user:
- Go to the Administration screen. Click Admin in the left navigation menu.
- Click Users.
- Click the delete icon
 for the user you want to remove.
 - Click OK to confirm you are sure you want to remove this user.

Troubleshooting users
If a user can't be updated, removed, or password reset, and the system keeps throwing errors when you try, the user must be deleted from the Keycloak admin panel and re-created in the Adhese UI's admin screen. Information on how to do this can be found here.
No comments to display
No comments to display