
Alerting
You can create alerts that are triggered upon a specific event you determine, which will result in an email being sent. This email is set up as specified by a template you create with a bit of coding.
Alerts
Alerts are email messages that are sent automatically when a specific event is triggered.
The Alerts screen displays a table with the following columns that detail the properties of a booking:
- A tick box to indicate an alert. This action makes the Duplicate, Run and Remove buttons available.
- The ID of the alert.
- The Recipients of the alert mail.
- The Name of the alert*.*
- The Hour when the alert runs.
- The Triggers set for the alert*.*
Add an alert
To add an alert:
-
Click Admin in the left navigation menu. The Administration screen opens.
-
Click Alerts under the General heading. The Alerting overview opens:

The Alerting overview contains the following columns:
- ID, the ID of the alert;
- Recipients, the persons who will receive the alert;
- Name, the name of the alert;
- When, when an alert is checked;
- Triggers: what event triggers the alert;
-
Click the Add button to add an alert. The Header tab of the Insert new alert screen opens.

-
Define the following details for the new alert:

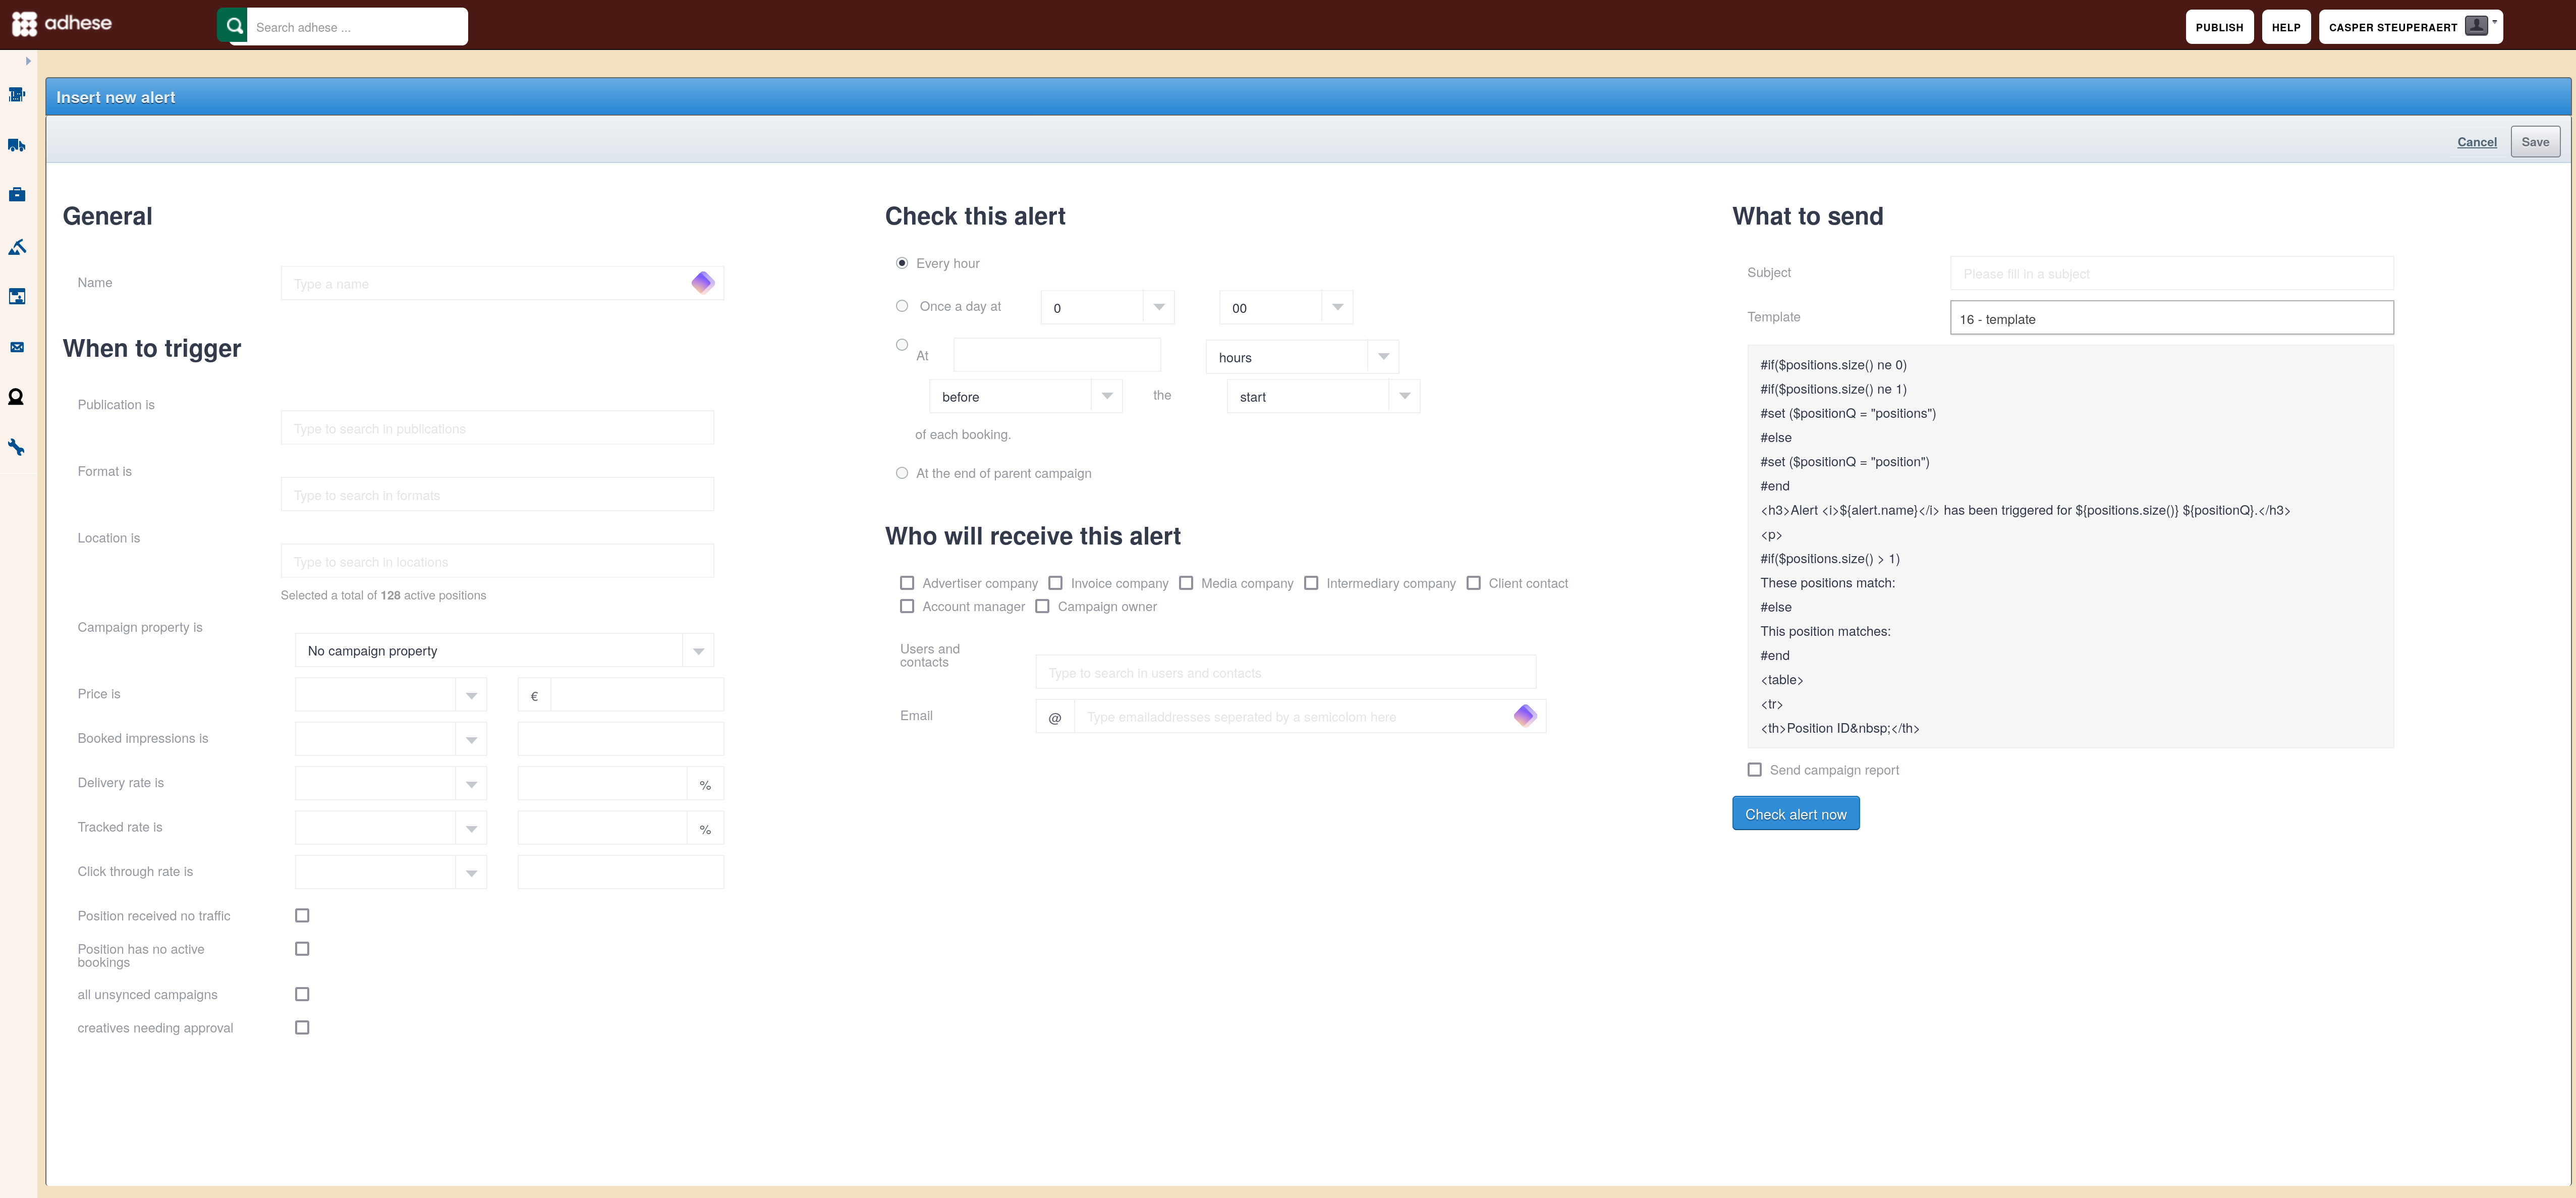
General
- Enter a name for the alert in the Name field.
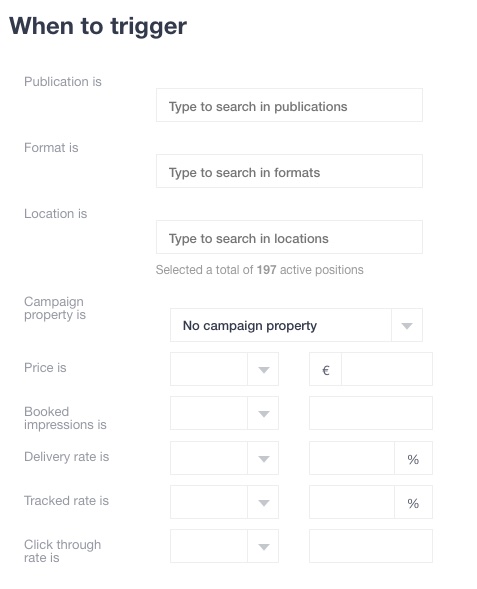
When to trigger
This section determines what event triggers an alert for a specific publisher, format, location or a combination of those variables.
- Select one or more publications or search for a publication by entering its name in the Publication is field. Click the Save button.
- Select one or more formats or search for a format by entering its name in the Format is field. Click the Save button.
- Select one or more locations or search for a location by entering its name in the Location is field. Click the Save button.
The above three variables (i.e. publication, format, and location) determine the number of active positions taken into account.
- In the Price is field, determine whether an alert should be sent when the price of a booking at the selected active positions is less than, equal to, or more than the specific monetary value you specify.
- In the Booked impressions is field, determine whether an alert should be sent when the number of booked impressions at the selected active positions is less than, equal to, or more than a certain amount of impressions you specify.
- In the Delivery rate is field, determine whether an alert should be sent when the delivery rate of a booking at the selected active positions is less than, equal to, or more than a particular delivery rate you specify.
- In the Tracked rate is field, determine whether an alert should be sent when the tracked rate of a booking at the selected active positions is less than, equal to, or more than a certain tracked rate you specify.
- In the Click through rate is field, determine whether an alert should be sent when the CTR of a booking at the selected active positions is less than, equal to, or more than a specific CTR you specify.
Check this alert
The Check this alert section determines when the selected, active positions should be checked for an event (as specified in the When to trigger section) that could trigger an alert.
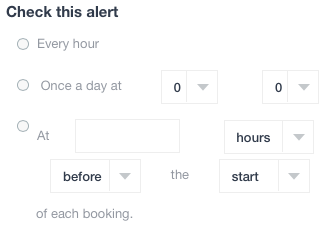
You can choose to check the alert:
- Every hour,
- Once a day at a time (in hours and minutes) you specify, or
- At a certain number of hours/days/working, before/after the start/end of each booking.
Who will receive this alert
The Who will receive this alert section determines who should receive an alert when the event is triggered:
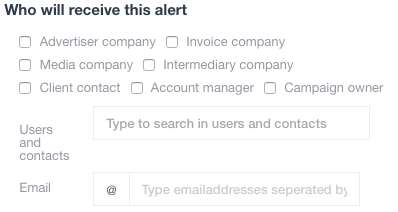
- You can select the following client users you have defined in the Client section of the Campaign Header tab: Advertiser company, Invoice company, Media company, Intermediary company, Client contact, Account manager, and/or Campaign owner.
- In the Users and contacts field, search for Adhese users or contacts by typing their name and clicking the Save button.
- In the Email field, enter one or more email addresses and separate them by a semicolon
;
What to send
In the What to send section, you specify the alert's content. This email is set up according to a template you create with a little bit of coding.
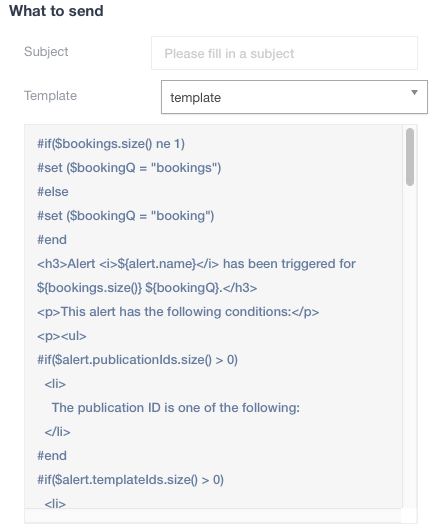
- Fill in a subject for the alert in the Subject field.
- Choose a predefined template from the Template drop-down. The template creates the message.
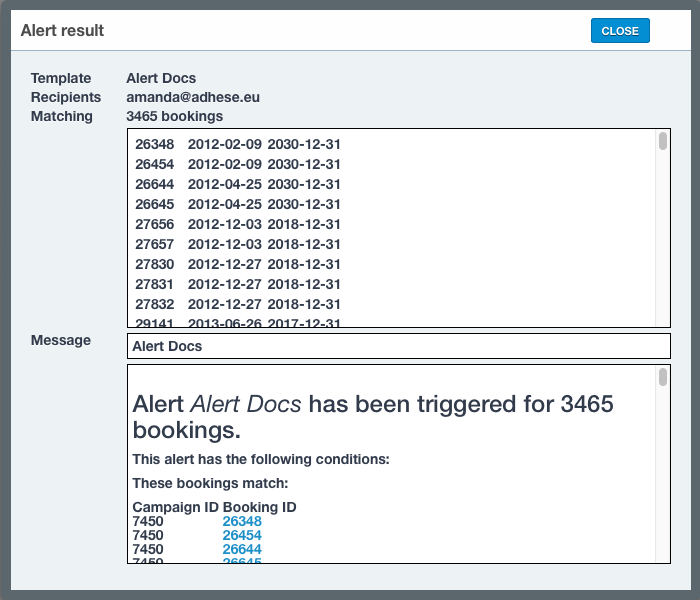
Check alert now
Click the Check alert now button beneath the What to send section and get a preview of the alert message and the bookings that match the alert.

This opens the Alert result modal window:
Do not forget to click the Save button in the Insert new alert screen to save the alert.
Edit an alert
To edit an alert:
- Click Alerts under the General heading of the Administration screen. The Alerting overview opens.
- In the Alerting overview, click the alert you want to edit. This opens the Header tab of the Edit alert screen.
- Edit the details you want to change.
- Click the Save button.
Duplicate alert
To duplicate one or more alerts:
- Click Alerts under the General heading of the Administration screen. The Alerting overview opens.
- In the Alerting overview, tick the checkboxes of the alerts you want to duplicate.
- Click the Duplicate button.
- Click OK to confirm and duplicate.
Remove alert
To remove one or more alerts:
- Click Alerts under the General heading of the Administration screen. The Alerting overview opens.
- In the Alerting overview, tick the checkboxes of the alerts you want to remove.
- Click the Remove button.
- Click OK to confirm and remove.
Run alerts
In the Check this alert section you have defined the circumstances under which an event should be checked to trigger an alert. However, you can also check one or more alerts at any time you wish.
- Click Alerts under the General heading of the Administration screen. The Alerting overview opens.
- In the Alerting overview, tick the checkboxes of the alerts you want to check.
- Click the Run button.
- Click OK to confirm and check the alerts. You will receive an email if the event of the alert is triggered.
Filter Alerting overview
In the Alerting overview, a search box lets you filter the overview. Enter a search term, and the overview will change accordingly, filtering the alerts that match the search term.
Sort Alerting overview
To sort the Alerting overview, click any column to sort the table in ascending or descending order.
Personalise Alerting overview
For more information about how to personalise the Alerting overview, refer to Personalise table columns.
No comments to display
No comments to display